Maintaining Group User Records
You can maintain Group User records from two locations:
-
The Group Users Dashboard (System Admin
 > Resources > Group Users)
 -
The Users Dashboard (System Admin
> Resources > Users)
Accessing a Group User Record
To access a Group User record:
-
Open the Group Users Dashboard or the Users Dashboard:
-
The Group Users Dashboard (System Admin
> Resources > Group Users) -
The Users Dashboard (System Admin
> Resources > Users)
-
-
Locate the desired record.
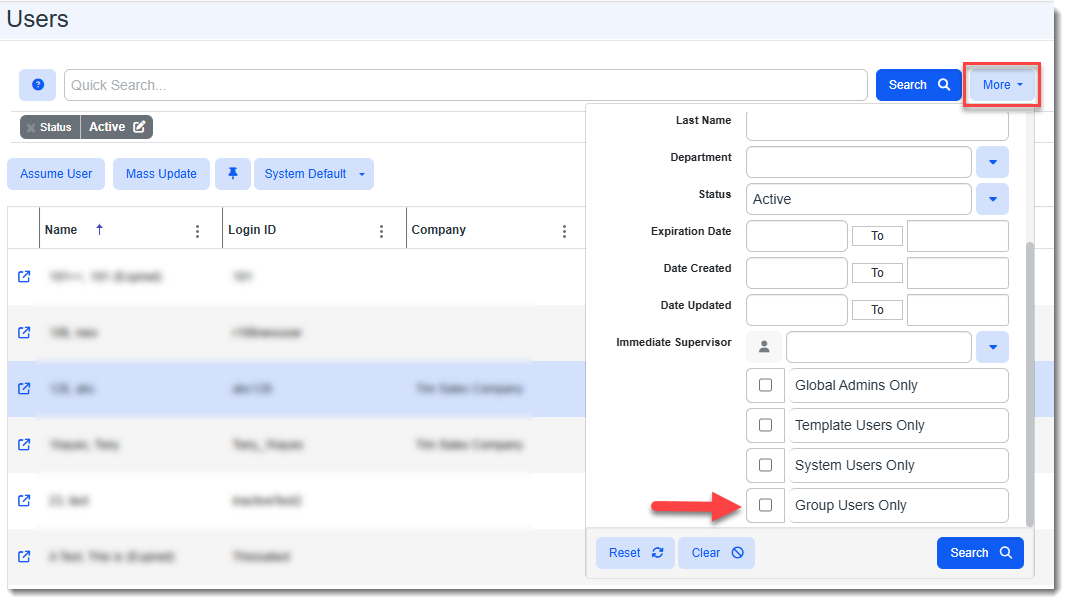
Note: You can use Quick Search or More search to locate a record. The Users Dashboard More search allows you to narrow your search by selecting a Group Users Only filter.
-
Click Open
 to display the record.
 -
If accessing the record from the Users Dashboard, click Configure Group in the Action Center to display all group-related fields and group members.
Making a Group User Record Inactive
You cannot delete Group User records but you can set unused Group User records to Inactive so that they no longer appear in User selection lists
To make a Group User record "Inactive":
-
Uncheck the Active checkbox.
-
Click Save.
The inactive Group Users record will no longer be available for selection in User fields.
Making Multiple Group User Records Active or Inactive Using Mass Update
The Mass Update feature can only be access on the Users Dashboard.
-
Go to the Users Dashboard (System Admin
> Resources > Users). -
Use the Users Dashboard More search allows you to narrow your search by selecting a Group Users Only filter.
-
Click the Select column checkbox next to each record you want to update and then click Mass Update.
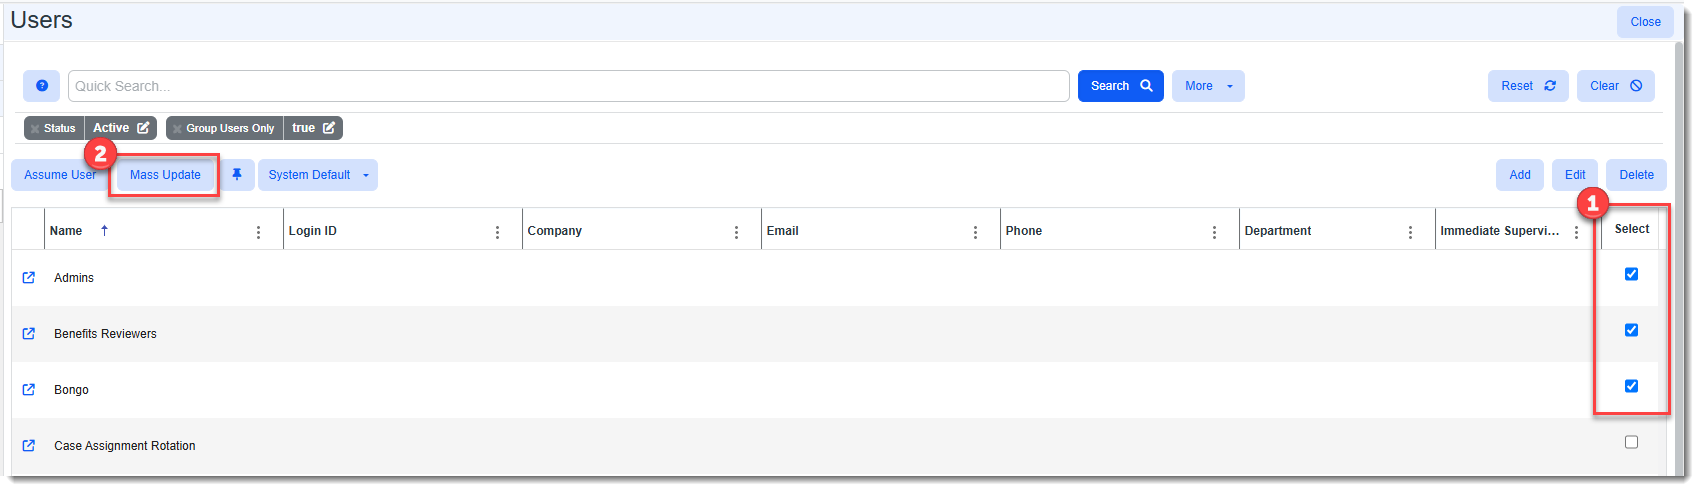
The Mass Update window displays.
-
Select Make Active to make all selections Active or select Make Inactive to make all selections Inactive.
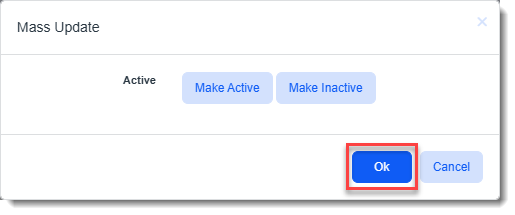
Any Inactive Group Users records will no longer be available for selection in User fields.
Adding/Removing Group Members
To add and remove group members:
-
Click Add Group Member to add rotation group members to the Group Users record.
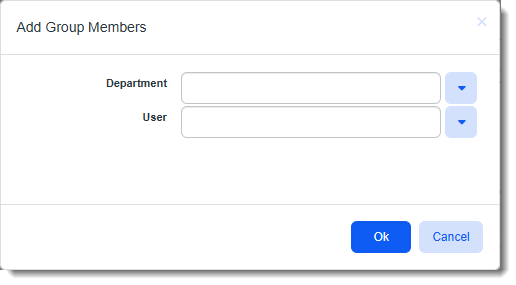
The Add Group Members window displays.
-
Optionally, select a Department to filter users by department.
-
Click the down arrow in the User field and begin selecting users. As you select users from the list, they are added to a list beneath the User field. You can remove a user from the list by clicking the Remove icon
 next to their name.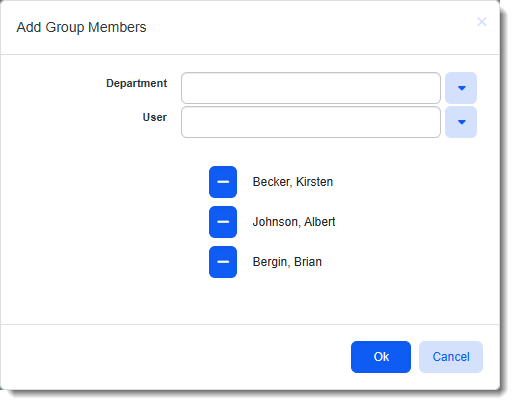
-
When finished adding users, click OK.
The group members display in the Members grid. The Sequence Numbers have been automatically assigned based on the order of selection. You can also click the Remove icon
on a user's line item in the grid to remove them.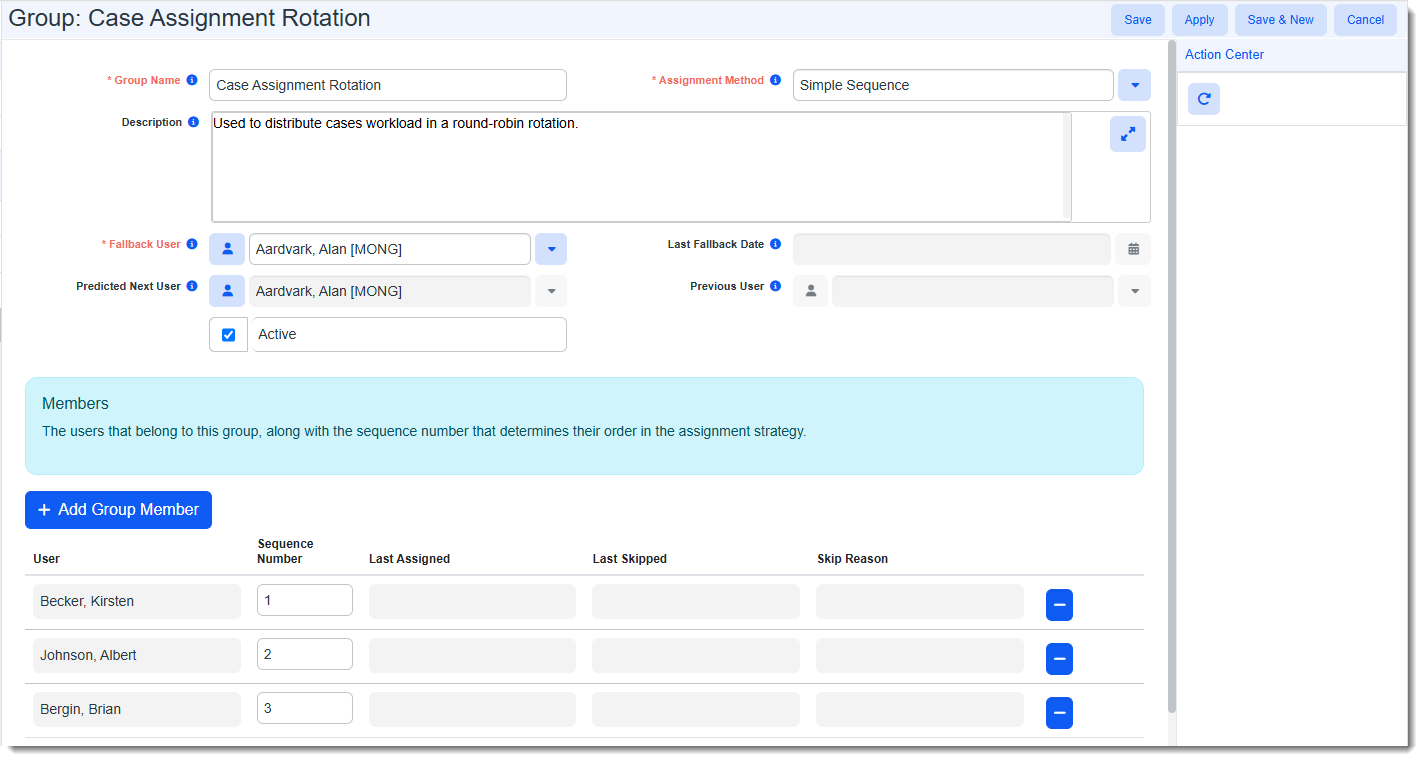
Note:
-
Last Assigned, Last Skipped and Skipped Reason fields auto-fill once the group is used and members are evaluated and either used or skipped in the rotation.
-
If a member is unavailable and skipped in the rotation, the Last Skipped and Skipped Reason are only displayed until they are used successfully in a rotation again. Once they get used in the rotation again, Last Skipped and Skipped Reason are cleared.
-
-
Click Save.
Editing Group Member Sequence Numbering
Sequence numbers determine which user is selected next in the rotation and can be edited.
To edit group member sequence numbers:
-
Click Add Group Member to add rotation group members to the Group Users record.
The Add Group Members window displays.
-
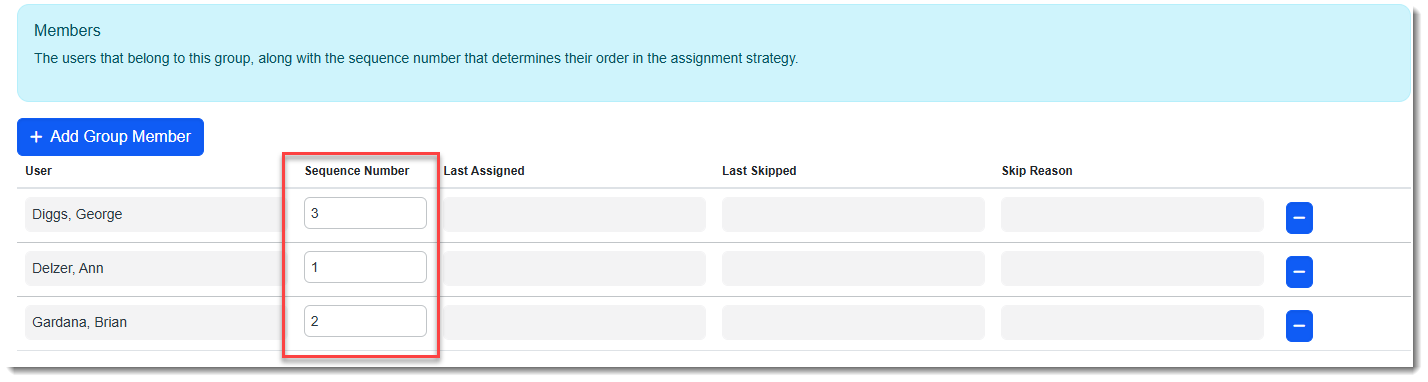
In the "Members" grid, manually edit the fields in the Sequence Number column.
-
Click Apply or Save.
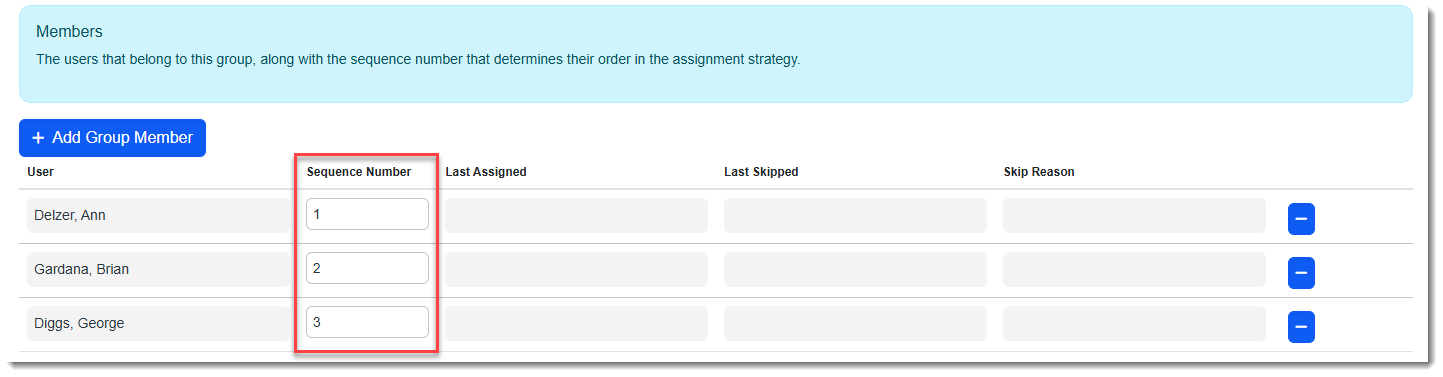
If you clicked Apply to save the changes and leave the record displayed, you may notice that the grid items were reordered by the new sequence:
Viewing the Latest Group User Record States
Click the Refresh button in the Action Center to see any real time changes to the Group User record state that may have occurred such as Last Assigned, Last Skipped, Skip Reason, or Predicted Next User updates.