Saving and Sharing Views
A view is a related subset of the original report that you have edited and customized to your needs.
FAQ: Instead of creating a view, why not just create a copy of the report?
Answer: When you save the report as a view, it remains organized neatly under the original report (on the Home page workbook tile under the Views link). While there are cases where it is beneficial to save a copy of the report (such as when you want a report to become the "template" for an entirely different report or dashboard) if the changes you are making are related to the original report, your views (which are only visible to you unless you share them) stay organized with the original report and therefore are easier to find. For example, you might create variations of the Cases By Type report showing a specific Type such as "Client Alerts" and name it "Cases By Type - Client Alerts". Or you might create a view named "Cases By Type - New" which shows all cases with a Status of "New".
The additional benefit of views is that you can save the changes to a report without affecting the original report (i.e., base report). Unless you have an Editor license, you cannot overwrite base reports with changes. (Even with an Editor license, you may not want to overwrite the original report until you have vetted the changes thoroughly.)
You also cannot edit "out of box reports". This is important because it allows us to maintain the integrity of the standard reports. If we update them, they do not overwrite your views. Your view may change, however, depending on changes we make. For instance, if we rename a field, the new field name will display in your view. With views, you can maintain your own custom reports while allowing us to maintain the original reports.
Therefore, the solution for those with Editor license types who want to preserve the original report, for Explorer license types who do not have access to overwrite a base report or for any Explorer or Editor who wants to personalize an "out of box" report is to save a view. The view becomes a workbook that you own, can edit freely and can share.
Saving a View
To save a view:
-
On the Report Center Home
 page, locate the report tile (by using the Search bar at the top of the page or by scrolling the list of available reports).
-
Click the blue report title link to open the workbook.
-
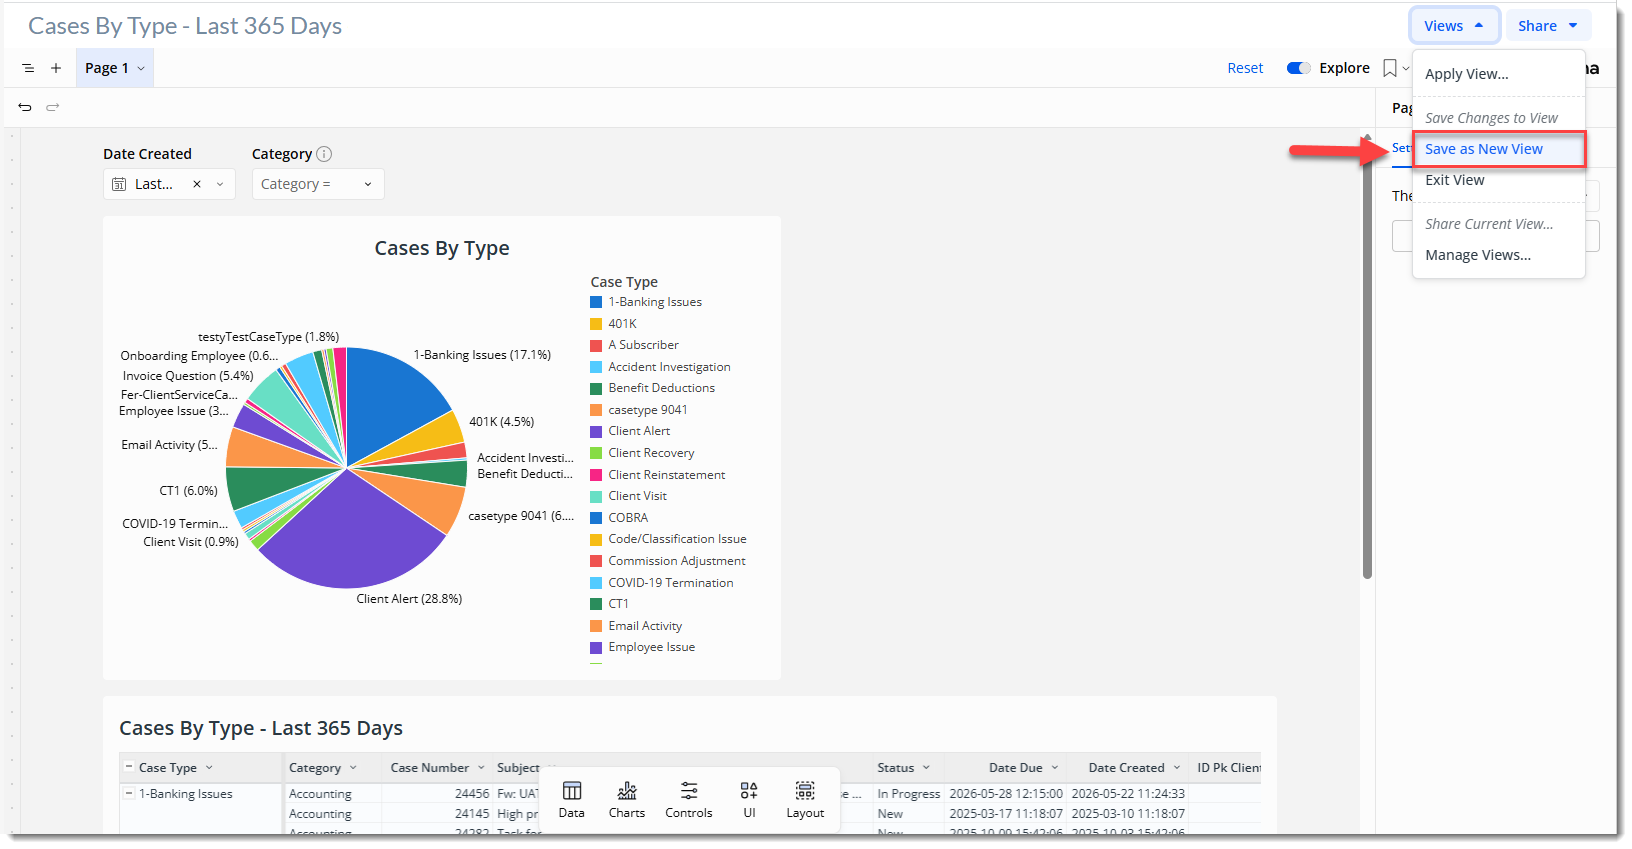
Click Views > Save as New View.
The Save New View popup window displays.
-
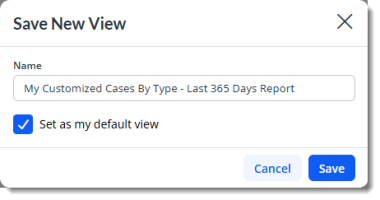
Enter the view Name and optionally, click the Set as my default view checkbox if this is the view you want to see when you open the report.
-
Click Save.
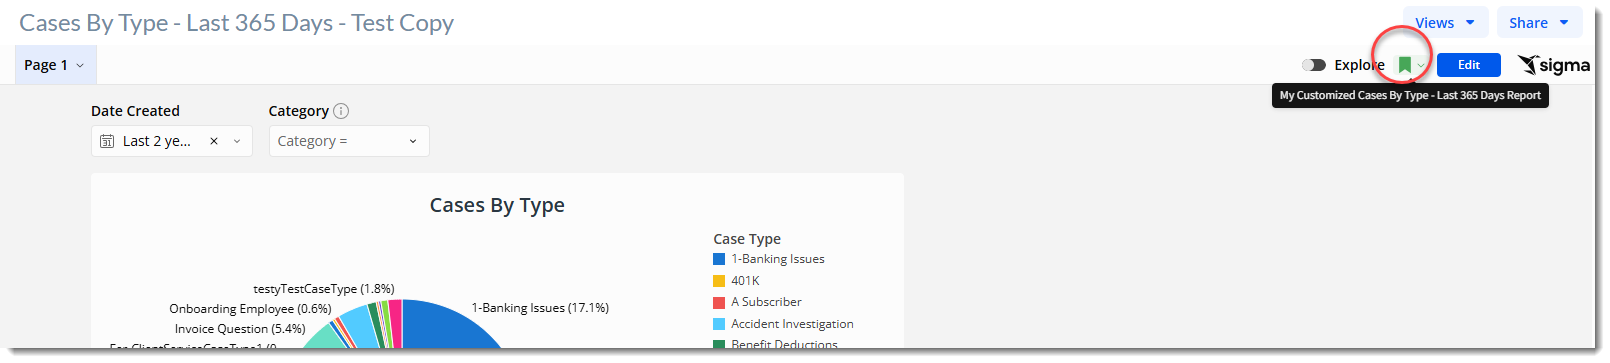
If you have set the view as your default view, the next time you open the workbook, the view will open and you will see a green tag next to the Explore field. This indicates that you are looking at a saved subset or view of the report. Hovering your mouse pointer over the tag displays the name of the view:
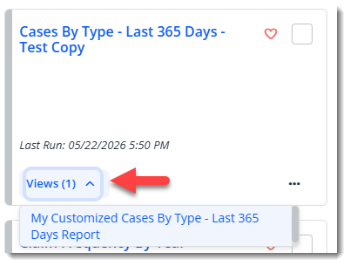
Additionally, views that you have created (or received access to when a view created by someone was shared with you) are organized under the Views listing on the Home page report tile:
Sharing a View
Once you create the view, you can share it with other Report Center users.
To share a view:
-
Click Views > Share Current View... or Share > Current View.
-
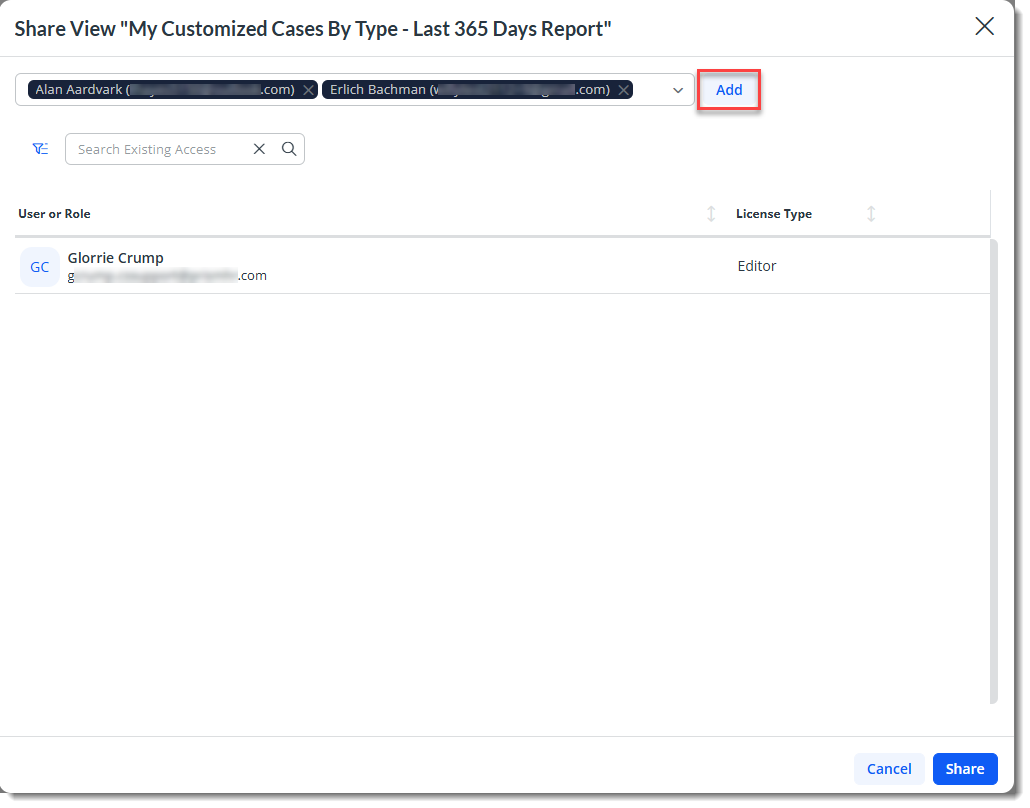
The Share View window displays.
-
In the first search field, you can search for and add multiple users to whom you will grant access to the view. In the second search list, you can filter a list of users with existing access to determine if you have already granted them access.
-
Click Add to grant access to the users shown in the first search field.
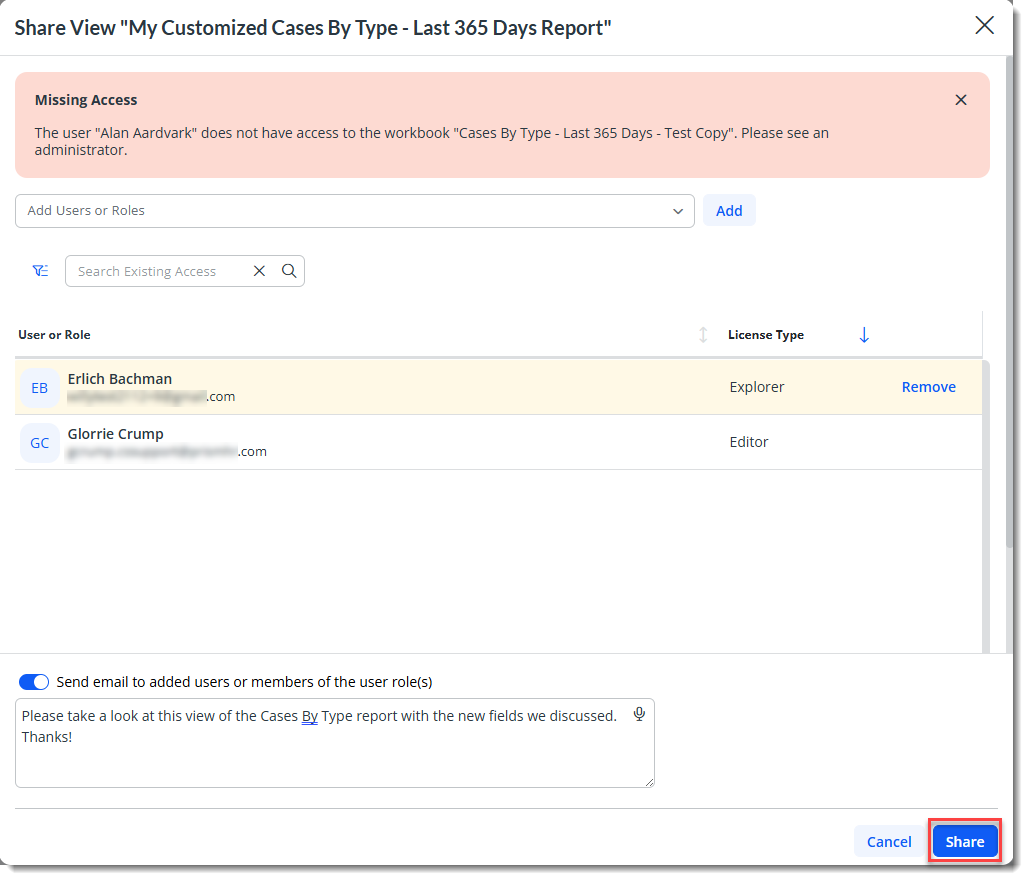
Note: The users must have access to the workbook to be granted access to any subset (i.e., view) of the workbook. A "Missing Access" message displays if the user does not have access. This message will not stop you from being able to share the view with the remaining users or roles selected, however.
Each user or role is added with the same level of access they have to the originating workbook.
-
By default, the Send email to added users or members of the user role(s) option is selected to notify users or role members that they have been granted access to the view.
-
Optionally, enter a brief message for the email notification recipients.
-
Click Share.
-
Creating ClientSpace Widgets Using Report Center Workbooks or Views
-
Creating ClientSpace Custom Dataform Links Using Report Center Workbooks or Views