Customizing BPM Login Notification Email Templates
Once you flag a batch as Open to BPM, if the email address on the Renewal Client Contact record identified on the batch is correct, your client will receive an email notification when you place the batch in Client Review status. An email using the default settings is shown below:
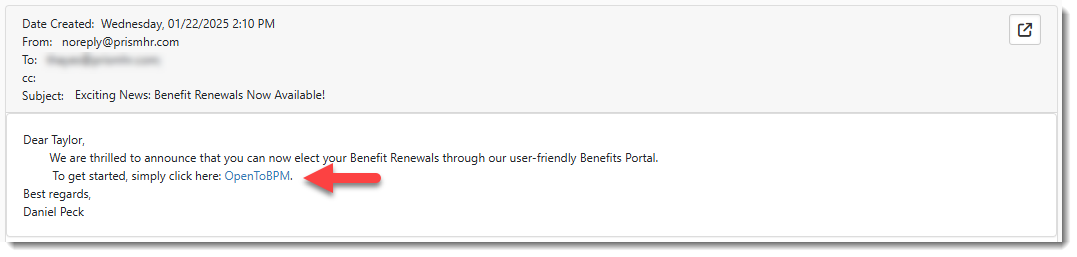
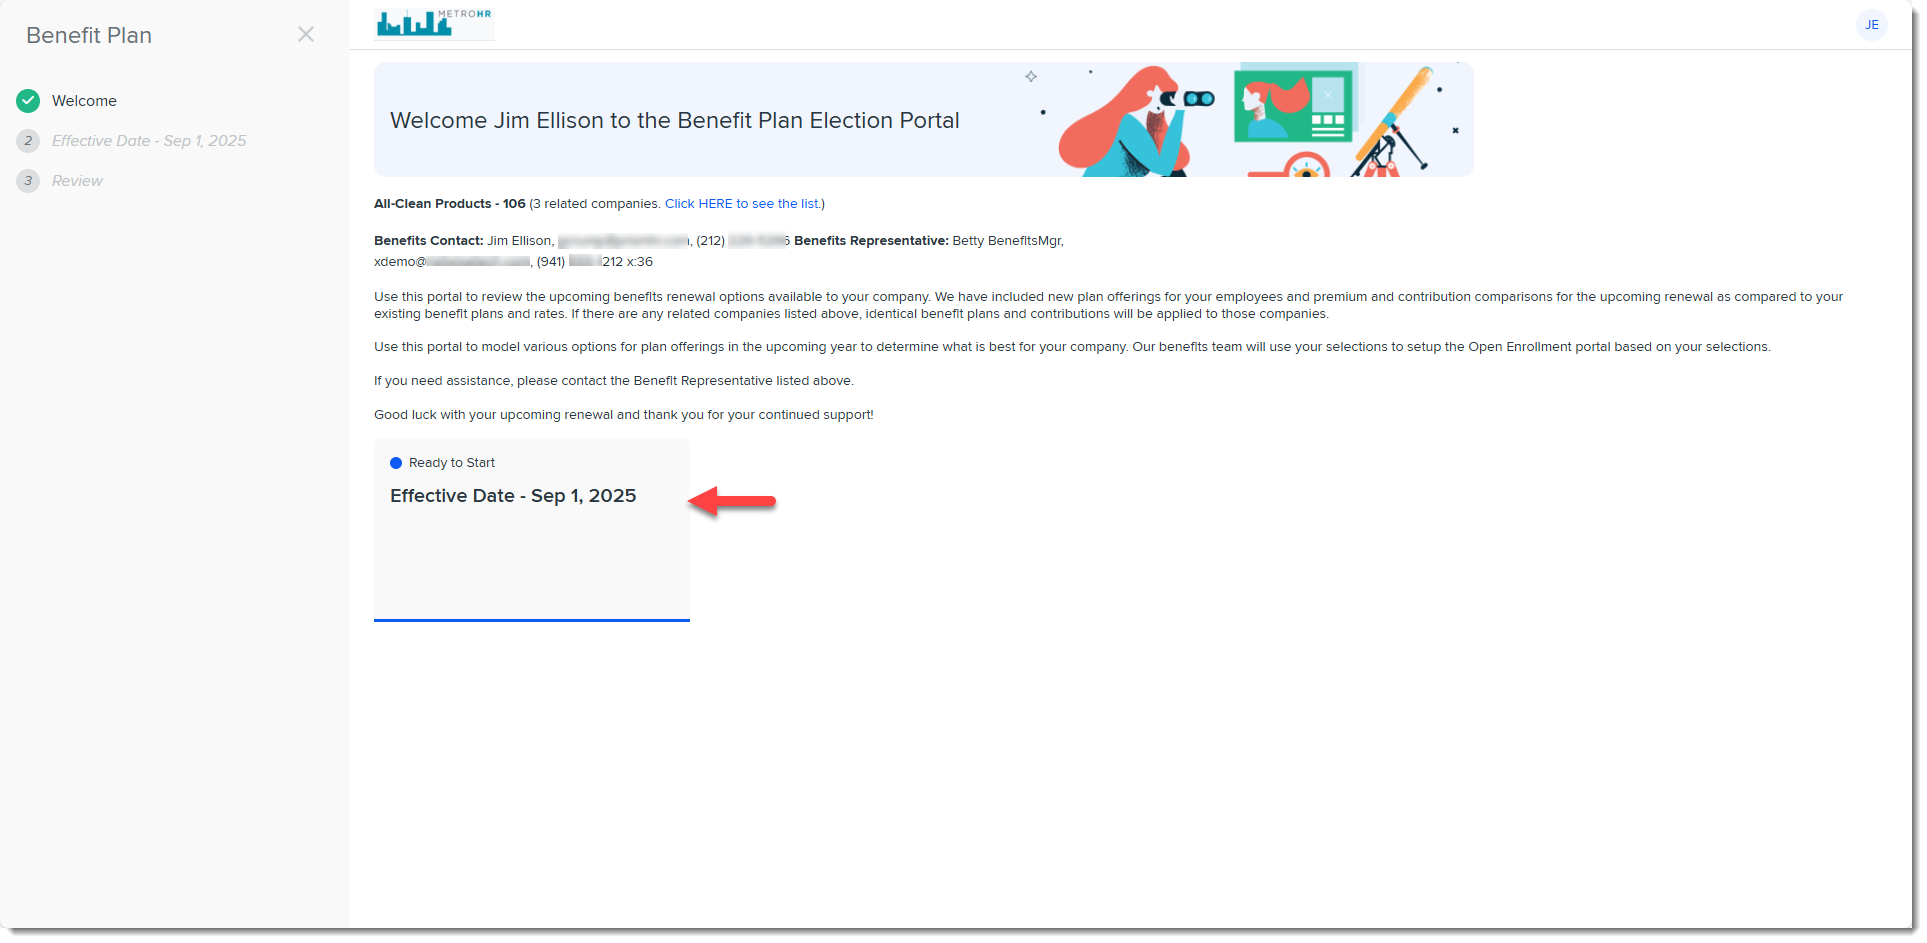
The email notification indicates that the batch is ready for review on BPM and contains a link to the Benefits Batch which they will access in BPM (upon successful authentication) by clicking a tile on the BPM Welcome page referred to as the Benefits Batch card:
Note: If you have added BPM Additional Contacts, they will also receive an email notification when you place the batch in Client Review status. See Adding and Editing BPM Additional Contacts.
Email Template Options
Existing Customers
If you are sending email notification to a customer with a Benefits Batch Type of Renewal, this informs the system that this is an existing customer. The email notification uses a pre-configured email template named BPM Login Email. It is flagged by default as "published" and can be used "out-of-the-box" or customized to your company's requirements. When your customer clicks a link using this template, they are prompted to enter their Client Number and Last Name on the BPM login window.
Note:
-
For security reasons, we do not include the Client Number in the default email template body. You may choose to add it to the template, provide it to them by phone or in a separate email. The Replace Field is located in the Client Master group on the Replace fields window. It is named {gen_ClientMaster.ClientNumber}.
-
If you have custom Benefits Batch Types and you have configured Benefits Batch Types Metadata to specify the BPM login type of ID or Client Number, you can also set a Server Data Proc 1 condition on the email template to indicate the login type(s) for which the email template is used. This is covered in the Customizing the BPM Email Templates section of this document. Also see Configuring the BPM Login Method for Custom Batch Types article.
Prospects
If you are sending email notification to a customer with a Benefits Batch Type of RFP, this informs the system that this is a sales prospect instead of a customer. The BPM Prospect email template is used for prospect/RFP customers. It includes a BPM access link that prompts for the ID on the BPM login window instead of the Client Number (since prospects do not have a client number yet.) The ID is the Benefits Batch ID. You can find it in the Administrative Fields fieldset of the Benefits Batch dataform:

The email template flagged by default as Inactive. To use it, you must make it Active and flag it as "published".
The ID is included as a Replace field in the default body text of the email template. The Replace field name is {gen_BenefitsBatch.pkBenefitsBatchID}.
Note: If you have custom Benefits Batch Types and you have configured Benefits Batch Types Metadata to specify the BPM login type of ID or Client Number, you can also set a Server Data Proc 1 condition on the email template to indicate the login type(s) for which the email template is used. This is covered in the Customizing the BPM Email Templates section of this document. Also see Configuring the BPM Login Method for Custom Batch Types article.
Customizing the BPM Email Templates
Both the BPM Login Email and BPM Prospect email templates can be customized to your company's requirements.
In this topic, we cover some of the optional customizations you can make to the BPM Login Email template.
Note: For steps on building your own template from scratch or making other customizations not discussed in this topic, refer toEmail Templates: Basic Configuration.
To edit the BPM Login or BPM Prospect Email Template:
-
Go to System Admin
 > Email Templates.
The Email Templates dashboard opens.
-
Locate the BPM Login Email or BPM Prospect template and click
 (Open) next to it.
 -
The Email Template wizard opens at Step 1 Initial.
-
Consider the following customizations.
-
Edit Body Text: On Step 2 Content, edit the Subject or Body text.
Note: To add additional replacement fields, click See Replace Fields as shown in the image below. For details about using replacement fields, see Replacement Fields.
Tip: Don't like the default OpenToBPM link label? Change it easily by selecting View in HTML
 in the Body section toolbar. When the View HTML window displays, edit only the text portion of the HTML that controls the hyperlink label (as highlighted in the screen below). Then click Update to save the changes and close the View HTML window. Preview your change in the Body section.
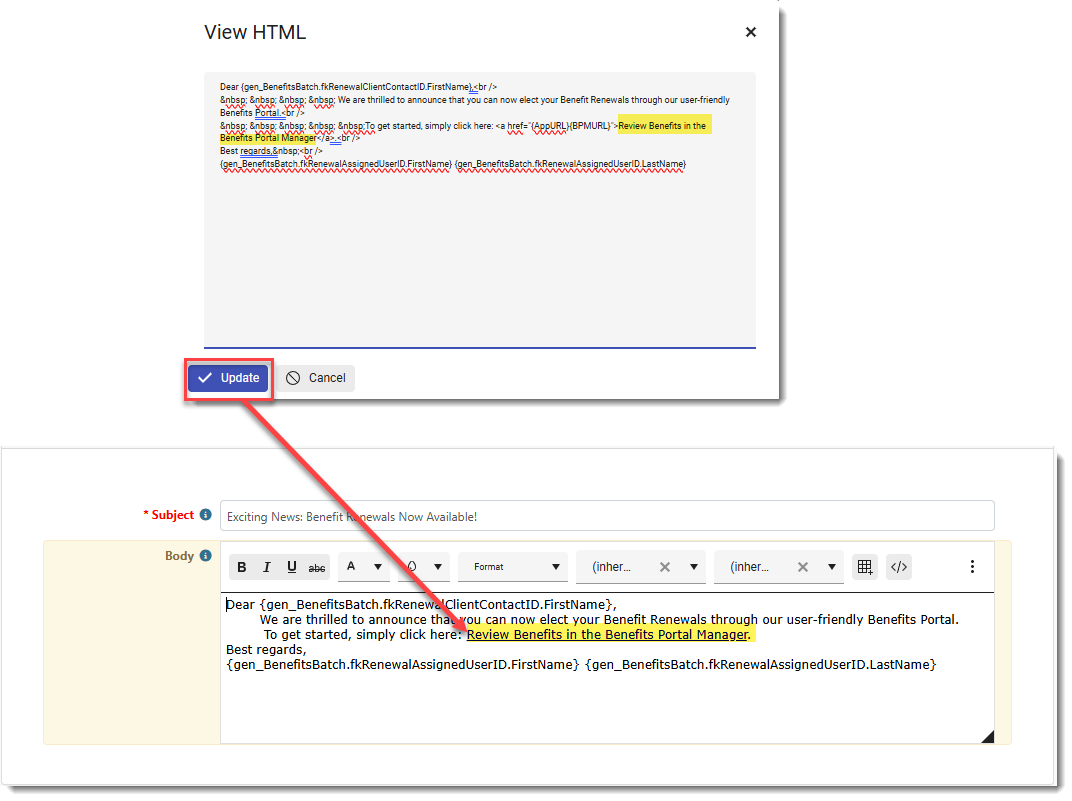
-
Add Custom Batch Type Condition (for use with Benefits Batch Types Metadata Configuration Only): On Step 4 Conditions, if you have custom Benefits Batch Types and you have configured Benefits Batch Types Metadata to specify the BPM login type of ID or Client Number for custom batch types, you can also set a Server Data Proc 1 condition on the email template to indicate the login type(s) for which an email template is used. In the example below, we have selected a Source of Server Data Proc 1 and added a condition that the BPMLoginType must be set to Client Number to use this email template. We also added this condition as an AND condition in the Condition Expression.
Using the Condition Expression example below, the Benefits Batch Status must equal Client Review, AND the Open to BPM field must equal Yes AND the BPM Login Type metadata field must equal Client Number to trigger this email template:

-
Add an Attachment: From any tab, add an attachment by clicking Add
 on the Attachments panel. For instance, you can add the instructions we provided for you to give to your customers on using BPM. See BPM Customer Guide.
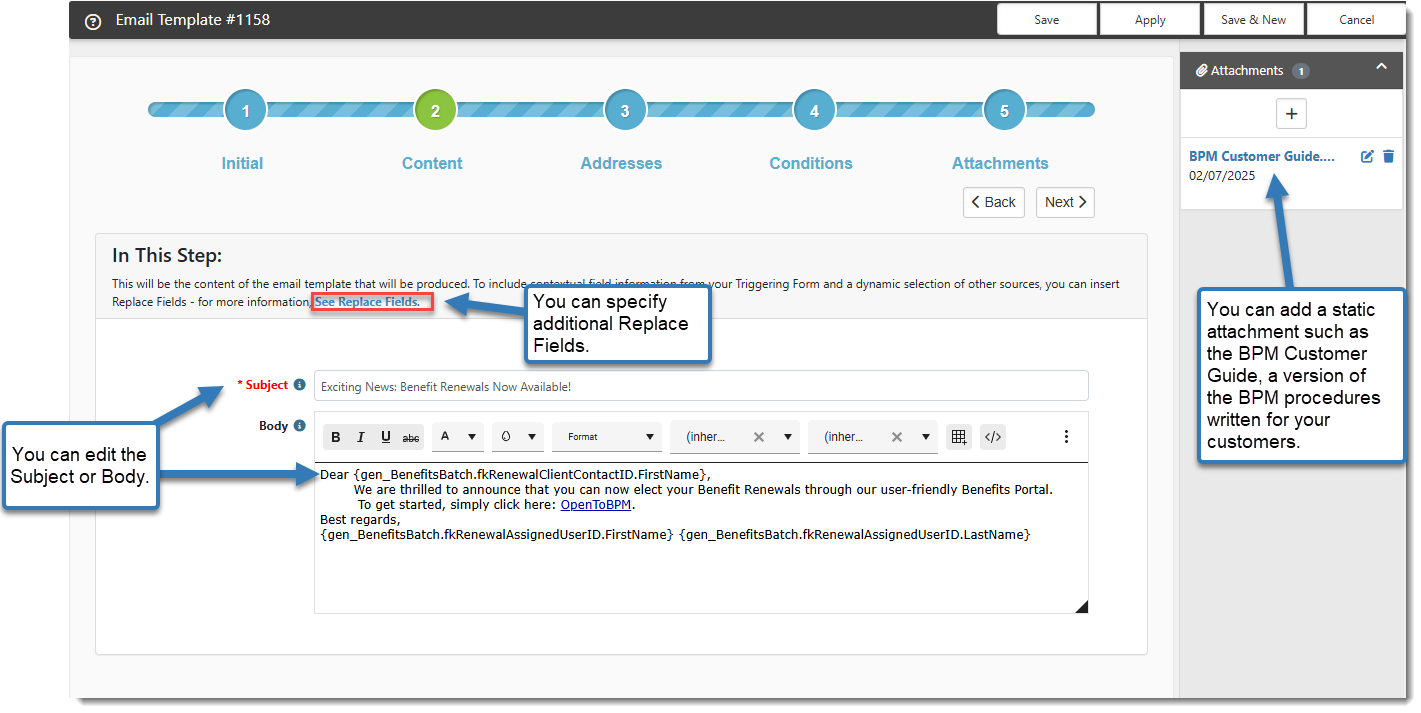
-
Click Apply or Save to save your changes.