Replacement Fields
Field replacement allows you to select fields from an associated dataform within the workspace from which the task is triggered. Field replacement is available when configuring Email Templates and Workflow Channels. For example, when configuring an Email Template for employee termination, you can select fields for employee-related information such as email, state, city, and SSN. The replacement fields help to customize your message.
- For Email Template configuration, replacement fields are available from the link See Replace Fields.
- For Workflow Channel configuration, replacement fields are available from the link Get Replace Fields.
You can use replacement fields for Workflow Channel configuration and Email Templates.
Field replacement includes
-
Any active fields on the triggering dataform
-
The active fields from any additional condition source dataform
-
Task fields when you select Task as the Triggering Form on an Email Template
-
The active fields from the tabbed forms related to the triggering form
-
The active fields from tabbed forms where the parent form is a singleform and is available
-
The active fields from the related Organization and Org Other Info
-
Any fields returned by the Server Data Procs related to the triggering dataform
-
Any field from the most recent parent dataform, even when tasks are multiple levels deep. See Ancestor fields.
To use replacement fields:
-
For Email Templates, in the Content step, click See Replace Fields. For Workflow Channels, in the Content step, click Get Replace Fields.
-
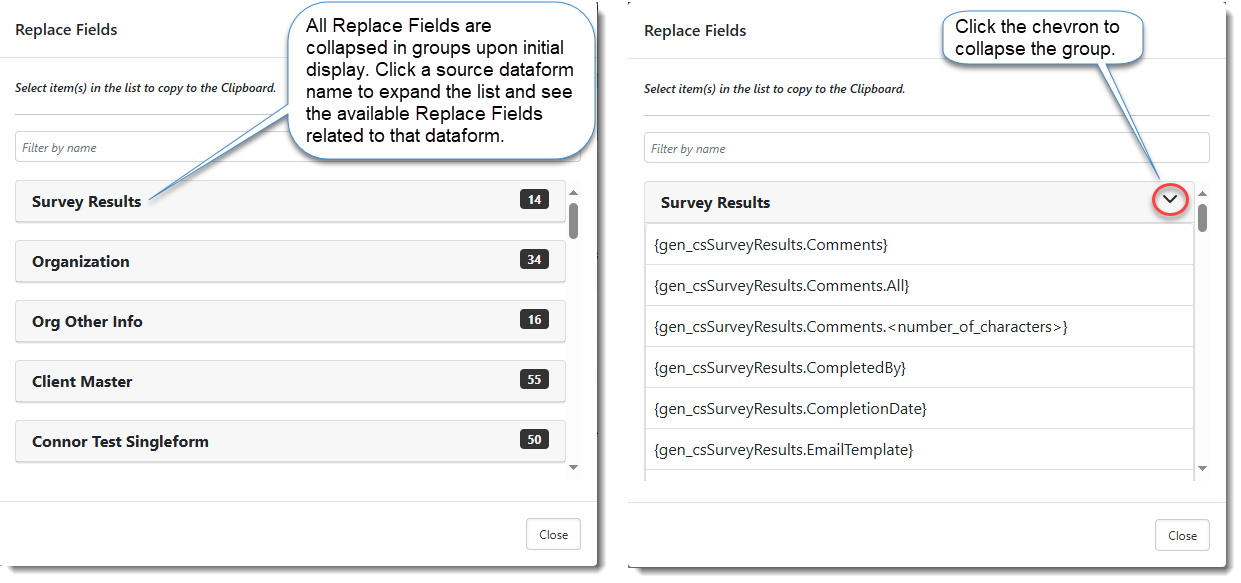
The Replace Fields dialog box opens, displaying fields grouped by source section and collapsed. The Replace Fields dialog box opens, displaying fields grouped by source section and collapsed. A field count is displayed for each group.
-
Expand and collapse fields as desired.
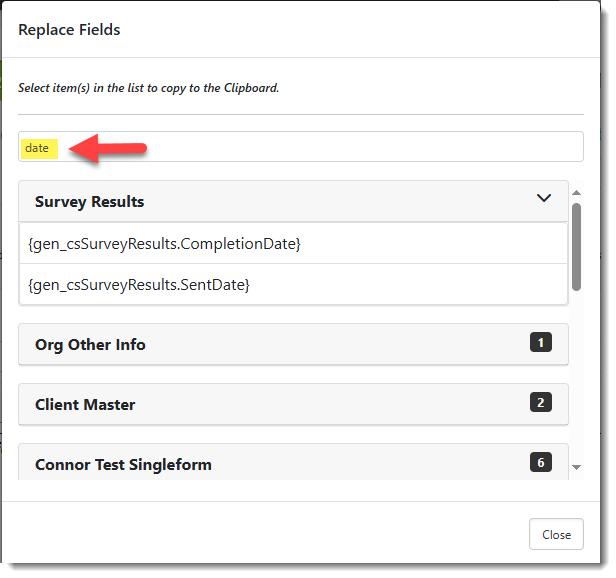
- To search for fields, in the Filter by name box, start typing your keyword. As you type, the matching fields display for any groups you have expanded. Collapsed groups remain collapsed but the count changes to reflect only the Replace Fields which meet the filter criteria. For example, type date and all entries containing date are either displayed in the expanded groups or reflected in the count of the collapsed groups.
- Click the fields you want to select as Replace Fields (as many fields as applicable) and then click Copy.
The Clipboard dialog box opens with the selected fields.
Note: Performing multiple searches and selecting fields from each result set will not impact your selections. All selections are retained until you copy them to the clipboard.
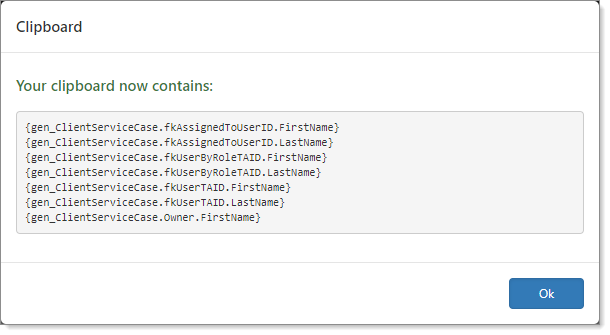
- Click Ok.
- On the Email Template or Workflow Channel, click in the field (Subject, Body, or Text Area) where you want to insert the replacement fields.
- Paste the copied fields (Ctrl+V).
- You can move the fields around as appropriate (copy and paste). You can invoke the Replace Fields dialog as often as necessary to paste your required fields.
- Click Apply.
Alternate values
The following field datatypes provide alternate values. Additional Replace Fields become available when the channel trigger dataform (Triggering Form field) contains a field of one of these datatypes.
| Field Datatype | Value | ||||||||||||
|---|---|---|---|---|---|---|---|---|---|---|---|---|---|
|
Contact, Org Contact, or Contact Type Ahead |
|
||||||||||||
|
User |
|
||||||||||||
|
Text Area |
|
||||||||||||
|
Lookup |
|
||||||||||||
|
Integer |
|
||||||||||||
|
Decimal or Money |
|
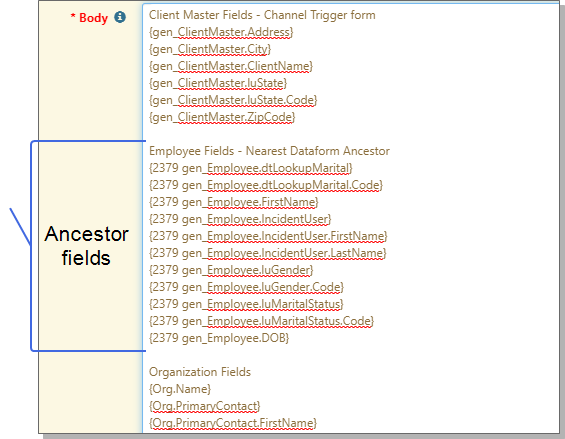
Ancestor fields
The following image illustrates pulling ancestor fields as replacement fields into the Body field. The fields are from the nearest dataform ancestor.
Example: 2379 gen_Employee.FirstName
-
The Workflow item is 2379
-
The form is gen_Employee
-
The field is FirstName