Processing SIDES Claims
To process a new SIDES claim:
-
In the modules bar, select UI Claims.
A list of all UI Claims displays.

OR
Open a specific workspace and go to the Unemployment Claim window to only work on UI Claims received for that workspace.
- From the modules bar, click
 Workspaces.
The Workspace Search dashboard opens. - Select a workspace and click
 (Open).
The Workspace page opens. -
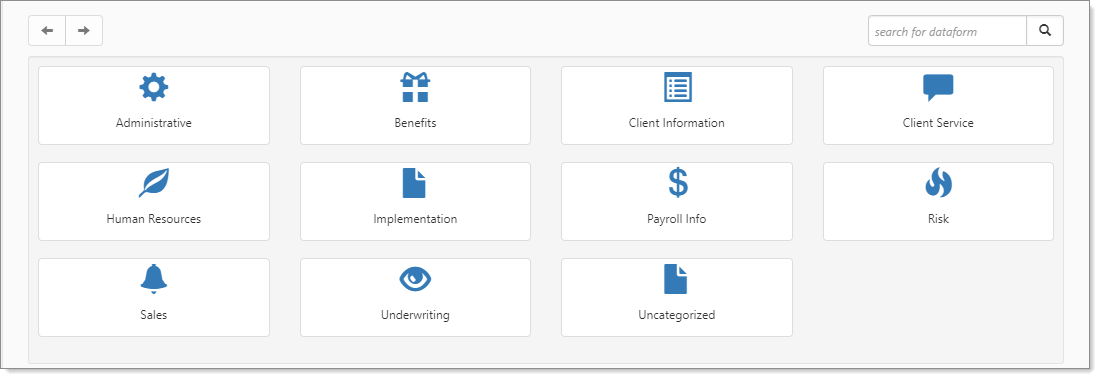
Move down the page to the administrative tiles where you see the dataform categories.
-
Enter "Claim" in the search for dataform field and then click the Unemployment Claim tile.
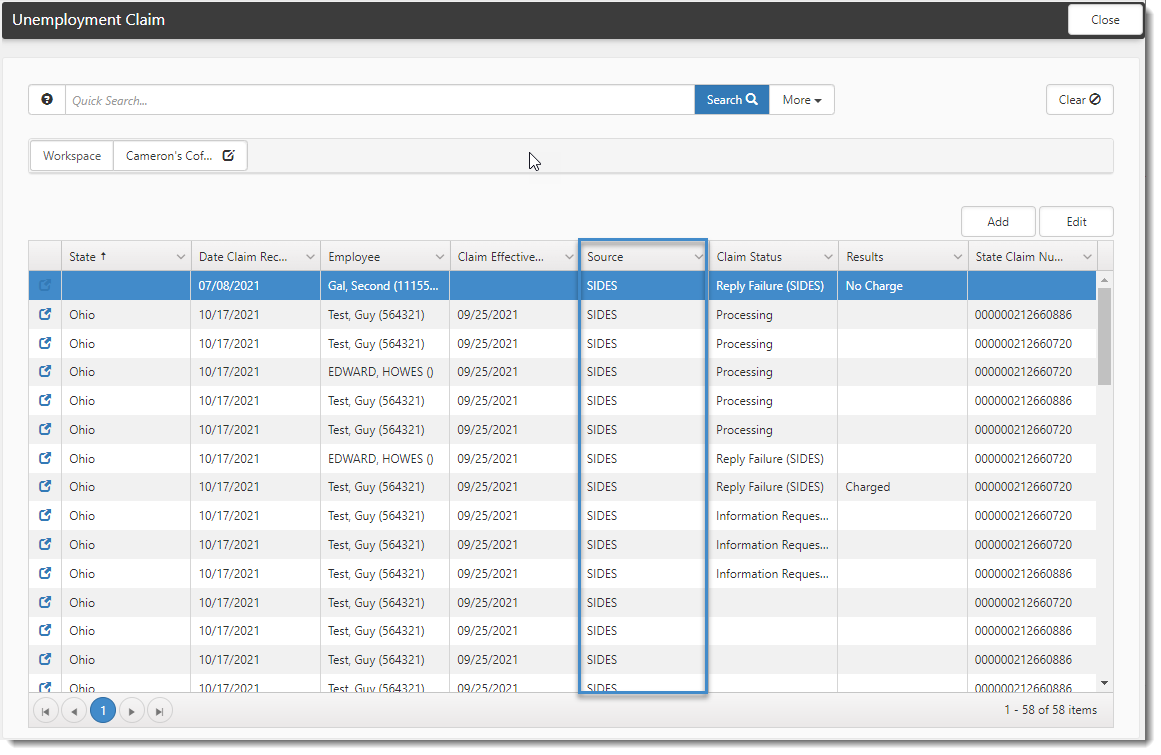
The Unemployment Claim window displays.
Note: This view includes a Source column for identifying SIDES claims at-a-glance.
- From the modules bar, click
-
Locate a SIDES claim to process and open it.
Note: New claims have a Claim Status and SIDES Status of "Received". The Claim Status field is used for general claims management regardless of whether you are using the SIDES integration. The SIDES Status field is a "read only" field that tracks the integrative part of SIDES claims processing only. This allows you to isolate "SIDES only" activities when needed, such as when generating reports.
Refer to Managing Unemployment Claims for additional information on searching for claims.
-
In the Action Center, under Workflow, click Begin Processing Claim.
The Separation Information Response tab displays. The Claim Status and SIDES Status change to Information Requested indicating that the state requires information (that you will provide on the Separation Information Response tab).
If you need to reference a Separation Information Response SIDES field identifier, hover your mouse pointer over the info bubble
 icon next to a field.
 -
On the UI Claim Home tab (
 ), verify the value displayed in the Employee Start Date field located in the "Claim Data" section and manually edit the date, if necessary.
This is the date that will be used as the position start date relevant to the claim. By default, ClientSpace sets the value in Employee Start Date using the Start Date field value from the most recent employment record. There are instances where this may not be the correct date. For example, if an employee was temporarily laid off for a week and the claim for that layoff period was not processed until after they were rehired, using the Start Date of the most recent employment record is not correct as it reflects the recent rehire date instead of the Start Date of the position the employee was in at the time of lay off.
-
Click the Separation Information Response tab to begin completing the questionnaire, making certain to complete the sections in the order shown so that you can complete the key fields Preparer Type and Employer reason for separation in the Claim Details fieldset before moving to other sections. Additionally, if you believe the claim to be fraudulent, be certain to check the Fraudulent Claim? flag located under Preparer Type.
The responses you enter to Preparer Type and Employer reason for separation determine which other fields and fieldsets display.
Note that in addition to displaying separation reasons, the Employer reason for separation field also includes several dispositions for handling invalid claims:
-
20-Never Employed Here
-
21-TPA does not represent this employer
-
22-PEO does not represent this employer
-
-
Continue completing the questionnaire until all required fields and relevant optional fields are completed.
Optionally, if wage data is required, you can click Get Wages in the Action Center under Workflow to auto-fill fields in Earnings & Schedule section from PrismHR instead of entering this information manually. If you need to correct imported wage date OR enter wage information manually, check the Wage Information Override flag in the Wage Information section.
-
What do you want to do?
- Do you want to complete an additional form first, such as a Remuneration form, before continuing with system validation of requirements (which may flag other missing forms and required information)?
-
Click Apply to save the fields you entered on the Separation Information Response tab and keep the claim record open.
-
In the Action Center, under Links, click Add
 next to the desired form.
 The new form becomes the active work item in the Work Center (i.e., left pane). The Claim record remains available in the Work Center and you can return to it once you complete and save the additional form.
-
When all known required forms are completed, click Submit to SIDES.
Clicking Submit to SIDES starts a validation process to ensure the claim is complete.
-
If responses are valid and no additional required fields or forms are missing, the claim is submitted and the Claim Status and SIDES Status fields are changed to Queued, and you can proceed with step 7.
-
If additional fields or forms are incomplete or there are invalid responses (such as incorrect dates), they will be listed in an error message. Continue with these steps before proceeding with step 7.
-
-
Complete or correct required fields listed in the submission error message.
-
Complete any remaining required forms listed in the submission error message.
-
Click Submit to SIDES again to submit the claim.
-
Do you want to continue with system validation of requirements (which will flag missing forms and other required information)?
-
Click Submit to SIDES.
Clicking Submit to SIDES starts a validation process to ensure the claim is complete.
-
If responses are valid and no required fields or forms are missing, the claim is submitted, the Claim Status and SIDES Status fields are changed to Queued, and you can proceed with step 7.
-
If fields or forms are incomplete or there are invalid responses (such as incorrect dates), they will be listed in an error message. Continue with these steps before proceeding with step 7.
-
-
Complete or correct any remaining required fields listed in the submission error message.
-
Complete any required forms listed in the submission error message in the Action Center. Under Links, click Add
next to the desired form. The new form becomes the active work item in the Work Center (i.e., left pane). The Claim record remains available in the Work Center and you can return to it once you complete and save the additional form. -
Click Submit to SIDES again to submit the claim.
-
Note:
-
The scheduled process to send submitted SIDES claims, receive new SIDES claims, and receive the state's responses to submitted claim runs every hour. Note that some states may only upload claims once per day.
-
Sometimes, when a secure connection cannot be made to the SIDES broker, SIDES claims submitted for processing can become stuck in "Processing" status. The system automatically resubmits claims for processing that have been stuck in "Processing" status for more than two hours.
-
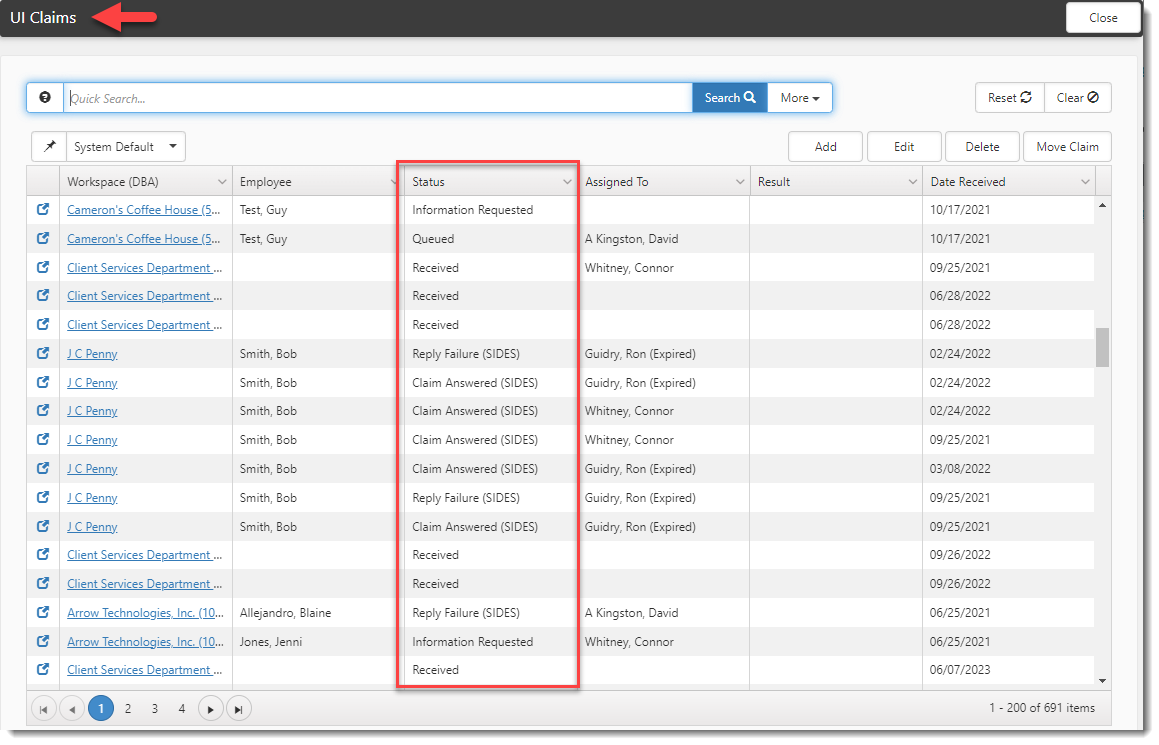
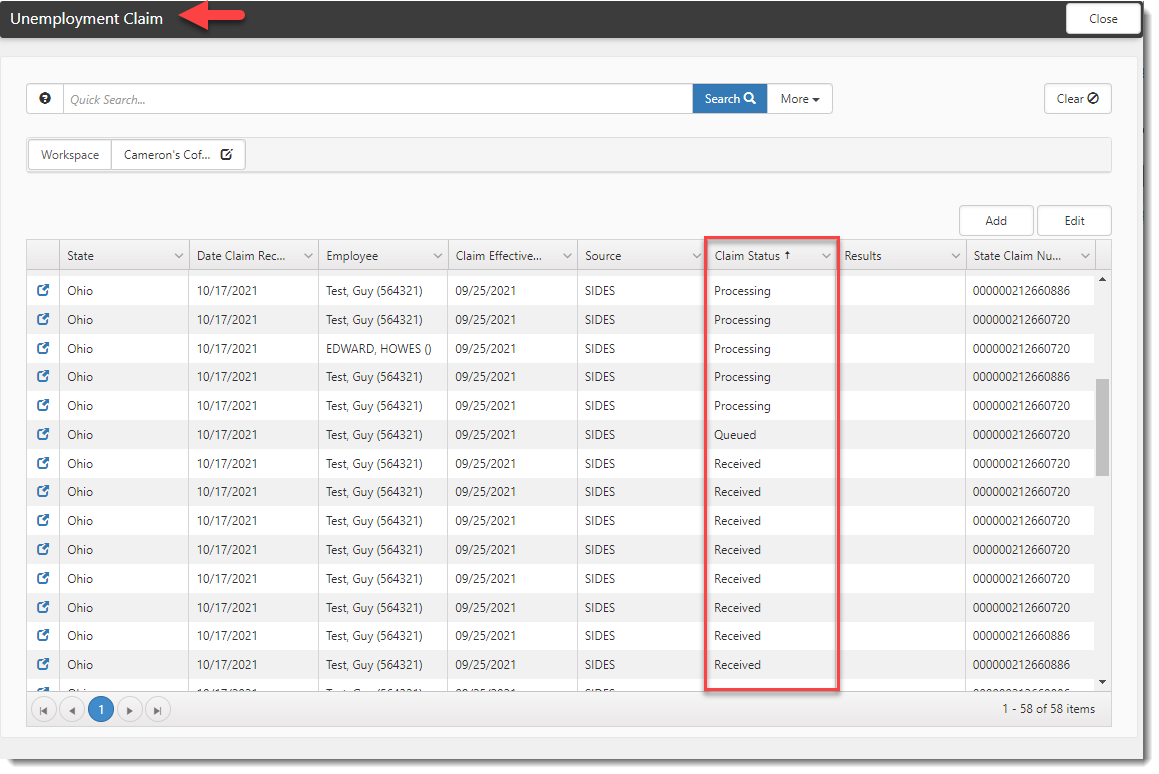
Check the UI Claims dashboard or the Unemployment Claims window of specific workspaces often for claim statuses and determine an action (if any) based on the status.
UI Claims Dashboard - Status Column
Unemployment Claim window - Claim Status Column
Refer to SIDES Status Definitions to review the list of SIDES-related statuses and their meanings.
Next: Helpful Hints