Configuring Recurring Visits

One of the best features of client visits is the ability to set automatically recurring visits. For a recurring visit, when you mark the visit as Completed, the visit is saved and you are returned to the Client Visit dashboard. When you refresh the list, you see that another Planned visit has been set up.
The recurring planned visit can be established from the Client Master Company Other Info tab of the Client Master, when you select a Visit Type of R but other forms can be used.
For recurrence to work, your system administrator must configure Lookup metadata for Type of Visit and Visit Schedule. The following procedures guide you through the configuration.
Note: If you need additional fields on the Client Visit Add form than the default fields, advanced administrative access or billable assistance (without a Gold service plan) is required. See ClientSpace Service Plans to learn more about available service plans.
Step 1: Activate the Rule
First, you must activate the rule, CreateNextVisit.
To activate the rule:
- Go to System Admin
 > Advanced > Manage Business Rules.
The Custom Logic Rules dashboard opens. - Locate the Dataform Client Site Visit with the Method Name CreateNextVisit and click
 (Open).
The Rule Details form opens. - Select the Active option.
Typically this rule is set to Active. - Click Save.
Step 2: Configure the Lookups
The next step is to configure the Lookup metadata for the Type of Visit and Visit Schedule. Different visit types can have different recurrence frequencies. Additionally, there are multiple entries for each of the Lookups. For recurrence to work, you must configure each one.
To configure the Type of Visit:
- Go to System Admin > Lookups.
The Lookups dashboard opens. - Filter on TypeOfVisit.
There are multiple entries for TypeOfVisit. Configure each type where you want recurrence.
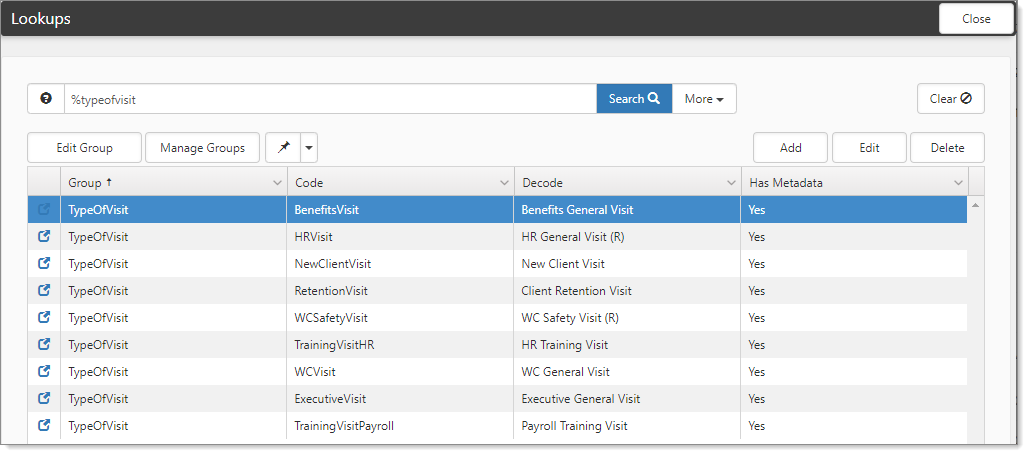
- Select an entry and click (Open).
The Lookup Details form opens. Our example uses RetentionVisit.
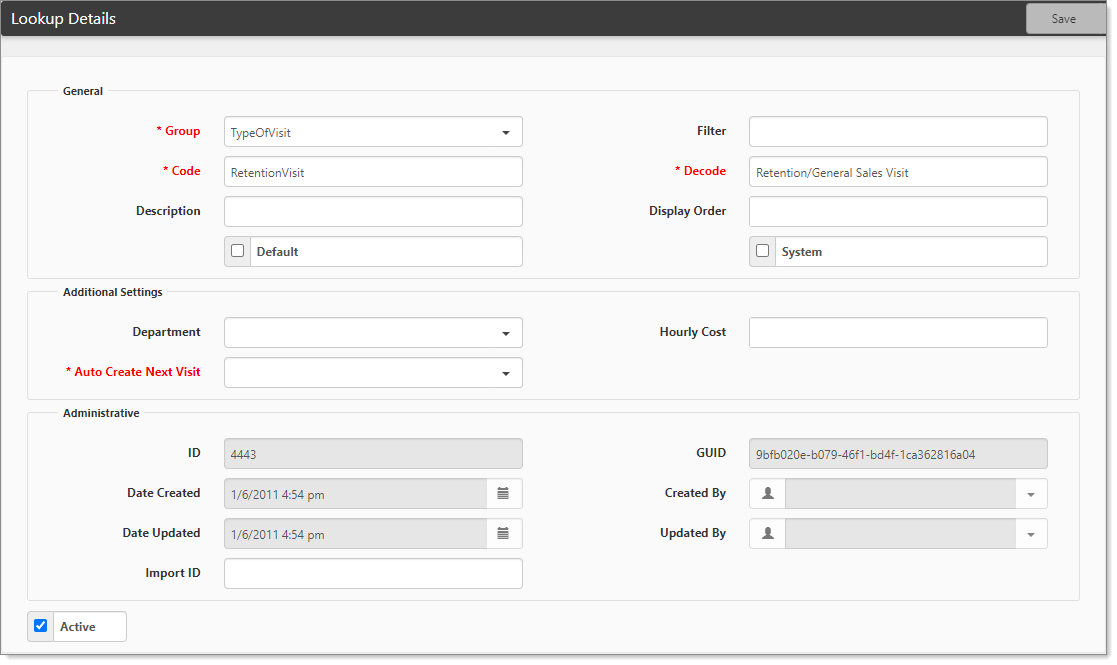
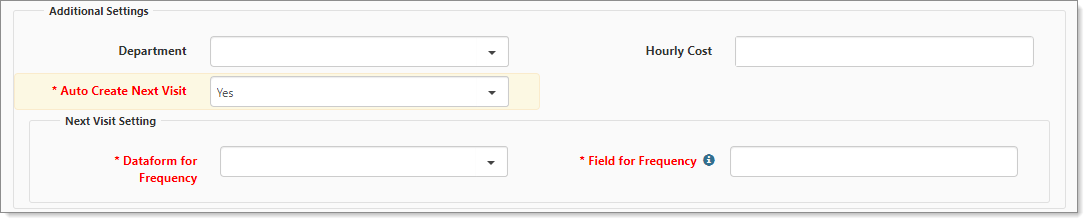
- In Auto Create Next Visit, select Yes.
The Next Visit Setting fieldset becomes available, with the required fields Dataform for Frequency and Field for Frequency.
|
Dataform for Frequency |
Select a dataform containing the field that you will use to determine how often a recurrence will occur. The Company Other Info dataform is often used. However, this can be any dataform. |
|
Field for Frequency |
Enter the Field Name (not Field Label) in this field. This must be a field located on the selected Dataform for Frequency. Additionally, the designated Field for Frequency must have an Element Type of Lookup (core) in the Lookup Group Visit Schedule and Visit Schedule metadata must be configured.
Note:
In the example below, we are displaying the field properties for the HR General Visit field. You can see that it has a Field Name of luHRGeneralVisitSchedule. If you wanted to use this field as the Field for Frequency, you would enter luHRGeneralVisitSchedule.
|

- Click Save.
To configure a new frequency:
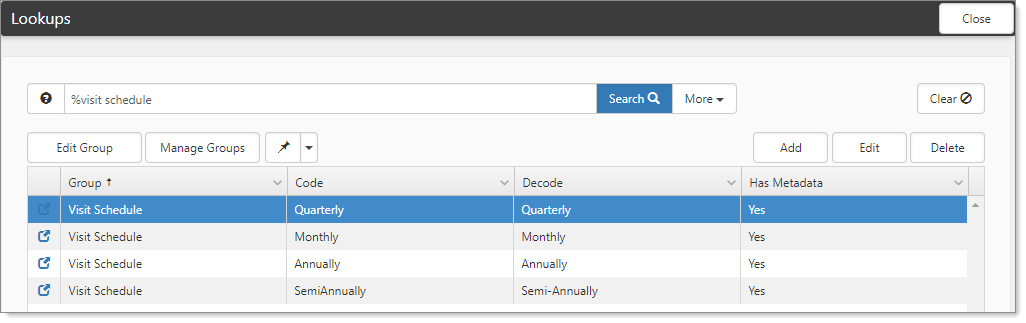
Lookups for Visit Schedule are already configured with frequency.
- To view frequency, in Lookups, filter for Visit Schedule.
The entries are already configured. However, you may want to review or add a new frequency.
- To add a new frequency, click Add.
The Lookup Details form opens. - Complete the fields:
|
Group |
Select Visit Schedule. |
|
Code |
Enter a name, such as Weekly. |
|
Decode |
Enter the name again, such as Weekly. |
- Click Apply.
The Additional Settings fieldset becomes available. - In Days per Frequency, enter a number. For example, for Weekly, type 7.
- Click Save.