Configuring the Import Map Detail
After you configure the Import Map Header (to select the dataform you will insert/update), the next step is to add the fields using the Import Map Detail form. Add each field from the import file that you want to import into ClientSpace, selecting the most appropriate values that match both the data you are importing as well as the field into which you are importing the data.
To configure the Import Map Detail:
- From the Import Map Header form that you just added/edited (in Configuring the Import Map Header), in the right pane, click Fields.
The Import Map Search dashboard opens. The list presents the fields that have been added for the Import Map Header. - To add fields, click Add.
The Import Map Detail form opens.
- Complete the required fields.
|
File Column |
Required. This is the exact column header name from the data file you are importing. This field is case sensitive: Clientname is different from ClientName. |
|||||||||||||||||||||||||||||||||||||||||||||
|
Dataform |
Select a dataform. The system then provides a list of fields from that dataform in the Field list. |
|||||||||||||||||||||||||||||||||||||||||||||
|
Field |
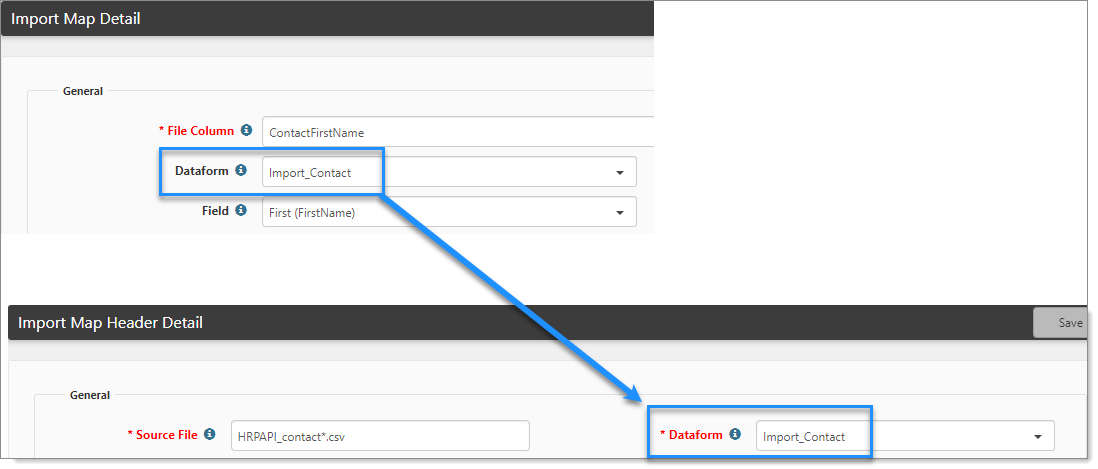
Select the field you want to populate. The Dataform selected on the Import Map Detail must match either the Dataform selected on the Import Map Header Detail or the tabbed forms related to that dataform.
Tabbed dataforms always have a parent form field linked to the primary dataform selected on the Import Map Header Detail and are associated with the primary form as a tab. For information about associating tabbed forms, log an Extranet case. |
|||||||||||||||||||||||||||||||||||||||||||||
|
Data Type |
Required. Indicates the type of information you insert into the field. The following list describes the types of data that your file should contain and can include:
|
|||||||||||||||||||||||||||||||||||||||||||||
|
Lookup Table |
When the Data Type Foreign Key is selected, use this required field to select the table (in conjunction with Field) to match the foreign key passed from the file. |
|||||||||||||||||||||||||||||||||||||||||||||
|
Lookup Field |
When the Data Type Foreign Key is selected, use this required field to select the field (in conjunction with Table) to match the foreign key passed from the file. |
|||||||||||||||||||||||||||||||||||||||||||||
|
Required Value |
When selected, the datarow value must be provided in the file (no blank cells), or the default value must be entered. If neither of these is present, the system issues a validation error. |
|||||||||||||||||||||||||||||||||||||||||||||
|
Required Column |
When selected, this column must be in the header and datarow of the imported file (blank values in the datarow use the default value configured). |
|||||||||||||||||||||||||||||||||||||||||||||
|
Default Value |
You can configure this in several ways on a field-by-field basis.
Standard Imports
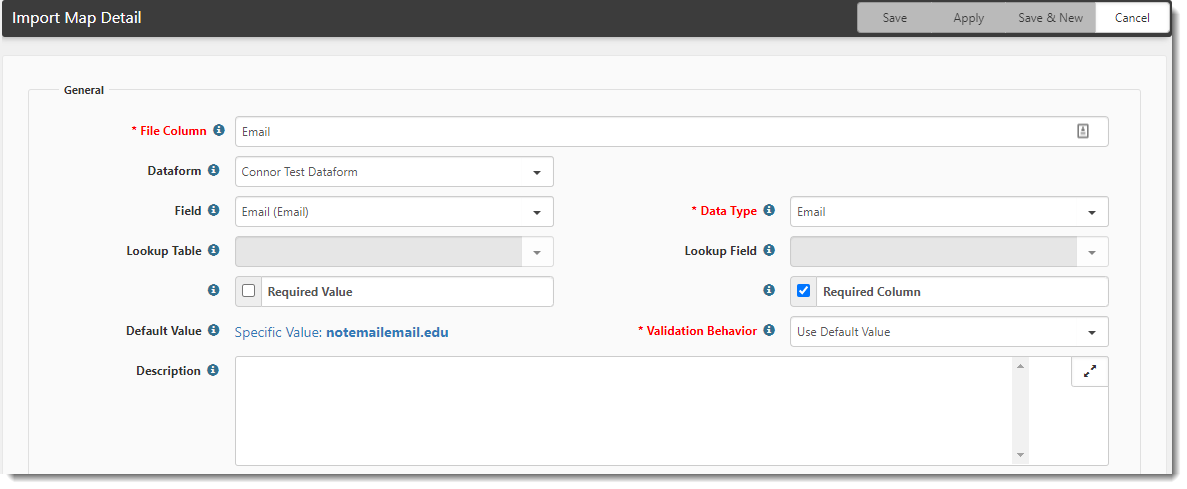
Imports with Email Data Type Fields When you select a Data Type of "Email", the Validation Behavior field displays. This is a required field used to configure ClientSpace behavior when a missing or invalid email address is encountered in a PrismHR import record. If you choose the Use Default Value option, a row with a missing or invalid email address will import but the system applies a specified Default Value setting (i.e., a permitted substitution) in place of the missing or invalid email address in the import record. For complete details on these settings, see the Validation Behavior field definition below.
Salesforce Imports
Salesforce Exports
|
|||||||||||||||||||||||||||||||||||||||||||||
|
Allow Invalid Lookup Values |
This option is only available when Data Type is Lookup.
When ClientSpace encounters a lookup error during import, the system displays a message that indicates whether the import was successful (allowed) or if the import failed (not allowed). See Managing Import Data and Common import errors. |
|||||||||||||||||||||||||||||||||||||||||||||
|
API Path |
Specifies the mapping path used to connect to a third-party API. This field is used only for imports configured to access directly from a third-party system API. This field is available when Import Type is set to API on the Import Map Header Detail form. |
|||||||||||||||||||||||||||||||||||||||||||||
|
Validation Behavior |
When a Data Type of "Email" is selected, the Validation Behavior field displays. This is a required field used to configure ClientSpace behavior when a missing or invalid email address is encountered in a PrismHR import. Select a configuration option from the drop down list. Available options are:
Note: If you click the Required Value checkbox on the Import Map Detail screen and the selected Data Type is "Email", "Fail Entire Row" is set by default in the Validation Behavior field and cannot be edited (unless you uncheck Required Value). This informs the system that an email field entry is required in each import row. If the email value is missing (i.e., blank) in the import row, the row fails. No Default Value substitutions are permitted. |
|||||||||||||||||||||||||||||||||||||||||||||
|
Description |
A short description of the imported data being imported, such as the data source. For example, "Payroll System, Client Address 1 field." |
|||||||||||||||||||||||||||||||||||||||||||||
|
Active |
When selected, this field is actively included in the import and subject to associated validation. Inactive rows are ignored on import. |
- To add multiple records, click Save & New. Else, click Save.
- Continue adding fields, until you have included each field in the import file you would like to insert into ClientSpace.