Configuring the Workflow Link
To configure the link:
- Go to System Admin
 > Advanced > Custom Links.
The Configure Links dashboard opens. - Click Add.
The Configure Links Detail form opens.
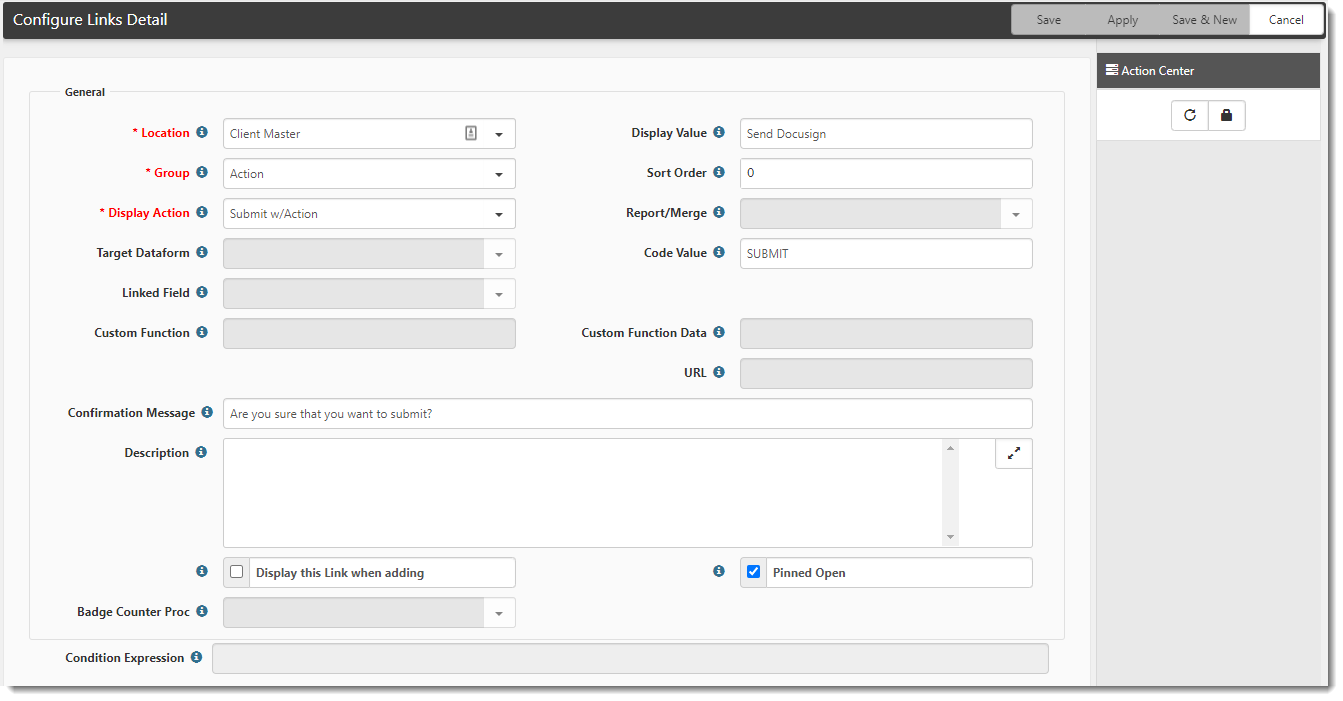
- Complete the form.
|
Location |
Select Client Master, or other targeted dataform that initiates the submit action to DocuSign. This is the name of the dataform on which you want the link to appear. |
|
Display Value |
Type Send to DocuSign. This is how the link will display in the Action Center > Workflow pane. |
|
Group |
Select Action. This denotes the type of link you are creating and drives the other fields on the form. |
|
Sort Order |
Use the default value. |
|
Display Action |
Select Submit w/Action. |
|
Code Value |
Type SendDocuSign. This is the HdrAction that is produced when the link Send to DocuSign is clicked (from the Client Master). |
|
Confirmation Message |
Optional. Allows you to display an OK / Cancel dialog box with a message before running the link action. Most often used with Action Links. |
|
Description |
Optional. A text description of what action the link performs may be recorded here. This description displays when you hover over the link on the dataform or system object. |
|
Display this Link when adding |
Optional. Dataforms prior to saving do not normally display links. This option allows you to display the link before the initial form save. |
|
Pinned Open |
Optional. When this option is enabled (selected), it forces the link always to be displayed in the Action Center. The link does not collapse when the associated group is collapsed. |
- To add a link display condition, click Add.
Link display conditions might be used to control when the link appears, such as when the client is in the approved status. For details on how to add a link display condition, see Configuring Link Display Conditions. - To add link security, click the Security
 icon in the Action Center to access the Security Roles window where you can add one or more roles and secure the custom link to unlimited roles. For details on how to configure link security, see Configuring Link Security.
 - Click Save.
- Proceed to the next step, Configuring the merge template.