Configuring the merge template
Let's say that you have a contract that needs a signature, perhaps a Client Service Agreement. You want to use ClientSpace as the mechanism to automate the signing process so that you can also save the contract in the CSA field on the Collateral form. You create the contract with the appropriate statements, and at the end of the document is where you want dates, titles, names, and signatures.
1. Determine the required tags
Tags represent the input area for the contract signers to enter a date, name, title, and signature. You can configure as many tags as required. You must use a unique symbol that differentiates the tag from actual content. A pair of slashes is recommended because they are typically not used in content. You can use a backslash \ or forward slash /. For contracts that require multiple signatures, increment the tag numbers. For example, S1 represents the first signer, and S2 would represent the second signer, and so on. Don't forget to add dates and other text for the subsequent signers, such as D2, and N2.
- Word docs: Place the tags where you need input.
Add the tag in a text box so that it can be easily adjusted up or down on the document. DocuSign actions often appear lower in the application than where the tag is configured on the merge template. Adding them in a text box allows you to make adjustments as to where they appear on the document.
- Excel files: Place the tags in the appropriate cells.
- PDFs: Open the PDF, select Edit PDF, and add the tag as text by selecting Add Text. A text box opens. Type the tag in the text box, such as \D1\.
2. Insert the tags
The next step is to configure your document so that you place the tags where the signers input data. The following example illustrates how you would use tags in the input fields for Date, Name, and Signature:
- \D1\ represents the Date for the first signer
- \S1\ represents the Signature for the first signer
- \N1\ represents the Name for the first signer
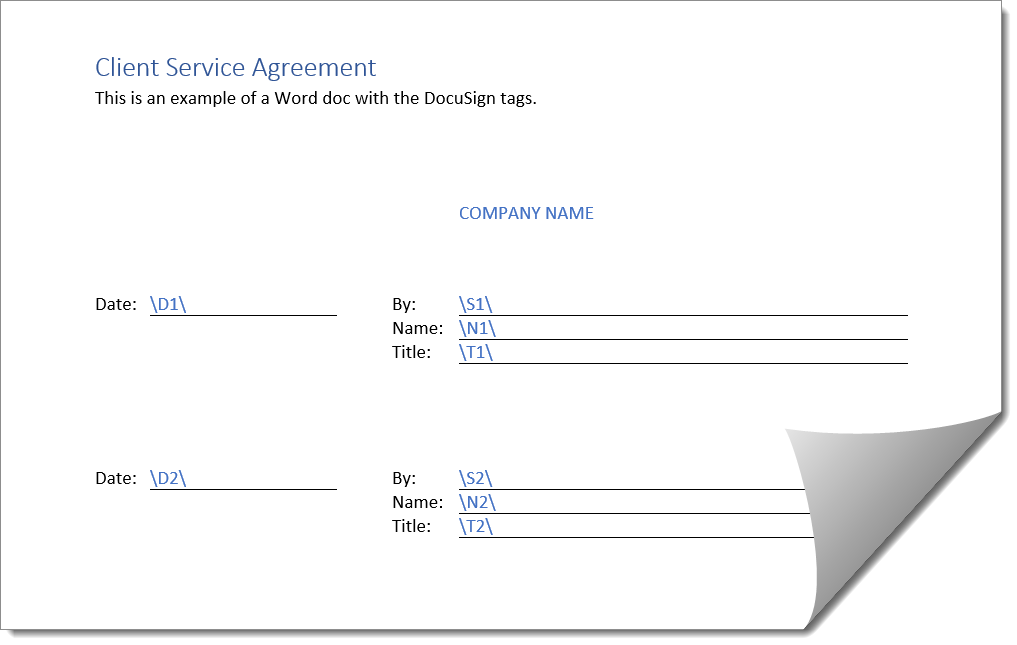
When you have configured your contract with the necessary tags, save the file with a unique name, such as Client Service Agreement.docx.
Before you go live with the merge template, change the DocuSign tag font color to white. This prevents the tags from showing on the signed document. DocuSign can read the tags with a white font color.
Now you are ready to proceed to the next topic, Uploading the merge template.