When a worksite employee’s work or personal email address is added or changed, you can send a notification to the employee. If the employee did not add, edit, or authorize a change to their email address, they can contact their service provider. The notification helps worksite employees and service providers to be more proactive in detecting and preventing fraud attempts.
How does it work? When an Employee’s Work Email and Personal Email changes occur in PrismHR, a business rule sets the Previous Email fields. The business rule (SetPreviousEmails) is set on the Employee dataform for when PersonalEmail or WorkEmail is changed. This rule stamps the old value into the corresponding PersonalEmailPrevious and WorkEmailPrevious fields. This rule is set to run on the Default and Imports pipelines.
To configure an email address change notification template:
| 1. | Go to System Admin |
The Email Templates dashboard opens.
| 2. | Click Add. |
The Email Template wizard opens at Step 1 Initial.
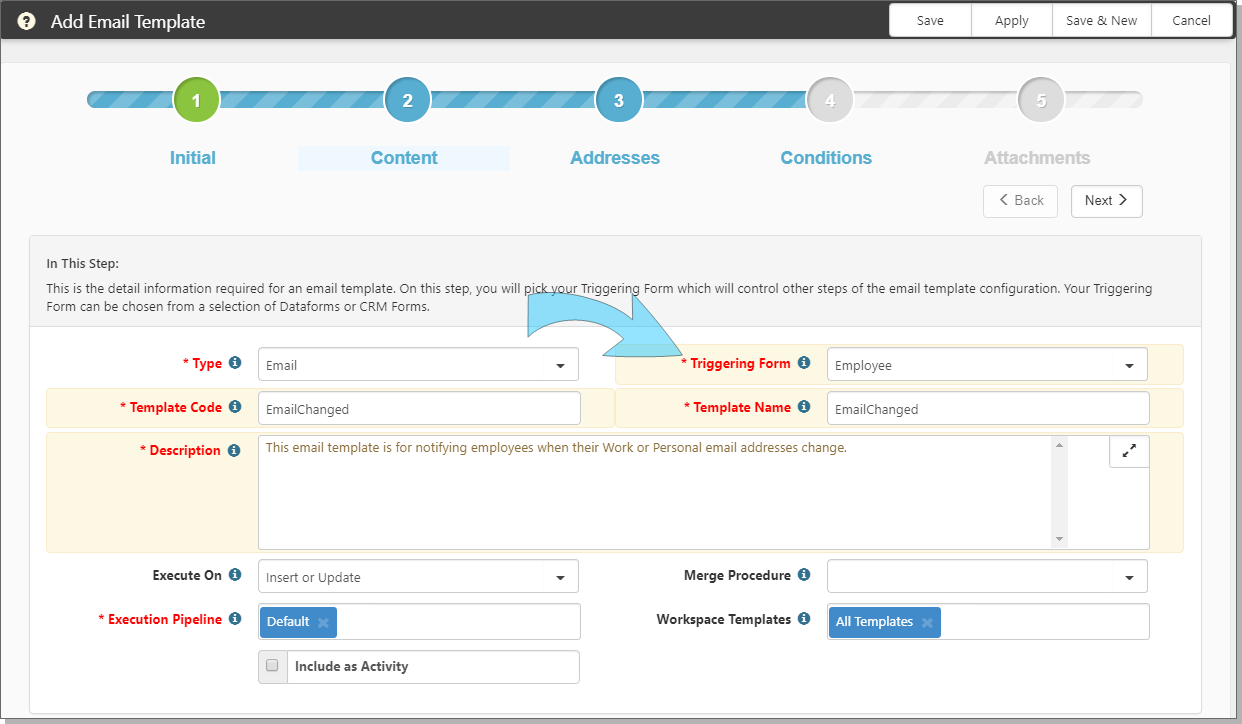
| 3. | Complete Step 1 Initial. |
|
Triggering Form |
Select Employee. The Employee dataform is where the previous email addresses reside. |
| Template Code | Add a short descriptive code to identify this template, such as EmailChanged. |
| Template Name | Add a descriptive name (this is displayed in the application list), such as Email address change notification. |
| Description | Include a brief description, such as Employee email address change notification. |
| Execute On | Select Insert or Update. |
| Merge Procedure | Select an optional Merge Procedure to provide additional system information for Field Replacement. |
| Execution Pipeline | Indicates how the data enters ClientSpace. Keep the setting as Default. |
|
Workspace Templates |
Select the Workspace Templates that will receive this email. Default is All Templates. |
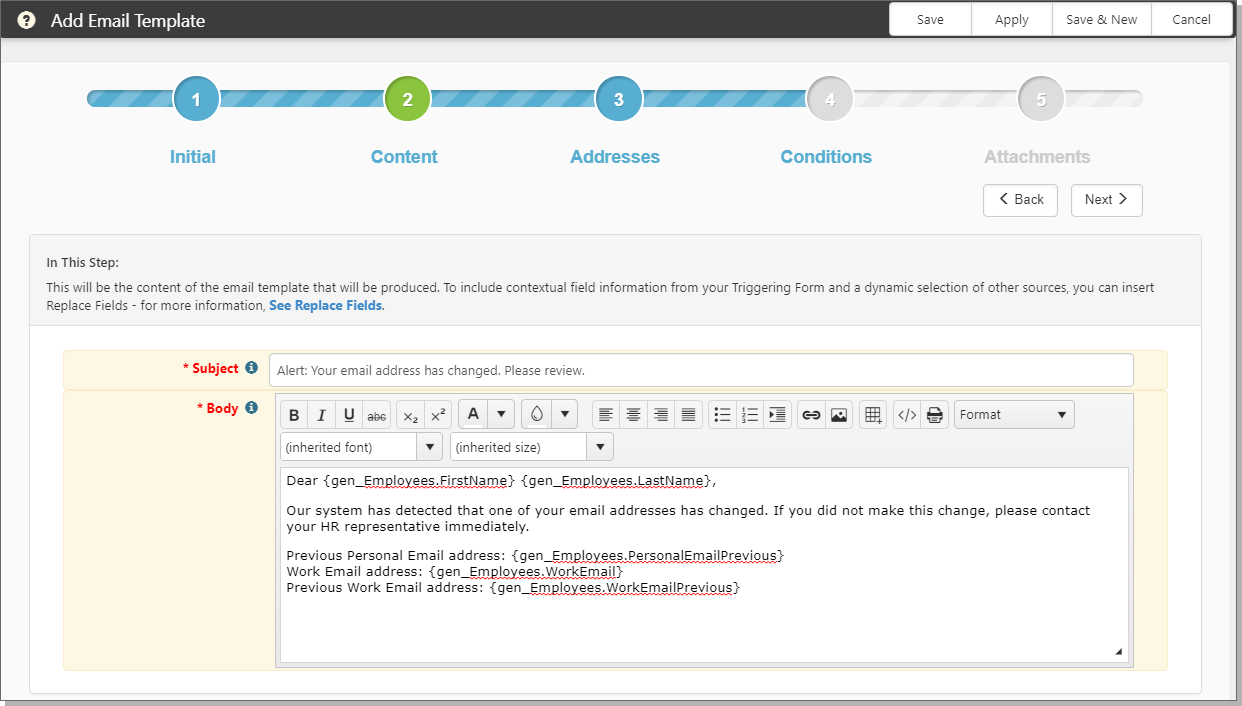
| 4. | Click Next and complete Step 2 Content. |
|
Subject |
The subject line of the email that is generated. The email recipients see this subject. For example, Alert: Your email address has changed. |
|
Body |
This is the body of the email. This field supports rich text, so the email can be branded with links. This is seen by the email recipients. You can use replacement fields to customize the message. To use replacement fields, click See Replace Fields. For details about replacement fields, see Replacement Fields. |
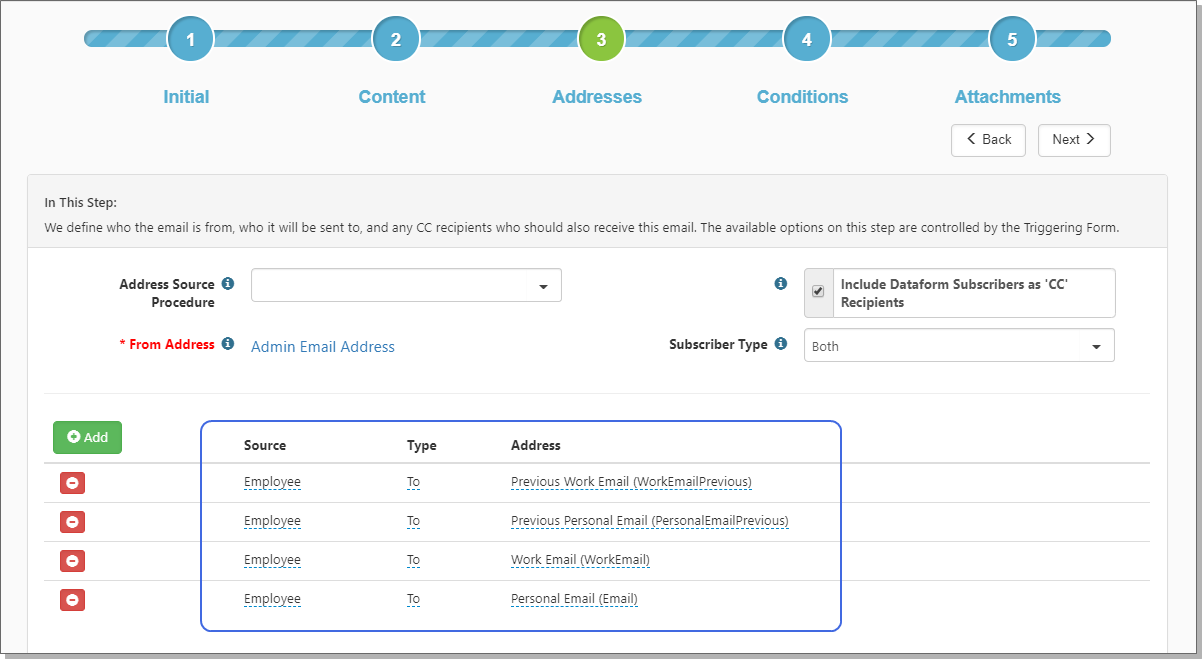
| 5. | Click Next and complete Step 3 Addresses. |
In this step you add the recipients. You want to select Previous Work and Previous Personal email addresses to ensure that when an employee's email address is changed, the notification is sent the previous email addresses in the event the system is compromised by a hacker. Sending the notification to the changed email (a new email address that could be supplied by a hacker) would potentially never reach the employee. Sending the notification to the previous email, would reach the employee because the previous email is most likely the employee's true email address.
| Address Stored Procedure |
Optional. |
|||||||||
|
Include Dataform Subscribers as 'CC' Recipients |
When you select this option it adds anyone who is subscribed to the dataform as CC recipients when this notification is sent. This is in addition to the recipients you configure in the Add section. When enabled (selected), this option defaults Subscriber Type to Both.
|
|||||||||
| From Address |
This field defaults to Admin Email Address (the application administrator's email address). This is the default admin email set in System Admin > Advanced > App Settings. To change this setting:
|
| 6. | To add the affected employee as a recipient, click Add. |
A row opens. This is where you specify the Employee's work and personal email address. We recommend that you add four rows for current work, current personal, previous work, and previous personal email addresses. See the example.
| Source |
For this email template, select Employee. This selection makes the Employee's email addresses (Previous Work and Personal) available in the Address column. To include additional team members as recipients, you can select Client Team or Adhoc Email Address. When you select Adhoc Email Address as the Source, you can type a specific email address in Address. |
||||||||||||
| Type | Type can be To or CC. | ||||||||||||
| Address |
The Address you select triggers the employee notification when their email addresses change. Select the previous email addresses to ensure the employee receives a notification if, indeed, the change was an attempt to commit fraud. Add four rows, for current and previous email addresses.
|
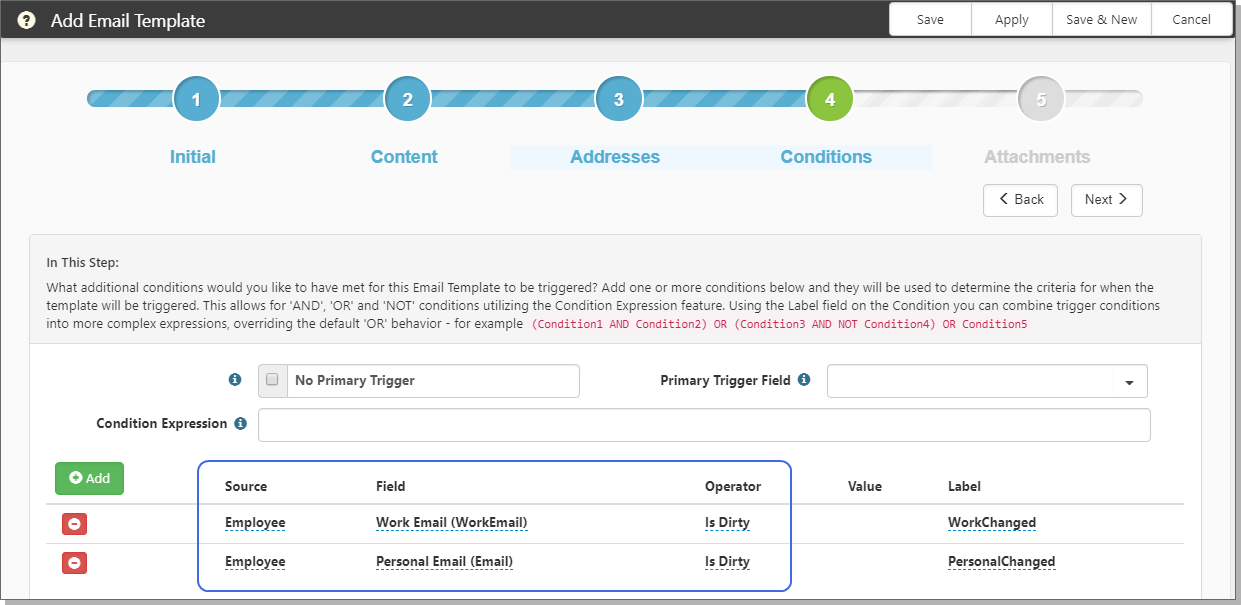
| 7. | Click Next and complete Step 4 Conditions. |
When configuring the email template, Step 4 Conditions is where you specify a condition for checking if the employee Work and Personal email fields have changed. When these fields change (Value: Is Dirty), that condition triggers the notification to the affected employee.
| 8. | Click Add. |
A row opens for adding conditions to include Source, Field, Operator, Value, and Label. You can add multiple conditions.
| Source | Indicates the dataform or stored procedure that provides the triggering condition. Select Employee. The Employee dataform contains the employee's work and personal email addresses. | ||||||
|
Field |
This is where you specify the Work and Personal email addresses. Add two rows for:
|
||||||
|
Operator |
Select Is Dirty. This value detects when the email address has changed. |
||||||
|
Value |
Not applicable for email address changes. |
||||||
|
Label |
Not applicable for email address changes. |
| 9. | Click Next. |
| 10. | Skip Step 5 Attachments. |
| 11. | Click Finish to save your work. |
After you click Finish, you see the Email Template list. This email template does not work just yet because it is unpublished (inactive). You must publish it to make it active.
If you are ready to publish immediately:
| 1. | Select the row for the new email template. |
| 2. | Click Publish. |
The email template is published.
If you want to publish later:
| 1. | Navigate to the Email Template list again. |
| 2. | Clear the Published option. |
The email template is unpublished.