Step 2: Action step
The Action step determines how the dataform is created, including where to create it, how to reply to it, what dataform will be created, and what to do if we cannot find an email match.
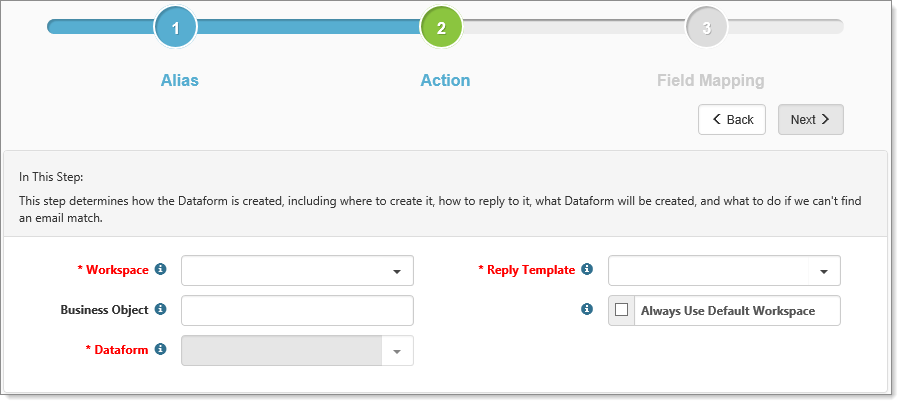
| 1. | Complete the form fields: |
|
Workspace |
Required. Contains the workspace that will be used by this email alias for the dataform creation if no matches for the sender's address are found. This is the default workspace used during the processing of the email. This value may be overridden by including the workspace in the body of the email. The override value must contain a valid workspace ID and be formatted as WSID=# with no spaces between the WSID= and the workspace ID.
|
||||||
|
Reply Template |
Required. This field indicates the reply template that the system uses to send the process complete notification reply. If no email reply is necessary, select No Reply.The system does not reply to the sender after completing the actions for the email integration If an email reply is necessary, select a reply template from the list. This can be an existing triggered template, or you can create one just for this reply. See Configuring the Email Integration Reply Template.
|
||||||
|
Business Object |
This is the ClientSpace business object that stores any code to be run during the email integration process. This should either be left blank or filled in with the appropriate business object.
Important: If you are configuring this for Case Discussion Replies, the requirements are quite different. See Step 2: Configure the Email Integration Mailbox.
The business object looks up the workspace using a CLID (ClientNumber) or WSID (ProjectID) to modify the data before the dataform is created or to modify the data before the reply template is generated and sent. In this way, you can add layer-specific data values to the form or layer-specific replace code values to the reply email.
Pipeline Business Logic
These options are powerful because the Workspace selection is not dependent on the email being sent from a specific email address. This allows your clients to send from personal email at home or on a mobile device, but they must always include the CLID or WSID in the exact format: These strings cannot contain additional spaces and must use the appropriate Client Number or ProjectID. If you have questions about this, please log an Extranet case. Note: Clients should insert the CLID or WSID in the body of the email message. If Always Use Default Workspace is not selected and the business object is configured, the system checks the body of the email for the CSID / WSID information. If no match is found, the system uses the Email Integration Processing hierarchy to determine which workspace is used when creating the new dataform. Configuring the business pipeline The default PEO business object resides in the DLL Custom Path folder and its complete name is ClientSpace.PEO.Business.EmailIntegrationBase. This name is case-sensitive and must match precisely in the configuration. If no business object is specified and the message contains a CLID tag, an exception occurs. |
||||||
|
Always Use Default Workspace |
When selected, this option forces the system to use the default workspace set in the Workspace field, regardless of the other methods of workspace selection. |
||||||
|
Dataform |
Required. Contains the project type associated with this email alias. This determines what type of dataform to create. Select the Project Type from the list.
|
| 2. | Click Next. |
The Field Mapping step opens. Go to the next topic, Step 3: Field Mapping.