Attachments
You can attach files to Organization records, the Client Master, Visits, Cases, Tasks, and Comp Claims – most anywhere you see the Attachments Action Center panel associated with any dataform or Org/Contact record. You can attach and link to files (such as Google docs and spreadsheets) or a website. Attaching files is easy; drag files to the Attachments bar or use the upload procedure.
To attach a file using drag:
- Open the file explorer on your computer and locate the targeted file.
- In ClientSpace, open the targeted dataform.
- From your file explorer, select and drag the files to the dataform Attachments bar. There is no need to expand the pane. You can select multiple files and drag them to the Attachments bar. You cannot upload additional files while a file upload is in progress.
The file is attached, with the counter incremented. If you try to upload an unsupported file extension, you receive an error message "You may not upload files with an extension of .xxx." To add accepted file types, see the topic, Adding accepted file types for file attachments.
To attach a file using Upload File:
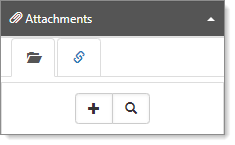
- From the Action Center, expand Attachments.
- Click
 (Attach a file).
Upload File becomes available.
 - Click
 (Upload File).
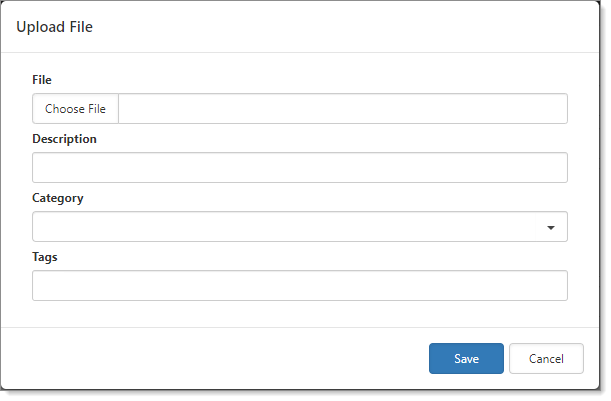
The Upload File dialog box opens. - Click Choose File.
File Explorer opens. - Locate the file and click Open.
The file name appears in File. - Click Save.
The uploaded file is now attached.
To link to a file or website:
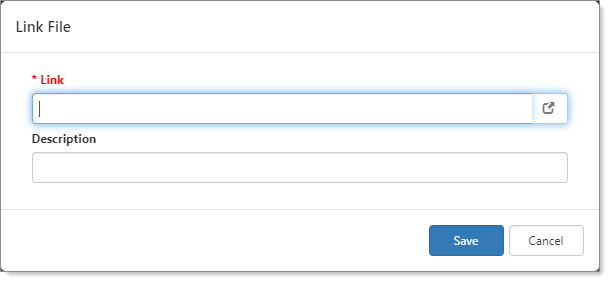
- From the Action Center, click Attachments.
- Click
 (Link) and then (Add a URL Link).
The Link File dialog box opens. - In Link, paste a link and then provide a Description.
- Click Save.
The linked document or URL is now available.
To delete attachments and links:
- In the Action Center, expand Attachments.
- Click (Files) or (Link).
- Locate the item, and click
 (Remove).
To download all attachments:
- In the Action Center, expand Attachments.
- Click (Files).
- Click
 (Download All Attachments).
The attachments are added to a zip file named {FormName}_ID_Attachments.zip and saved in your Windows Downloads folder.
To view all attachments:
- In the Action Center, expand Attachments and click View Full Search.
The Uploaded Files dashboard opens.
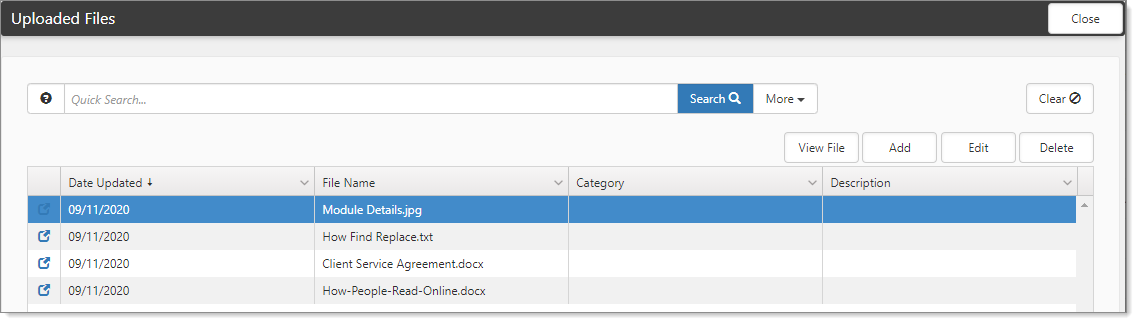
- From here you can View File, Add, Edit, Delete and Download selected attachments.
To download a single attachment:
- In the Action Center, expand Attachments and click View Full Search.
The Uploaded Files dashboard opens.
- Click the line item of the attachment file you want to download in the grid. (Alternatively, to select all files, click the Select column header.)
- Click Download.
The file is saved in your Windows Downloads folder.
To download multiple selected attachments:
- In the Action Center, expand Attachments and click View Full Search.
The Uploaded Files dashboard opens.
- Click the Select checkbox in the grid next to the attachment files you want to download. (Alternatively, to select all files, click the Select column header.)
- Click Mass Actions > Download.
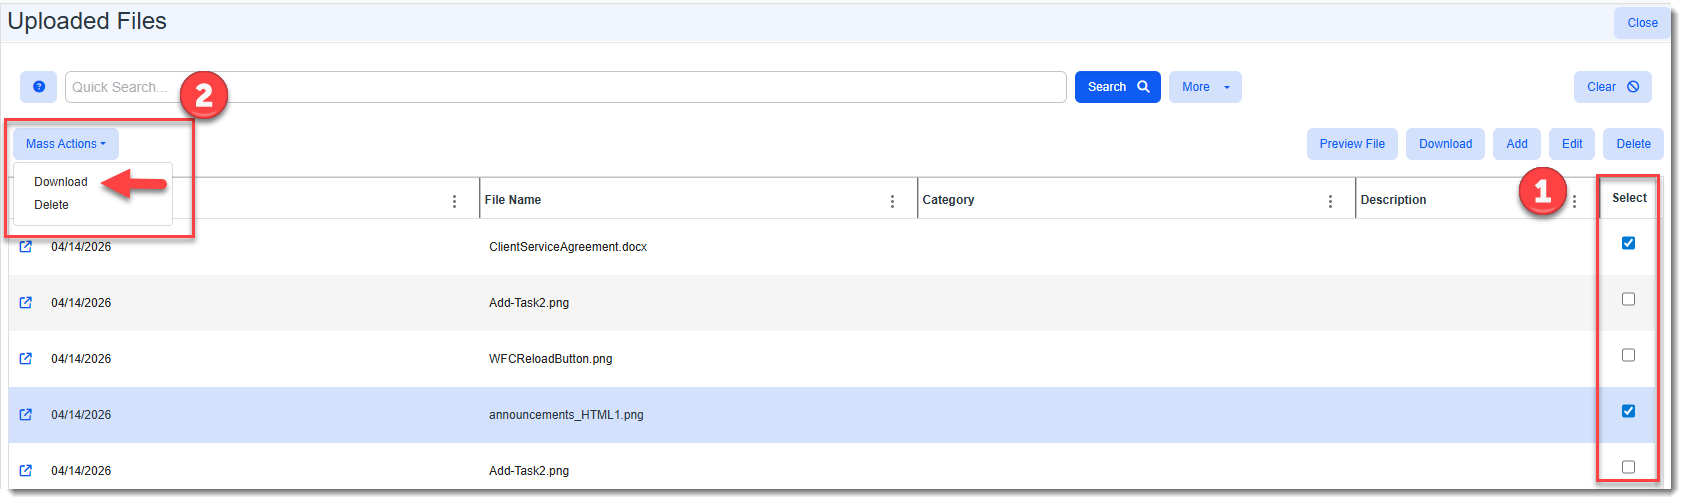
- The attachments are added to a zip file named {FormName}_ID_Attachments.zip and saved in your Windows Downloads folder.
For details on managing file versions, see the next topic Managing Attachments.