Salesforce API Implementation in Salesforce (Implementation Phase 2)
In this topic we cover the details of the major steps required for the Salesforce Setup phase of the Salesforce API implementation. In this phase, we work closely with your company's designated Salesforce expert, asking them to perform the steps outlined here and assisting as needed.
Step 1: Request Access to a Sandbox Environment
If you prefer to test the implementation in a sandbox environment instead of in Production, create a case with SalesForce.com to request access to a sandbox environment. We can use this environment for testing before we finalize the production environment settings or we can test directly in the production environment using a test account, opportunity, and contract.
Step 2: Create the Work Queue Object
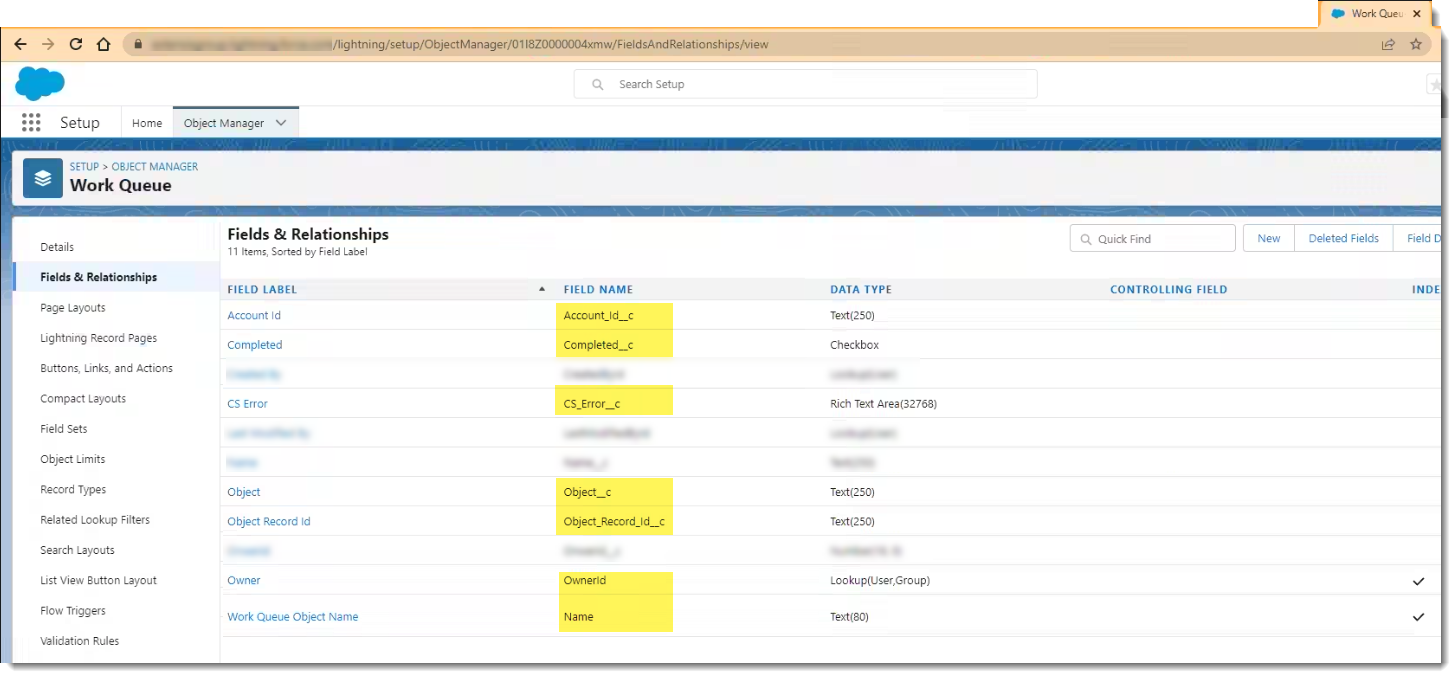
The Work Queue object is monitored by ClientSpace for new updates. Create a new object named Work Queue with the following fields.
Note: "_c" at the end of the field name indicates that it is a custom field.
| Field Name |
Notes |
|---|---|
| Account_ID_c | This is the 18 character ID of associated Account. Every Work Queue record must have an Account. |
| Object_c | This is the name of the Object for the record specified by the Object Record ID field. Account, Opportunity or Contact. |
| Object_Record_ID_c | This is the 18 character ID of the associated Object. |
| CS_Error_c | Leave empty. |
| Completed__c | Default to False (unchecked) upon record creation. ClientSpace will handle setting this field once the Work Queue record is processed. |
| OwnerId | The Salesforce Owner Id for this Object. Not used but must be available. Leave empty. |
|
Name |
Name of the company (if this is a Lead Object). This is a text field. Not used but must be available. Leave empty. |
Refer to the image below to review an example Work Queue with the fields added.
Note: Only add the highlighted fields. Do not add any other fields unless instructed to by the ClientSpace team member assisting you with the implementation.
Step 3: Create the Work Queue Object Flow
Create a flow to generate a Work Queue object when Opportunity , Account, or Contact reaches a certain stage.
Note: The Salesforce stage that triggers the Flow is determined during the first implementation phase (Phase 1: Initial Prep). See the Defining the Four Implementation Phases section in the Salesforce API: Extended Overview for details.
Step 4: Create a Salesforce User
When you set up the Salesforce User:
-
Set it up so that the password never expires. If you do not do this, the API user could be locked out.
-
Set the user as a ClientSpace team member at first. Then, after testing is complete, move the user to a client's member account.
-
Verify that the Salesforce User has access to every field being imported into Salesforce.
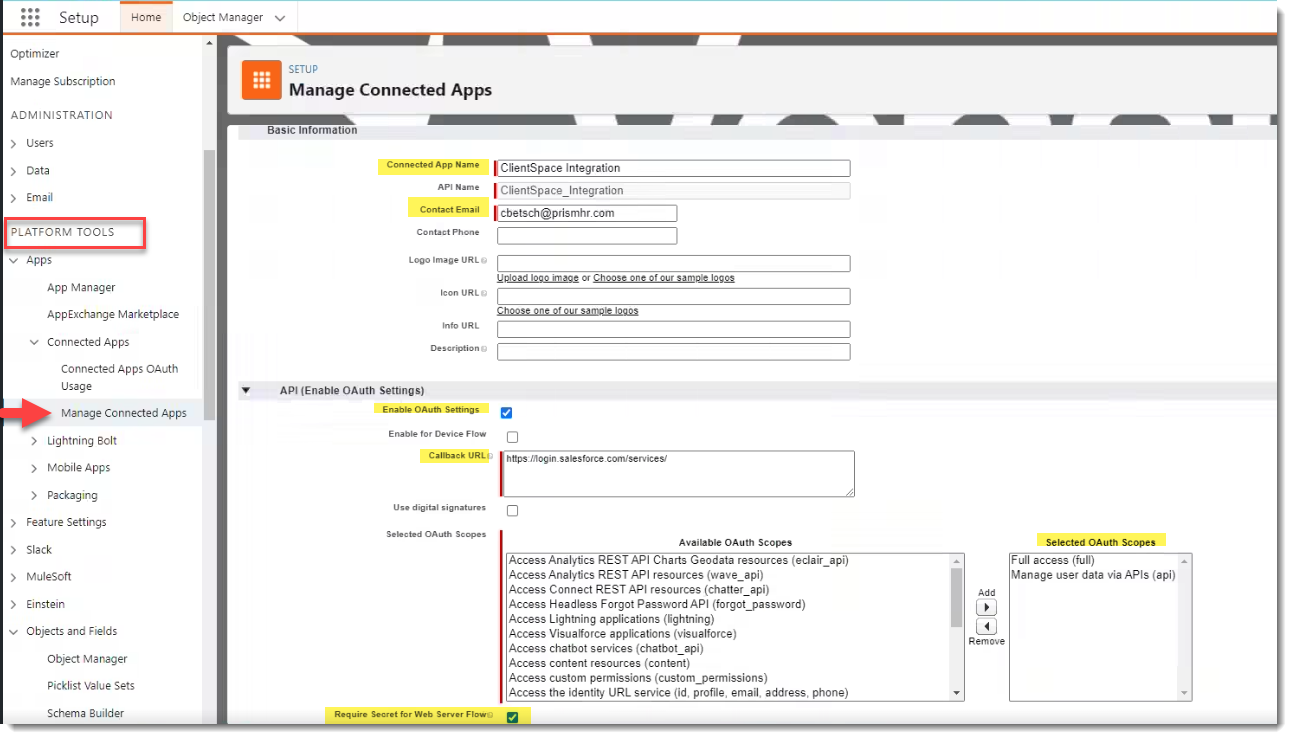
Step 5: Set Up the ClientSpace Integration Connected App/Obtain the Consumer Key and Consumer Key Tokens
Add a Connected App named ClientSpace Integration, and complete the following fields:
|
Field Name |
Value |
|---|---|
| Connected App Name | ClientSpace Integration |
| Contact Email | Enter the contact email address provided to you by the ClientSpace team member assisting you with configuration. |
| Enable OAuth Settings | Checked |
| Callback URL | https://login.salesforce.com/services/ |
| Selected Oauth Scopes |
Full access (full) Manage user data via APIs (api) |
| Require Secret for Web Server Flow | Checked |
|
Require Secret for Refresh Token Flow |
Checked |
A completed ClientSpace Integration Connected App setup appears similar to the following:
Also remember to obtain the Consumer Key and Consumer Secret tokens for the App from Manage Connected Apps. Provide this information to the ClientSpace team member who is assisting you with the implementation. This information is added to the Salesforce API Configuration Parameters in implementation Phase 3 (ClientSpace Setup). See Additional Salesforce Parameters.
If you need to come back to the Connected App configuration later to obtain the tokens, see Finding the Consumer Key and Consumer Secret for steps.
Step 6: Verify Email Addresses
Ensure the Salesforce Sales Team members' emails are the same in ClientSpace and Salesforce.
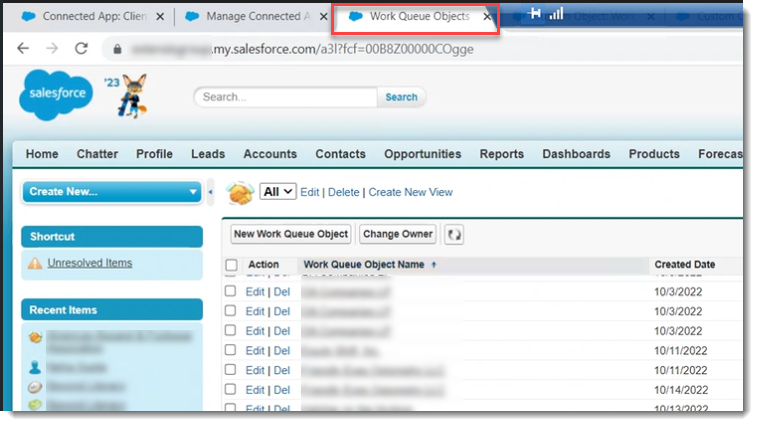
Step 7: Clean Up Work Queue Records
On the Work Queue Objects tab, delete the Work Queue records.
Step 8: Create Test Opportunity and Account
Create a test Opportunity and Account called “zz Prismhr”.
Step 9: Provide the "Fields to Map" List
If you have not done so already, provide the list of fields you want to map from Salesforce to ClientSpace to the ClientSpace team member assisting you with the implementation. This should include any basic fields listed in the Salesforce API: Extended Overview topic as well as any custom fields you want to include.
We recommend listing your fields in a new Excel Workbook and adding a tab for each Salesforce Object that you would like to map to ClientSpace with columns on each tab for Field Name, Code Name, and Field Type.
See Best Practices and Tips: Creating the Salesforce List of Fields to Map.
Step 10: Identify Sales Flows Requiring Adjustment or Removal
A helpful tip for organizing flows is to create a list of flows![]() In Salesforce, a Flow allows you to build a business automation, such as sending an email, inserting, updating, or deleting data, and much more. The automation is configured to trigger based on an event. In ClientSpace, we call this a Workflow. and append an asterisk (*) after the item name to indicate a new flow. Similarly append a pound sign (#) after the item name of old flows requiring removal.
In Salesforce, a Flow allows you to build a business automation, such as sending an email, inserting, updating, or deleting data, and much more. The automation is configured to trigger based on an event. In ClientSpace, we call this a Workflow. and append an asterisk (*) after the item name to indicate a new flow. Similarly append a pound sign (#) after the item name of old flows requiring removal.
If any flows require the addition of fields, you must create additional objects for them and give the correct permissions to the ClientSpace User in Salesforce. These new fields must also be provided to the ClientSpace team member assisting with your implementation for mapping.
ALERT: Use caution when adding new objects for new fields and providing a list of fields to map as adding an incorrect field to the mapping will stop the Salesforce API from working.