Document Previewer
The Document Previewer module allows you to view file attachments across the system without needing to download the document. If you choose to download the document while previewing it, you can.
The Document Previewer can be accessed from four locations:
-
Any file attachment field
-
The Action Center Attachments panel
-
Any Upload File window
-
The Document Search module
| File Extension | File Type | Supported by HTML5? |
|---|---|---|
| avi | Audio Video Interleave | Yes |
| bmp | Bitmap | Yes |
| css | Cascading Style Sheet | Converted to Text |
| csv | Comma Separated Values | Converted to Image |
| doc | Microsoft Document | Converted to Image |
| docm | Microsoft Document Macro Enabled | Converted to Image |
| docx | Microsoft Document 2007 | Converted to Image |
| dot | Microsoft Document Template | Converted to Image |
| dotx | Microsoft Document Template 2007 | Converted to Image |
| gif | Graphics Interface Format | Yes |
| htm | HyperText Markup | Converted to Text |
| html | HyperText Markup Language | Converted to Text |
| jpeg | Joint Photographic Experts Group | Yes |
| jpg | Joint Photographic Experts Group | Yes |
| js | Javascript | Converted to Text |
| log | Log File | Converted to Text |
| m4a | Audio MP4 | Yes |
| mp3 | Audio | Yes |
| mp4 | Video | Yes |
| Portable Document Format | Converted to Image | |
| png | Portable Network Graphics | Yes |
| ppt | Microsoft PowerPoint Presentation | Converted to Image |
| pptx | Microsoft PowerPoint Open XML Presentation | Converted to Image |
| pps | Microsoft PowerPoint Slide Show (Legacy) | Converted to Image |
| ppsx | Microsoft PowerPoint Open XML Slide Show (2007+) | Converted to Image |
| pptm | Microsoft PowerPoint Macro-Enabled Presentation | Converted to Image |
| ppsm | Microsoft PowerPoint Macro-Enabled Slide Show (2007+) | Converted to Image |
| potx . | Microsoft PowerPoint Template (Open XML, 2007+) | Converted to Image |
| potm | Microsoft PowerPoint Macro-Enabled Template File | Converted to Image |
| rtf | Rich Text Format | Converted to Image |
| txt | Text File | Yes |
| wav | Waveform Audio File | Yes |
| xls | Excel | Converted to Image |
| xlsb | Excel Binary | Converted to Image |
| xlsm | Excel Macro-Enabled | Converted to Image |
| xlsx | Excel 2007 | Converted to Image |
| xml | Extensible Markup Language | Converted to Text |
| xsl | Extensible Stylesheet Language | Converted to Text |
| xslt | Extensible Stylesheet Language Transformations | Converted to Text |
| zip | Compressed Archive | Converted to Text |
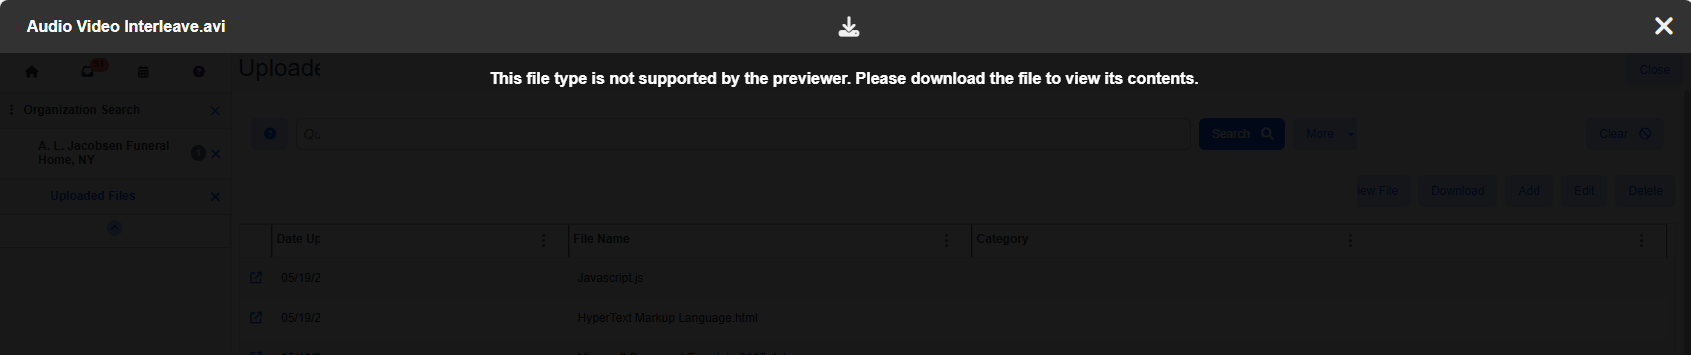
Note: If you attempt to preview an unsupported file, the following message displays:
"This file type is not supported by the previewer. Please download the file to view its contents."
However, you can still click the Download ![]() button to download a copy of the file and open it outside of ClientSpace.
button to download a copy of the file and open it outside of ClientSpace.
Accessing the Document Previewer
File Attachment Field
To access Document Previewer from a file attachment field:
On any file attachment field, click the file name.

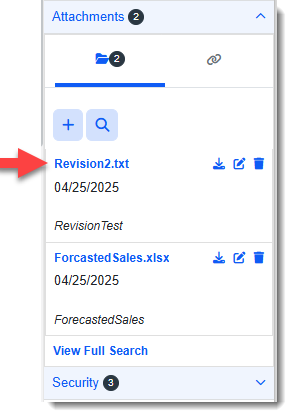
Action Center Attachments Panel
To access Document Previewer from an Action Center Attachments Panel:
-
On any dataform or CRM form with an attachments panel, in the Action Center, click the down chevron symbol
 to expand the Attachments panel.
 -
Then, click the link of the file you want to preview.
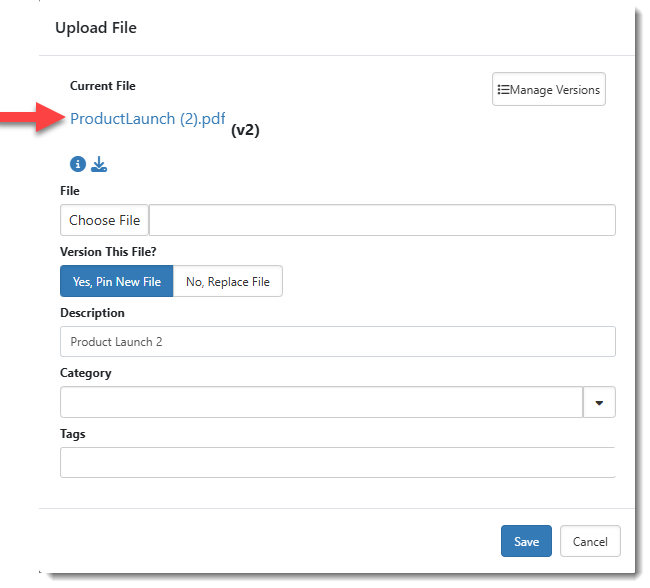
Upload File Window
To access Document Previewer from an Upload File window:
-
On any file attachment field, click the Upload File
 icon.
icon.
OR
On the Action Center Attachments panel, click the Edit Attachment
 icon.
icon.
The Upload File window displays.
-
What do you want to do?
-
To preview the most recently uploaded version of the file: Click the link under Current File.
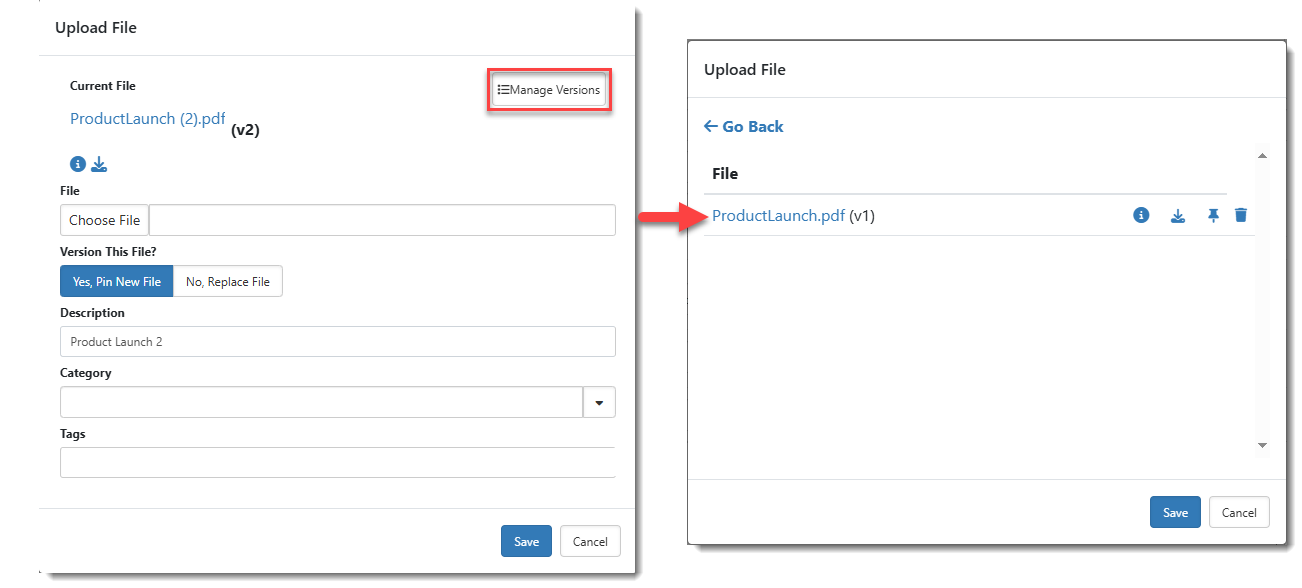
-
To preview an older version of the file: Click Manage Versions and then when the screen refreshes to display a list of older revisions, click the link of the revision you want to preview.
-
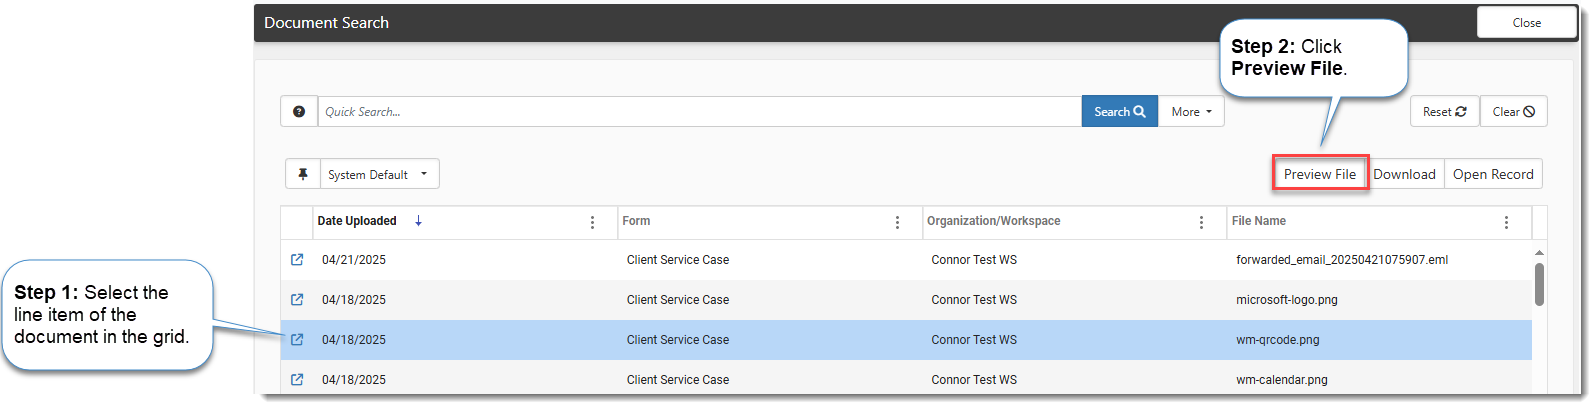
The Document Search Module
To access the Document Previewer from the Document Search module:
-
From the modules bar, select Document Search.
The Document Search dashboard opens.
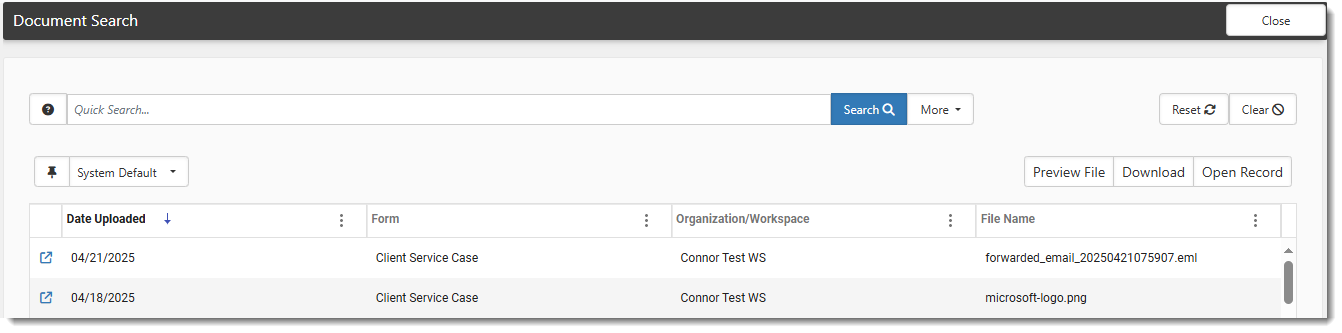
Note: You may need to use More Search to filter the list. For more details on using the Document Search module, see theDocument Search topic.Document Search
-
With the topic you want to preview selected in the grid, click Preview File.
Using the Document PreviewerDocument Search
Once the Document Previewer displays, you can easily navigate the window to view a document (such as a Word or PDF file) and optionally, download the document. For other supported file types, where you cannot view actual pages, you can preview an image of the file contents as pages or (as in the case of video or audio files) you can play the file in entirety and optionally download the file.
Document Previewer Toolbar
A toolbar displays at the top of the Document Previewer. Options vary based on document or file type. For documents such as a video or other media file, the toolbar displays the Document Name, Download option and Close:

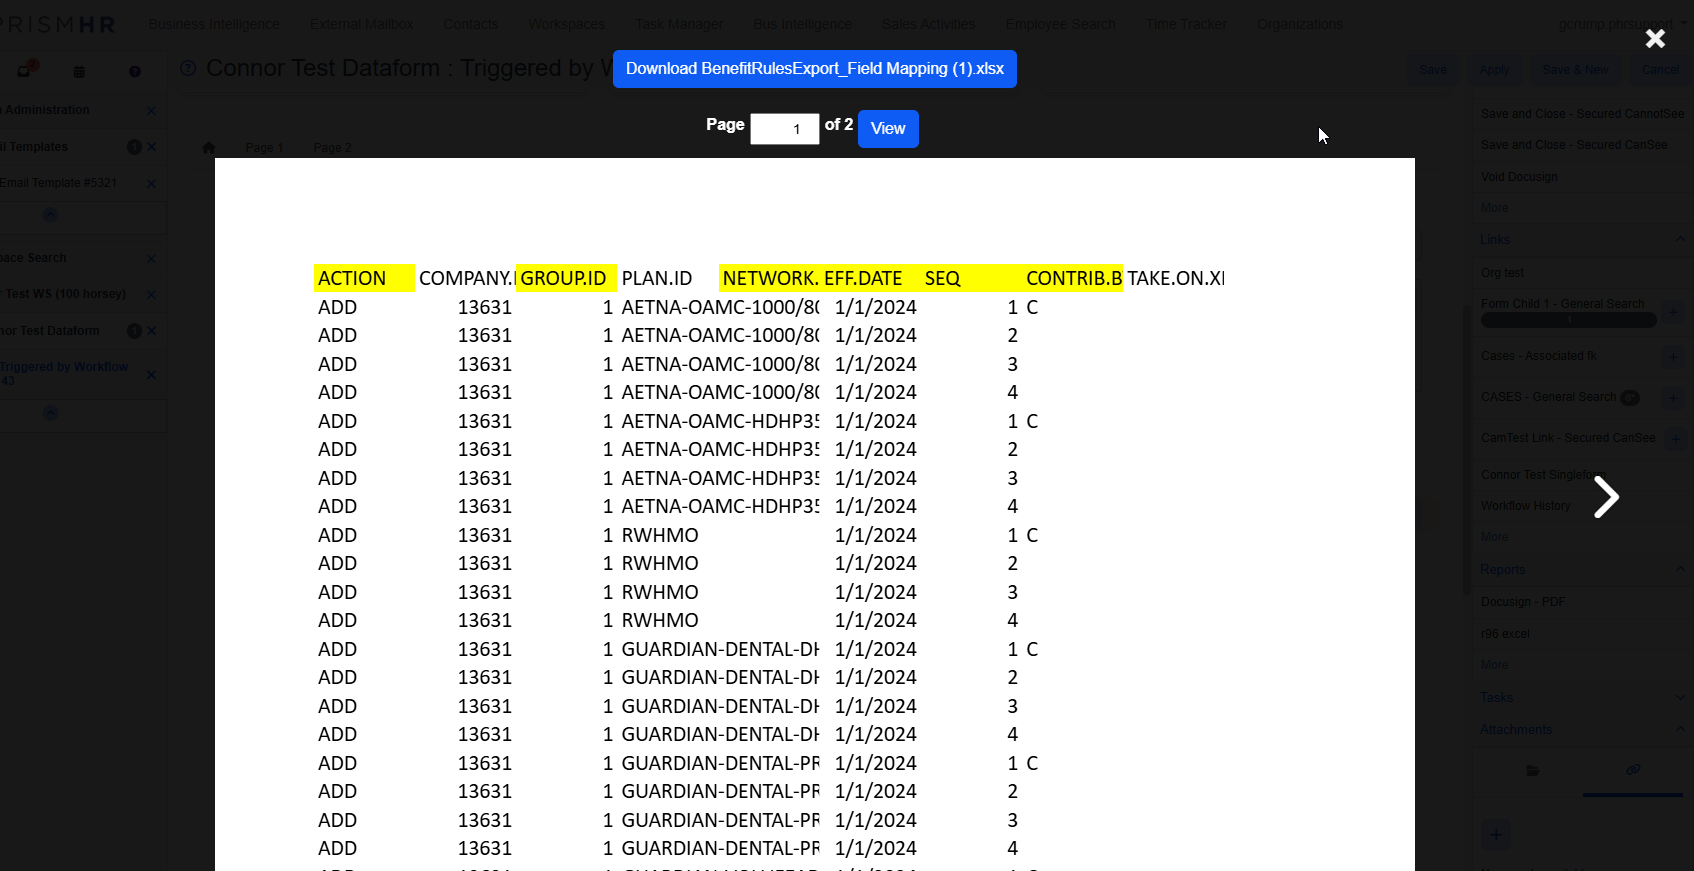
For a paged document such a Word, PowerPoint, or Excel file that allows page navigation and zooming, the toolbar displays the Document Name, Page Selector, Zoom tools, Download option and Close:

Zoom Tool Functionality Overview:
-
You can zoom in or out by using the magnifier tools: Zoom In
 to increase the zoom level, Zoom Out
  to decrease the zoom level.
 -
You can also manually type a zoom value into the data entry field located next to the magnifier tools and press Enter to increase or decrease the zoom level. For paged documents or image-based previews, such as Word, Excel, or PDF files, the value is entered as a percentage: Minimum zoom = 25%, Maximum zoom = 300%. For text-based previews, such as text or XML files, the zoom value must be entered as a font point-size value: Minimum point size = 8pt, Maximum point size= 48pt. You will be able to easily denote which value you should enter as either a "%" symbol or "pt" will be shown next to the data entry area:

-
If you are using the magnifier tools, the displayed percentage or point-size value adjusts automatically as you click Zoom In
to increase the zoom level or Zoom Out to decrease the zoom level. -
For paged documents or image-based previews, with each click, Zoom In
enlarges by 25%, Zoom Out reduces by 25%. For text-based previews, with each click, Zoom In enlarges by 2 points, Zoom Out reduces by 2 points. -
For paged documents or image-based previews, intelligent zoom (also referred to as contextual zoom or focus zoom) maintains your relative position as you zoom in or out instead of zooming from a fixed center point. For instance, if you scroll to the center of the page and zoom in or out, the focus remains approximately at the center of the page you are viewing.
-
For paged documents or image-based previews, if you zoom in to a level where the entire page no longer fits on the screen, hold down left mouse button so that the grab hand becomes a "closed fist" (i.e., a "pan and drag" tool) that you can use to move an area of the document into view without changing the zoom level:

-
If you want to return to the default zoom setting of 100% for paged documents or image-based previews or 12 pt for text-based previews, click
 Reset Zoom .
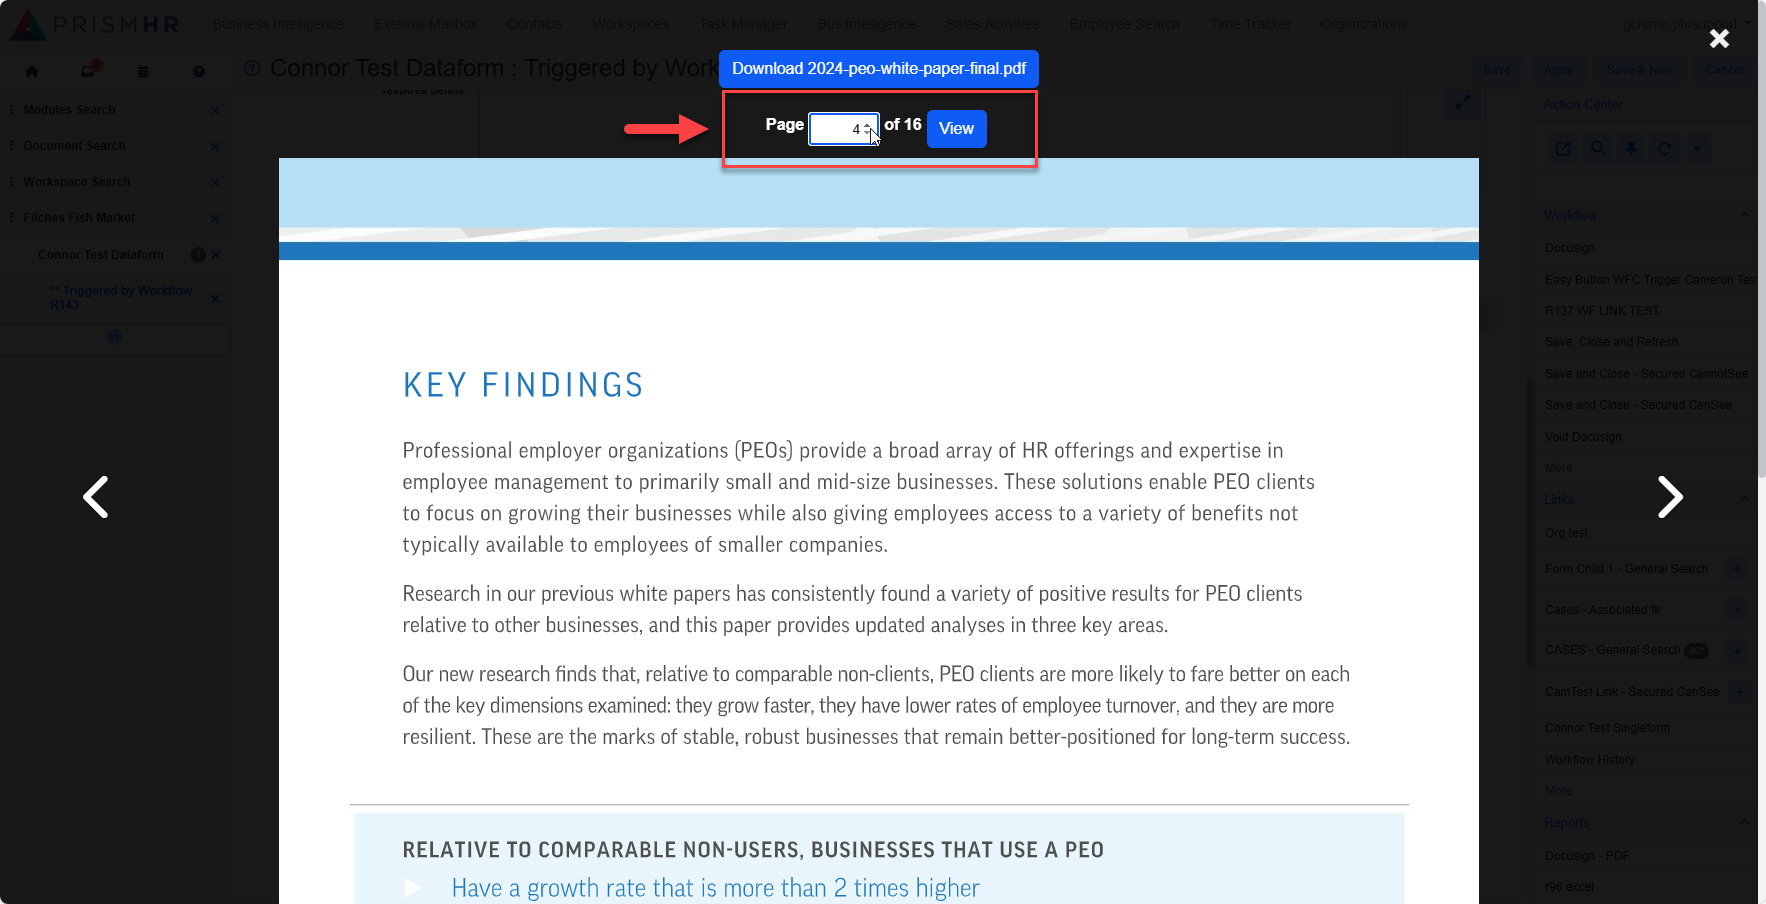
Page Selector Functionality Overview
-
The page selector function allows you to either click through the pages using the left and right arrows or you can enter a page number to go to the page.
Document Previewer Hotkeys and Shortcuts
For all preview types:
|
To do this... |
Use this shortcut... |
|---|---|
|
Close the Document Previewer. |
Press Esc on the keyboard. |
|
Close the Document Previewer. |
Click anywhere outside of the content area. |
When viewing a "zoomable" preview image or paged document:
|
To do this... |
Use this shortcut... |
|---|---|
|
Zoom in. |
Press the Equals symbol (=) on the keyboard or press the Plus symbol (+) on the numpad. |
|
Zoom out. |
Press Minus symbol (-) on the keyboard or the Minus symbol (-) on the numpad. |
|
Scroll the preview vertically up and down. |
Use the mouse scroll wheel. |
|
Pan or scroll the preview left, right, up, and down. |
Click and drag the preview. (Best used when the preview is zoomed in to a degree that the content no longer fits on your screen. This allows you to move an area of the document into view without changing the zoom level.) |
When viewing a paged document:
|
To do this... |
Use this shortcut... |
|---|---|
|
Go to the previous page. |
Press the Left Arrow (←) on the keyboard. |
|
Go to the next page. |
Press the Right Arrow (→) on the keyboard. |
When the text cursor is inside the "page number" or "zoom level" data entry fields of the toolbar:
|
To do this... |
Use this shortcut... |
|---|---|
|
Increment the value by 1 (when less than Max). |
Press the Up Arrow (↑) on the keyboard. |
|
Decrement the value by 1 (when greater than Min). |
Press the Down Arrow (↓) on the keyboard. |
|
Move the cursor left in the field. |
Press the Left Arrow (←) on the keyboard. |
|
Move the cursor right in the field. |
Press the Right Arrow (→) on the keyboard. |
|
Select the whole contents of the field. |
Select Ctrl + A on the keyboard. |
|
Submit or apply a page number or zoom level entry. |
Press Enter on the keyboard. (Entries are not applied until you press Enter.) |
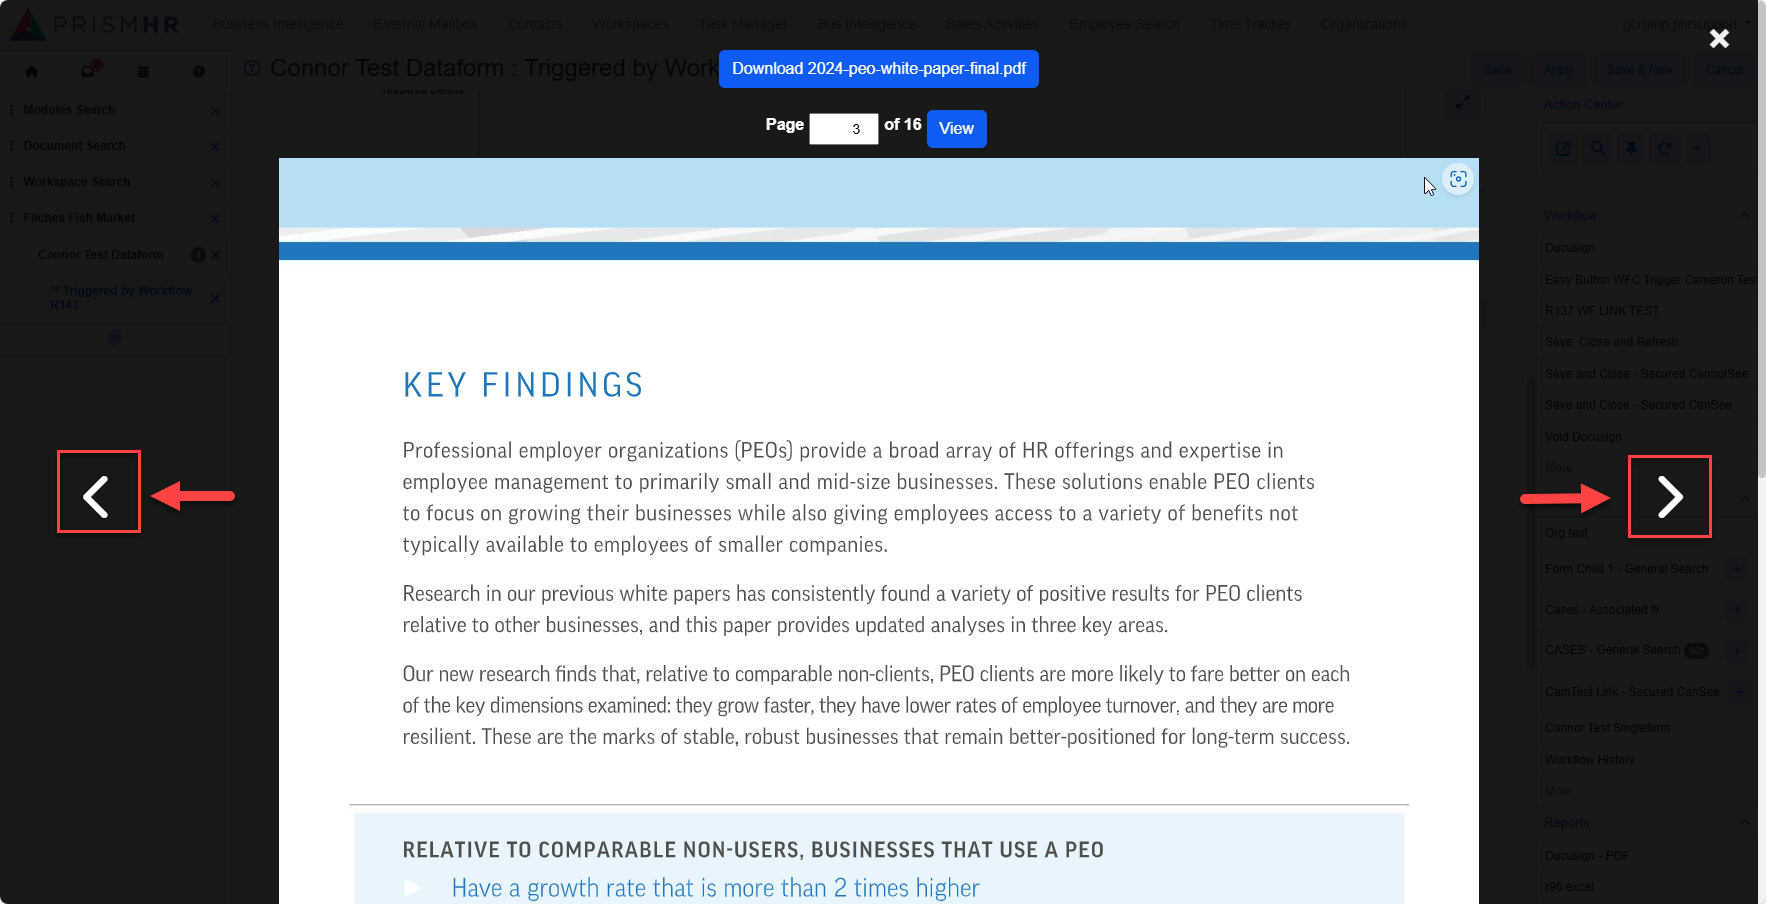
Navigating Paged Documents
There are two methods for navigating paged documents:
Method 1 - Arrows: Use the left and right arrows located in the toolbar and on either side or the preview pages to navigate from page to page.
Note: If a paged document only has one page, the page selector still displays as 1 / 1. However, the left and right arrows for scrolling through pages are disabled on both the toolbar and on either side of the page.
Method 2 - Page Selector: Type a page number and press Enter to jump to the selected page.
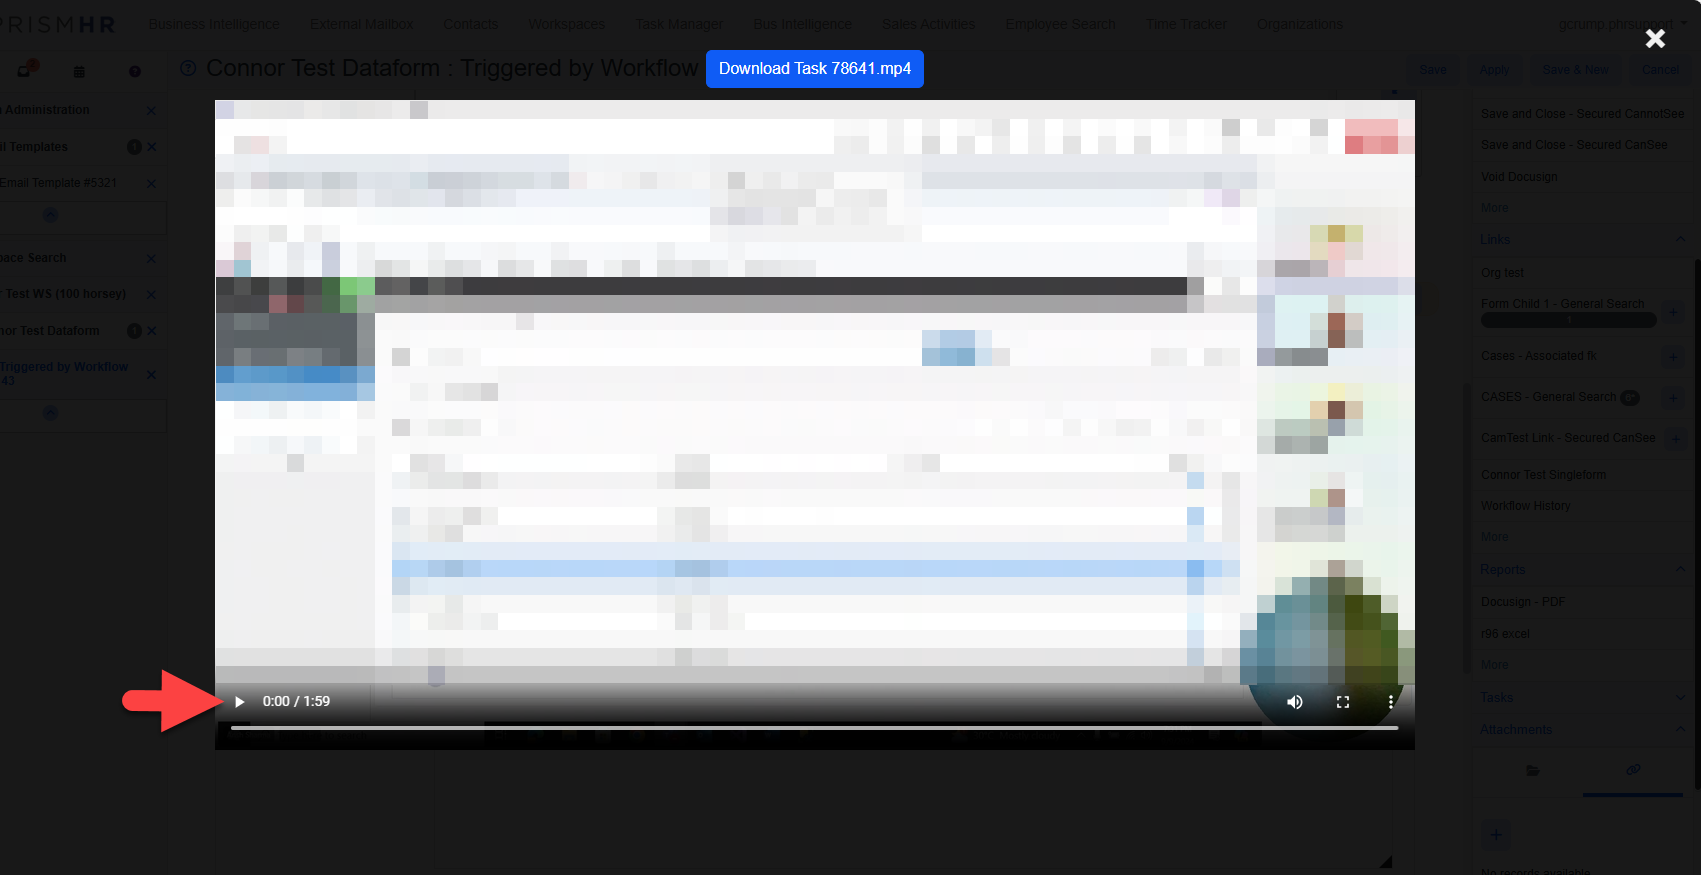
Previewing Video and Audio Files
The Document Previewer allows you to play video or audio files in entirety as you would with any other player application. Just click the Play button. As with other file types, you also have the option to download the file.
Previewing Zip File Contents
When you preview a Zip file, the Document Previewer displays a list of files contained within it. If sub-folders are present, each sub-folder and the records within are listed. You must download the file to unpack the contents and view each file in entirety.

Converted Versus Unsupported File Types
To view a file in its original format within the Document Previewer, it must be supported by HTML5. If it is not supported by HTML5 but is still a supported file type in the previewer, it will either be converted to text or into an image per page. Excel workbooks, Word documents, and PDF files are examples of file types where each page is converted to an image. In the example below, the Document Previewer has converted the pages of an Excel workbook into images and displays the pages of the workbook. During the conversion process, all columns on the page may not be captured. Therefore, a message displays at the top of the page: "Some data may not be shown in this preview. Please download the file to view its full contents."
Note: To learn which file types are supported by HTML5 and which file types are supported as converted file types, refer to the supported files list
If a file type is not supported at all, the following message displays at the top of the Document Previewer and the Download ![]() button flashes as an indication that you must download the file to view its contents.
button flashes as an indication that you must download the file to view its contents.
Downloading Files
At any time while previewing a file, you can click Download ![]() button on the static toolbar at the top of the Document Previewer to download a copy of the file to your PC. Retrieve the file from your Windows Downloads folder.
button on the static toolbar at the top of the Document Previewer to download a copy of the file to your PC. Retrieve the file from your Windows Downloads folder.
Exiting
There are multiple methods for closing a preview, including:
-
Pressing Esc on the keyboard
-
Using the Close
 button.
 -
Clicking in a blank area of the Document Previewer window (i.e., clicking in an area absent of preview content).
Once you close the preview, you are returned to the currently displayed form in ClientSpace.
Additional Notes
-
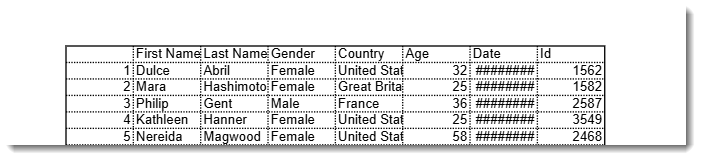
Cell division lines are added to .csv file previews. Although .csv files have no native formatting, cell division lines are added to enhance readability.
-
The following message displays at the top of the Document Previewer when the file is a spreadsheet or comma-separated values file (i.e., .xls, .xlsx, .csv) as all columns of a spreadsheet or .csv file (as formatted using cell division lines) may not fit within the preview:
"Some data may not be shown in this preview. Please download the file to view its full contents."