Configuring the API account information
The API Configuration contains the information to connect to the specific PrismHR installation for the client.
To configure the API:
- Go to System Admin
 > Advanced > API Configuration.
The API Configuration dashboard opens. - Click Add.
The New API Configuration form opens.
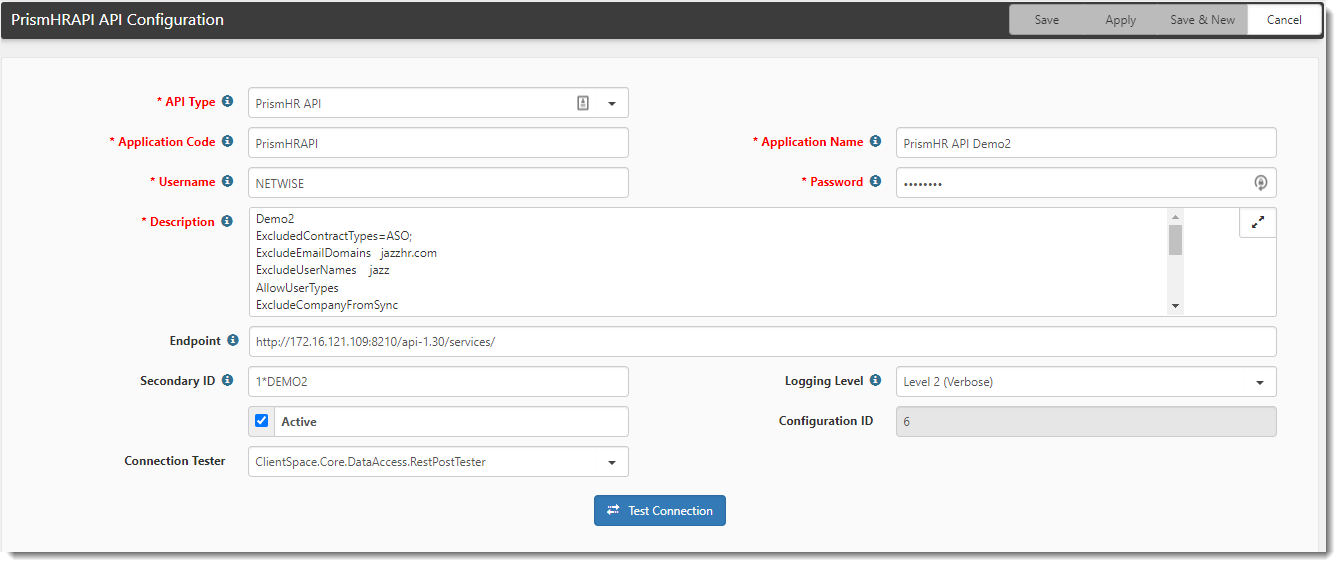
- Complete the form.
| API Type | Select PrismHR API. |
| Application Code | Select PrismHRAPI as the Primary PrismHR server. There can be multiple instances of this API configuration type for multiple PrismHR servers. Name them PrismHRAPIx. The scheduled process will iterate through every API Configuration where Application Code starts with PrismHRAPI%. |
| Application Name | Type a description. This name is displayed in the ClientSpace lists. Use PrismHR API. |
| UserName | This is the username registered with PrismHR. |
| Password | Provide the password associated with the account username. |
| Description | Provide a brief description of the API. |
|
Endpoint |
Type a formatted URL that points to PrismHR, such as |
|
Secondary ID |
An identifier used to enable the monitoring of all Prism Clients at an installation. |
|
Logging Level |
Select a logging level:
|
|
Active |
When this option is selected, the configuration is active (enabled). |
|
Connection Tester |
Select ClientSpace.Core.DataAccess.RestPostTester and Save or Apply to display the Test Connection button. |
|
Test Connection |
When the Connection Tester field is set to ClientSpace.Core.DataAccess.RestPostTester, clicking Test Connection connects to the API and either returns a "Connected Successfully" message or an "Unable to connect" message. The "Unable to connect" message lists missing parameters contributing to the failure to connect. |
- Click Save.