Using Generative AI to Create Case Discussion Responses
The Generative AI feature in the email composition area of Case Discussions allows you, as an internal ClientSpace user, to quickly generate the body text for a new message or reply.
Note:
-
Please contact your Professional Services team representative or log an extranet case if you are interested in this feature.
-
AI-generated responses are not moderated, reviewed, or endorsed by ClientSpace. Content may be inaccurate or incomplete and should be independently verified prior to use.
To configure the content of the email using the Generative AI tool:
-
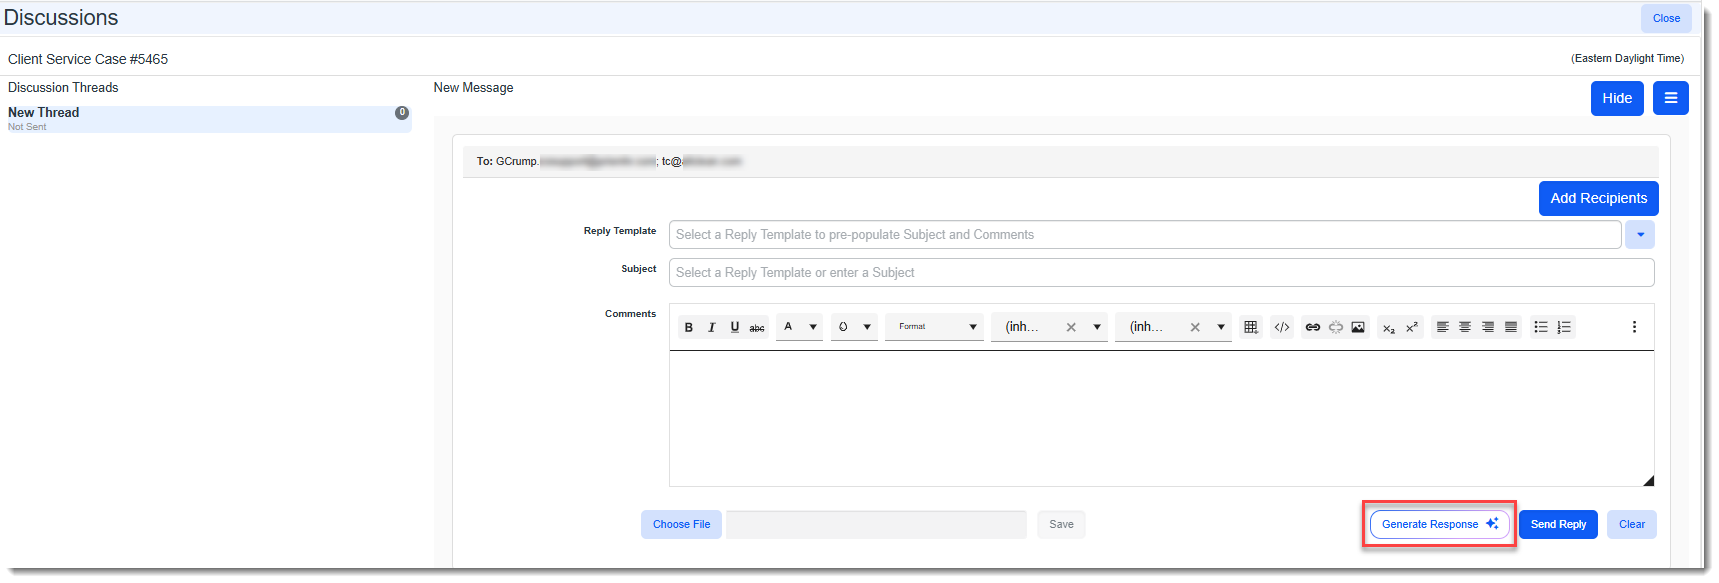
On a new discussion or existing Discussion thread, in the message composition area, click Generate Response.
Note: On a new discussion, the message composition area will be visible by default. On an existing discussion, click the Reply/Hide toggle button in the upper right corner of the screen to display the message composition area. Also, on a new discussion, the Subject field will be blank. Be certain to enter the Subject prior to sending, if necessary.
-
Click the Generate Response button.
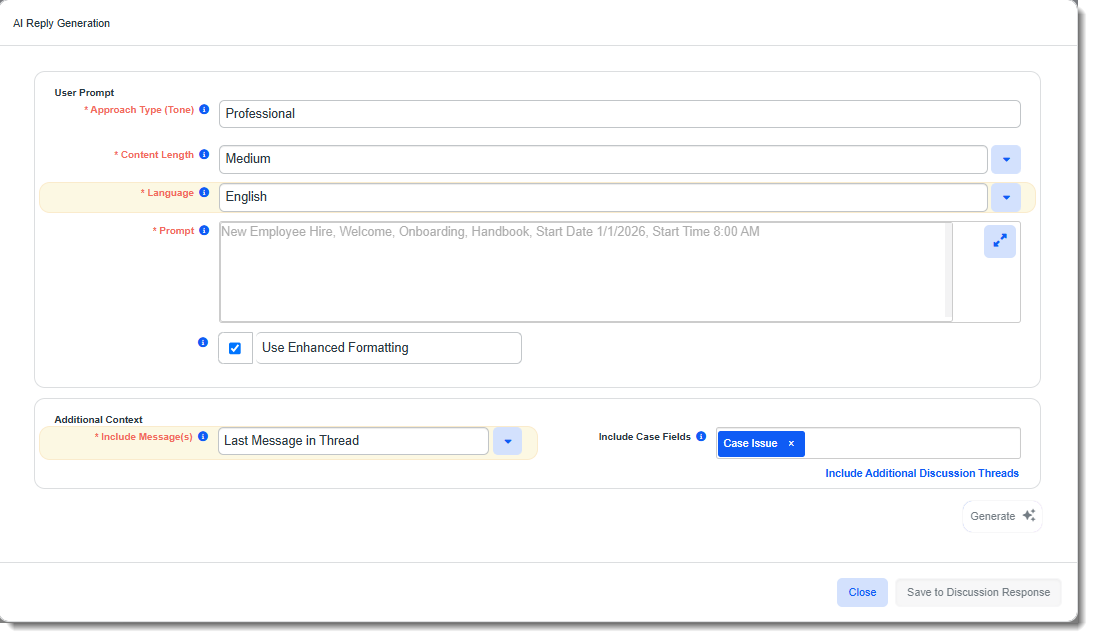
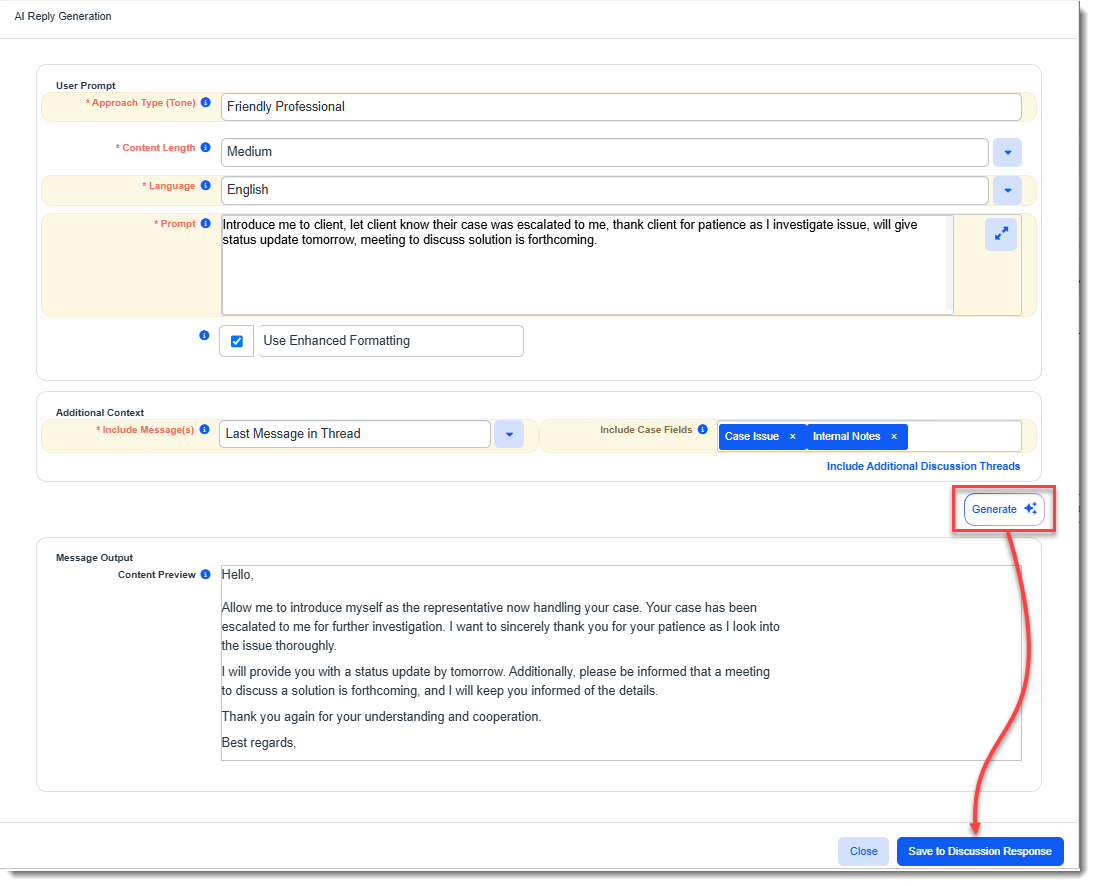
The AI Reply Generation window displays.
-
Complete the following fields:
Approach Type (Tone)
Required. This is a free text field that is used to set the tone of the email. The default setting is Professional, but you can try other options such as "Professional Friendly" for a professional but warm tone or "Feedback" to deliver a message optimized for conveying feedback. You might also try "Formal", "Casual", "Professional with Light Humor", etc.
Content Length
Required. The default setting is Medium but you can select a desired content length from the drop-down list. Valid options include:
-
Short - One to three sentences.
-
Medium - One to two paragraphs.
-
Long - Three or more paragraphs.
Language
Required. The Language of the generated output defaults to English. Valid options include:
-
English
-
Spanish
-
French
-
Portuguese
Prompt
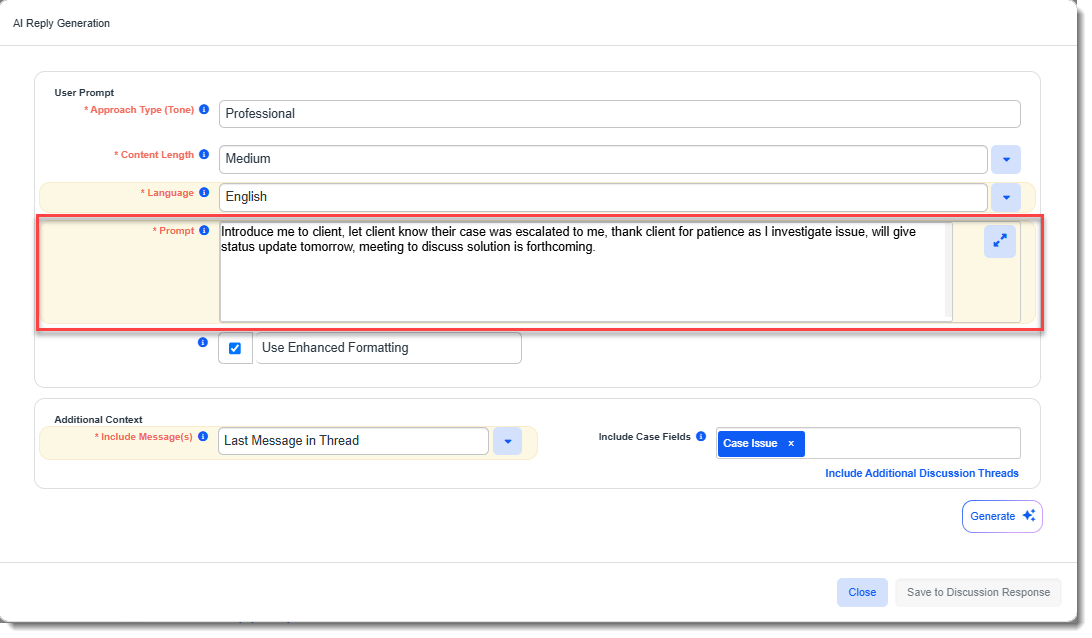
Required. Enter keywords or phrases (with a comma between each keyword or phrase) as prompts to define the output that will be generated. For example, to inform a client that their case has been escalated to you and that you are reviewing the details and will be in touch, you might prompt:
Introduce me to client, let client know their case was escalated to me, thank client for patience as I investigate issue, will give status update tomorrow, meeting to discuss solution is forthcoming.
Use Enhanced Formatting
Select Use Enhanced Formatting to allow the tool to enhance the appearance of your email body text with formatting such as Italics, bold, custom spacing and more.
Note: Once you save the content to the Comments field, you will be able to edit the formatting since the Comments field contents a rich text editor and supports font styling, embedded images, hyperlinks, lists, and tables.
Include Message(s)
Required. This is used to provide context to the Generative AI tool so that it can produce a response that considers any previous correspondence. The default setting is Last Message in Thread. Valid options include:
-
Last Message in Thread
-
All Messages in Thread
Include Case Fields
This multi-select, multi-lookup field allows you to select case fields as context to pass to the Generative AI tool so that it can reference the values in those fields when building a response. Case Issue is selected by default, but you can click in the field to select other fields from the lookup list to include.
Include Additional Discussion Threads
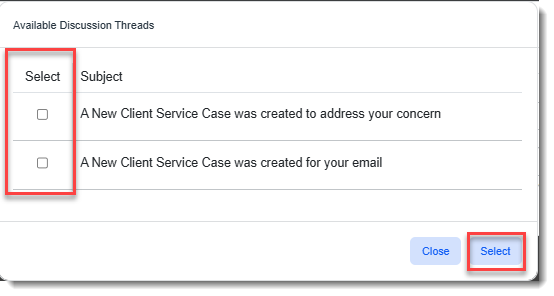
If additional discussion threads are available, you can click the link to select them as context the Generative AI tool can reference when building a response from the Available Discussion Threads popup window. Click the Select checkbox next to the threads you want include and then click the Select button to apply the settings.
-
-
Click Generate.
The generated output displays in the Message Output/Content Preview pane.
Note: You cannot edit the content here. Once you save the content to the message composition area, you can apply edits.
-
What do you want to do?
-
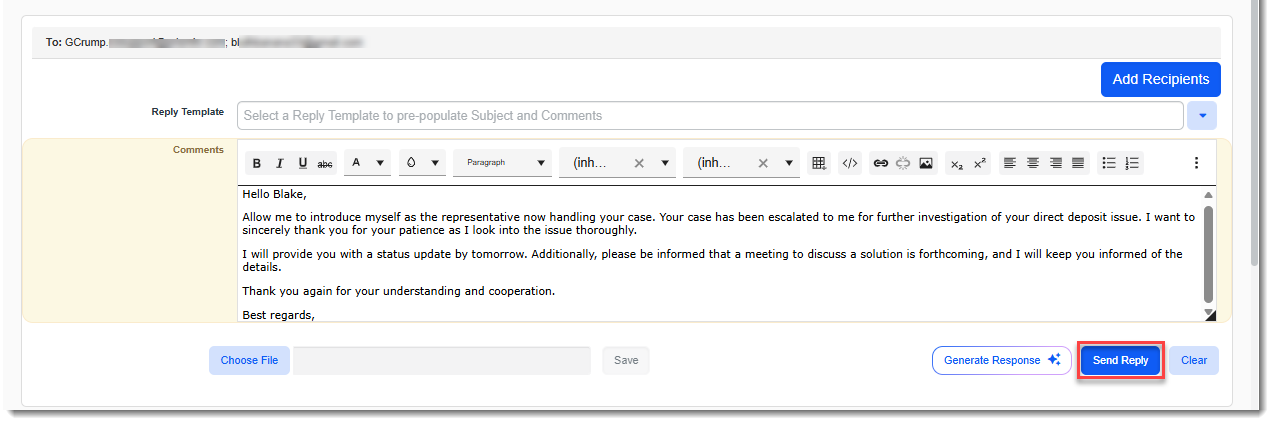
If you are satisfied with the generated output: Click Save to Discussion Response to add the content to the Comments field of the message composition area of the discussion thread.
Note: If there is already content in the field, a confirmation message will display asking you if you want to overwrite the existing content. Click Yes if you want to continue.
-
If you are not satisfied with the generated output: Click Generate again to view new output using the same details or edit details such as Approach Type (Tone), Content Length, Prompt or context fields (Include Message(s), Include Case Fields, Include Additional Discussion Threads) before clicking Generate.
-
-
Once you have successfully saved AI-generated content to the Comments field, review the content for accuracy, and make any necessary formatting changes or other changes before clicking Send Reply, such as:
-
Entering missing information or correcting any inaccuracies or misinterpretations of the input by the AI tool.
-
Adding your name or the client's name to any placeholders that may have been generated by the tool for a greeting or signature.
-
Adding the Subject on new discussions.
-
Adding to or editing the recipients list (Add Recipients).
-
Using the rich text editor in the Comments field to adjust font styling or add embedded images, hyperlinks, lists, or tables.
-
Adding any applicable attachments (Choose File).
-