Adding a Quick Task
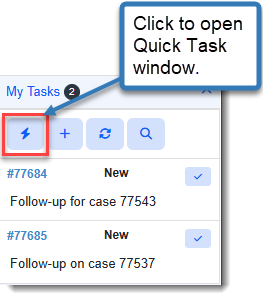
Use the Quick Task ![]() feature to quickly add a task from the My Tasks pane in the Action Center using a minimum number of required fields.
feature to quickly add a task from the My Tasks pane in the Action Center using a minimum number of required fields.
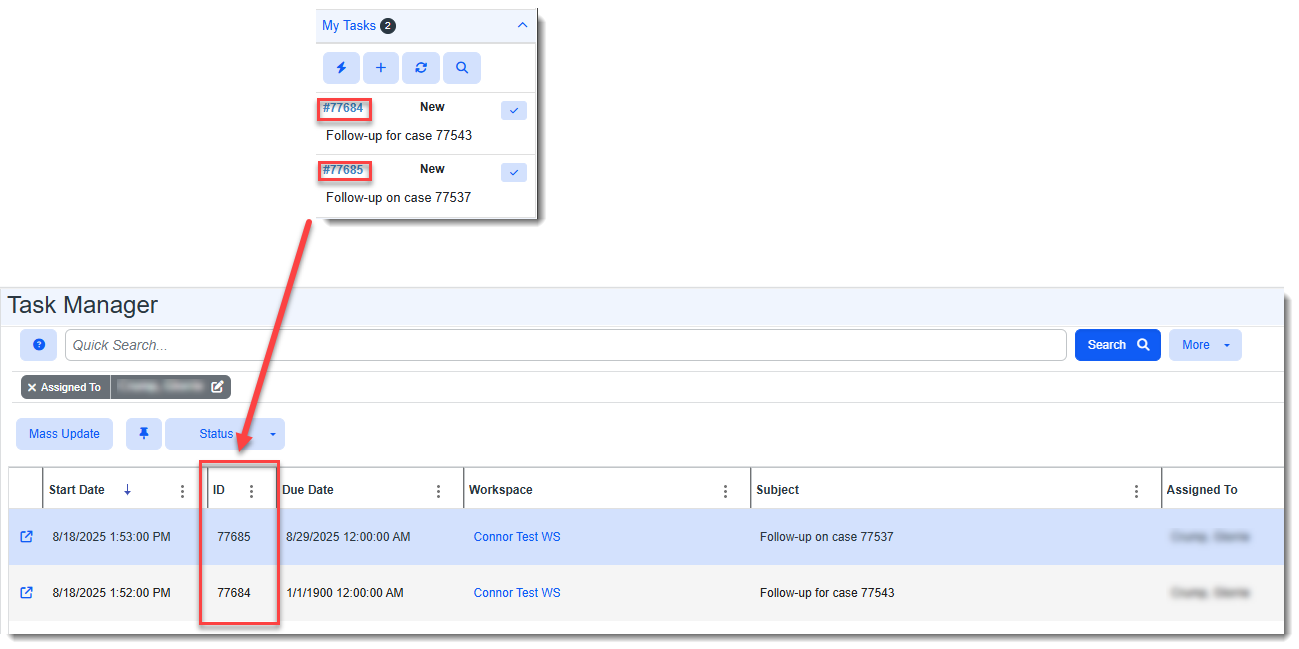
Once a Quick Task is saved, it displays in the Task Manager dashboard. You can click the Open ![]() icon next to the task in Task manager to add more information as you receive it.
icon next to the task in Task manager to add more information as you receive it.
The feature is accessed from a workspace in the My Tasks pane of the Action Center in ClientSpace.
To add a Quick Task:
-
From a Workspace landing page: In the Action Center under My Tasks, select the Quick Task link:
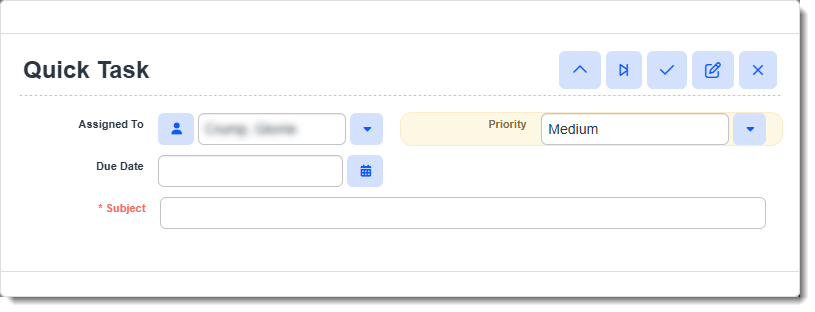
The Quick Task popup window displays. The current user defaults in the Assigned To field. The Priority defaults to the configured Task Priority lookup default value, and the cursor is active in Subject field.
-
Complete the form. Required fields are marked in red.
Assigned To If you are not the person completing the task, edit the default entry. Select the user who will perform the work and complete the task. Due Date
Select or enter a due date for task completion, if applicable.
Priority The Priority defaults to the configured Task Priority lookup default value. Edit this value if necessary to help the Assigned To person understand the urgency of the task. Valid options include: Critical, High, Medium, Low. Subject
Required. Enter a short, meaningful task summary to help the Assigned To person understand the task.
-
Select a save (or cancel) option from the Quick Task toolbar as appropriate.
Icon
Tooltip Text
Description

New
Creates and saves a new task containing the Quick Task details and places it in New status.

In Progress
Creates and saves a new task containing the Quick Task details and places it in In Progress status.

Complete Task
Creates and saves a new task containing the Quick Task details, places it in Complete status and sets the task record to Inactive.

Go to full form
Creates and saves a new task containing the Quick Task details, places it in New status, and opens the task in the full Task record form.

Cancel
Aborts Quick Task entry. Closes the Quick Task form without saving.
-
If you selected a "save" option, select Yes on the confirmation message to proceed with saving your work. If you selected Cancel, select Yes on the confirmation message to exit without saving.
Upon saving, your new Task is added and is accessible from the Task Manager dashboard. Your assigned tasks (i.e., tasks with your name in the Assigned To field) are accessible under My Tasks in the Client Workspace Action Center.
If you are adding a task in Complete status, to see the task, you may need to edit your Task Manager dashboard to display Inactive tasks if Inactive tasks are hidden.