Widget: Help Center
The Help Center Widget allows you to make your organization's external online documentation, such as a Help Center, Knowledge Base or Wiki, searchable from the ClientSpace Home page. Your documentation system remains its own external Help project. ClientSpace queries the system from within a widget frame. The widget frame is a customizable Search page with a built-in Search field as shown in the example below:
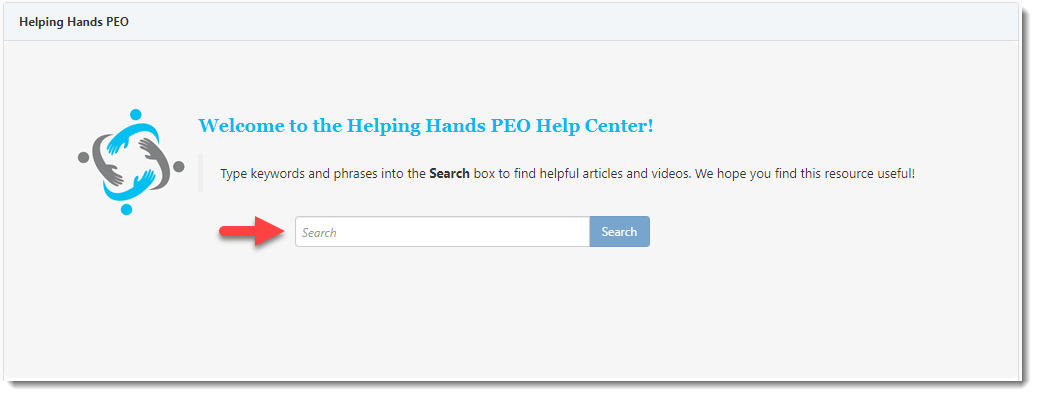
Users can enter keywords and phrases in the Search field and then click the Search button (or press the Enter key on the keyboard) to initiate a search of the documentation system. Search results display in new browser tab.
Note:
-
Configuration by a global administrator is required.
-
Your global administrator can optionally customize the background color of the widget Search page to make it match your organization's branding colors, add a logo, adjust text font sizes, etc. The example image shown above reflects several customizations including the addition of an image, adjustments to font colors, font sizes and the background color. If no customizations are made, the default settings are a white background with black text.
-
Your organization can display unlimited Help Center widgets, each pointing to a different Help system.
Configuration
Step 1: Add a Lookup Value to the Help Project Lookup Group
A Lookup Group named Help Project has been created in System Admin![]() > Lookups > Manage Groups). This is set up the URL record that ClientSpace will use to point to the Help system. You will select this lookup value from the Widget settings later in the configuration.
> Lookups > Manage Groups). This is set up the URL record that ClientSpace will use to point to the Help system. You will select this lookup value from the Widget settings later in the configuration.
Note: You can add unlimited lookup values to the Help Project lookup group. This allows you to set up multiple Help Center widgets if desired, with each widget pointing to a different Help system.
To add a lookup value to the Help Project lookup group:
-
Go to System Admin
 > Lookups.
 -
The Lookups dashboard opens.
-
Optional: Locate the Help Project lookup group and review existing codes.
Note: This step is not required for initial setup but is recommended as you continue to maintain the lookup group and add values to it over time. Doing this ensures you are not attempting to add duplicate values.
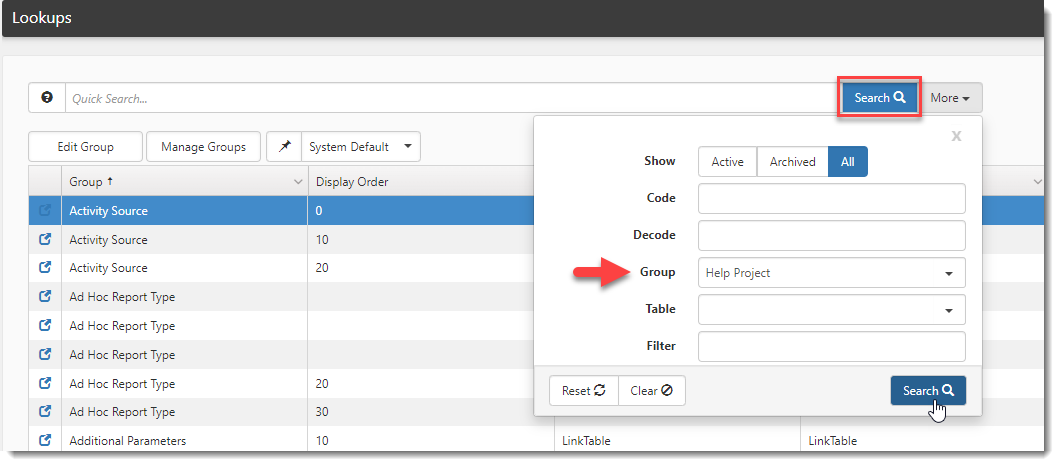
- Click More.
- Next to Show, click All. Note: Doing this shows any archived values that may be hidden in the list.
- Type Help Project in the Group field and then click Search.
-
- Open the existing lookup records and review the Code and Decode values to ensure you are not attempting to add duplicate values and then close the records.
-
Click Add on the Lookups dashboard.
The Lookup Details form opens.
- Complete the form:
- Click Save.
Note: Any fields not listed below are either optional or not applicable for this configuration.
|
Group |
Select the Help Project group. |
|
Code |
Enter the URL of the Help system.
Example: https://extranet.clientspace.net/Helpdoc/search.htm
Tip: If the Help system has a search results page, set the URL to point to it (as shown in the example above) instead of pointing to the default page, such as a Home landing page, that launches when you first open the system. Then, when a user enters a search, the default page is bypassed and they are taken directly to the search results. If you do not do this, the widget will still function but may briefly display the default page before rerouting to display the search results page. |
|
Decode |
The Decode value displays in the Project drop down field in the Help Center widget settings when configuring the Help Center widget.
Example: ClientSpace Help |
|
Active |
Leave the Active checkbox selected if you want the lookup Decode value to be available for selection when configuring the Help Center widget. |
Step 2: Configure Widget Settings
-
Go to System Admin
 > Widget Layouts.
 -
Click Add Widgets to add a new widget layout or click
 (Open) next to an existing layout in the grid to edit the widget layout.
 -
On the Widget Layout Details window, click the Add Widgets button.
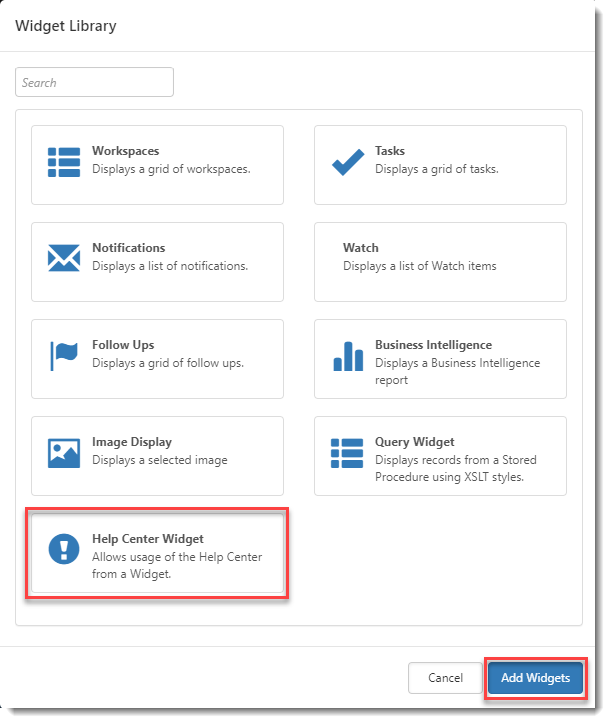
The Widget Library window displays.
-
Click Help Center Widget and then click Add Widgets as shown in the example below:
The Widget Library window closes. A Help Center widget control displays on the Widget Layout Details screen.
-
Drag the bottom right corner of the widget control to dimensions that will properly display the Help Center widget Search page. (Once you finish configuring the widget and test how the widget renders in the target location, you may need to adjust dimensions.)
-
Click the Settings button on the Help Center widget control.
The Widget Settings window displays.
-
Complete the following fields as applicable.
Title
Enter the text to display in the title bar of the widget.
Message
Enter the text to display on the Search page above the Search field. Use the rich text editor toolbar settings to make customizations such as:
-
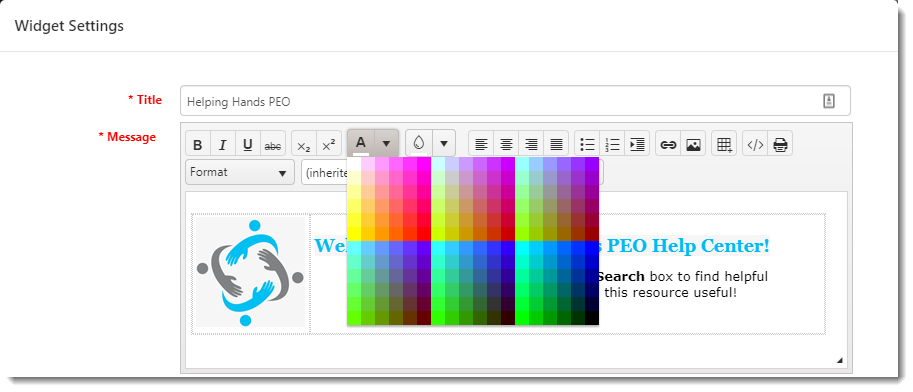
Changing the font color of the text from the default of black:
-
Adding a block of background color to text:
-
Applying boldface, italics or underline styling:
-
Increasing or decreasing font size:
-
Adding a logo or other image:
Tips:
-
When changing text color or text background, there is a limited palette of colors:
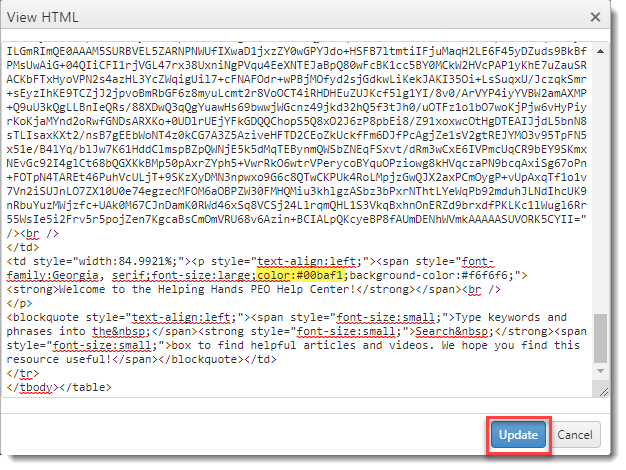
To achieve an exact color to match branding, use an online color selector tool or a desktop image editor's color selector tool to get the hex color code. Then select the View HTML
 option on the rich text editor toolbar, enter the hex color code and click Update to save the change:
Note: You can use the View HTML option to make other changes and apply other custom effects that are not available on the toolbar.
-
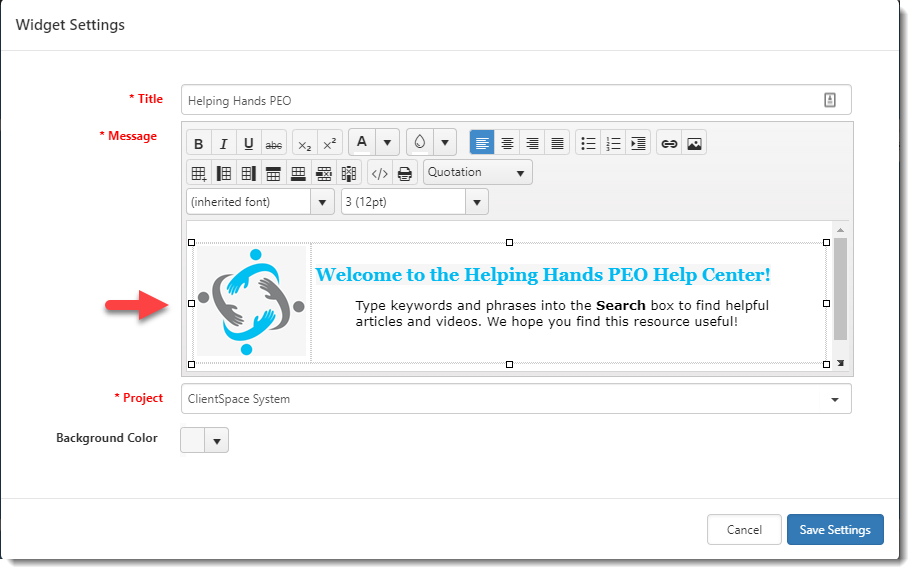
To add an image, such as a logo, drag and drop the image from your PC to the Messagefield. Then, drag the corners of the image. (It will resize proportionally.)
-
Consider experimenting with adding a table
 and embedding an image (such as a logo) and any nearby text within its cells to hold those elements in place and control spacing between them. Drag the cell borders of the table cells to adjust cell widths and achieve the desired spacing as shown below:
Background Color
Change the background color of the Search page. The default color is white.
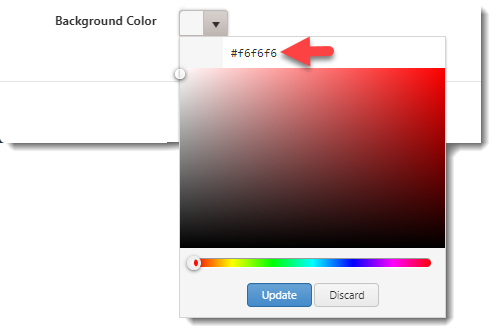
You can create a custom color by dragging the selector along the color bar and then dragging the selector in the color box to create a custom color. Alternatively, you can type a hex color code as shown below:
-
-
When finished configuring the Help Center widget, click Save.
You are returned to the Widget Layouts list. If your widget layout is new, it is displayed in the list as unpublished. (A new layout is displayed in italics and bold – meaning it is unpublished.)
-
To publish a new widget layout, select the Published option in the far right column.
-
Test the widget by going to the target location identified in the Widget layout and adjust the widget control frame as necessary to ensure proper display.

