Widget: Announcements
The Announcements widget displays important notifications on any Workspace landing page, Home page or dataform.
To set up the Announcements widget, you begin by configuring the widget layout to add the Announcements widget. This step determines the size and position of the Widget frame. Then, you can configure the announcement details from the Announcements window located in the Admin Workspace. This is where you enter the notification text that will display in the widget, set the priority (i.e., Highlight Option) of the notification, and enter a Start Date and End Date reflecting the range of time you want the announcement to display, format the text, and publish the announcement when you are ready.
Note:
-
The following hard error message (using the HE_AnnouncementOverlap business rule) displays if the Start Date overlaps with another record's End Date within the same widget and widget layout:
-
The only exception to this is if you set up a higher priority message than the one which is currently displaying.
-
For instance, if you set up the lowest priority announcement (called a Casual announcement), any Normal or Urgent priority announcement which overlaps the date of the Casual announcement will take its place.
-
If you set up a Normal priority announcement, an Urgent announcement can take its place if the dates overlap.
-
Urgent messages, being the highest priority message, will always take precedence over Casual and Normal messages scheduled within the same time frame.
-
-
The takeaway is that to display multiple messages at the same time in the same widget layout, you must add multiple announcement widgets to the same widget layout as you cannot display messages within the same widget at the same time. There may only be one message per frame. Messages with overlapping dates may take precedence over each other as outlined above, but they will never appear together in the same widget frame.
-
-
Another hard error (using the HE_EndDateAfterStartDate) validates that the End Date is greater than the Start Date.
-
An Archive Announcements Scheduled Process runs once nightly to archive any expired announcements from the previous day.
-
If there is no active notification to display in an Announcement widget frame, the following message displays in the Announcements widget frame: "You have no announcements at this time."
Step 1: Configuring the Widget Layout
In this step, you will be adding the Announcements widget frame for your message to appear and setting the target (i.e., a workspace, home page, or dataform). You will configure the announcement details in Step 2: Configuring the Announcement Details.
Important: Please be aware that if you edit the widget layout once you have already completed Step 2, you will need to reselect the value in the Widget Selector field (see Step 2) as it will be cleared.
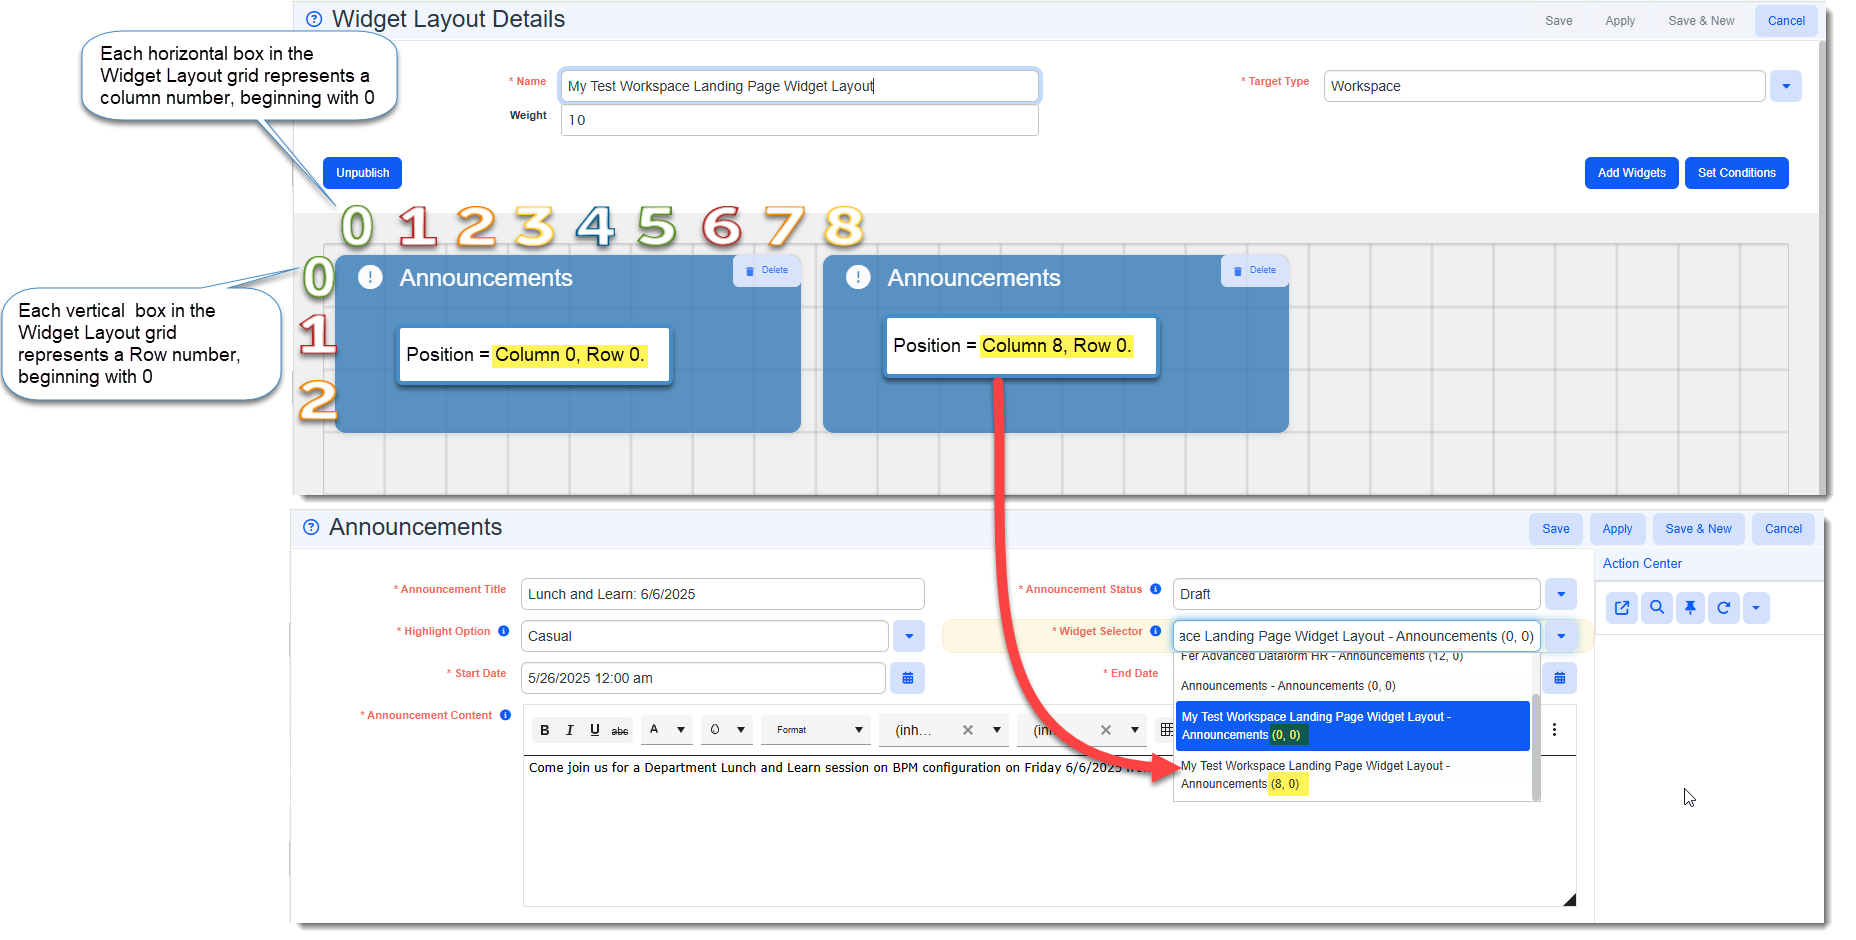
Note: You can add multiple Announcement widgets if you want to display multiple announcements in the same layout as only one announcement may appear in the same widget frame. Each widget has its own unique position as illustrated below. The position number represents the beginning column and row of the widget. This is how you will distinguish between multiple Announcement widgets in the same layout when you select them in the Widget Selector during Step 2. Take note of the positions if you have multiple Announcement widgets and the positions of your announcements matters to you.
To configure the Announcements widget:
-
Go to System Admin
 > Widget Layouts.
 -
Add a new widget layout or click
 (Open) next to an existing layout in the grid to edit the widget layout.
 -
On the Widget Layout Details window, click the Add Widgets button.
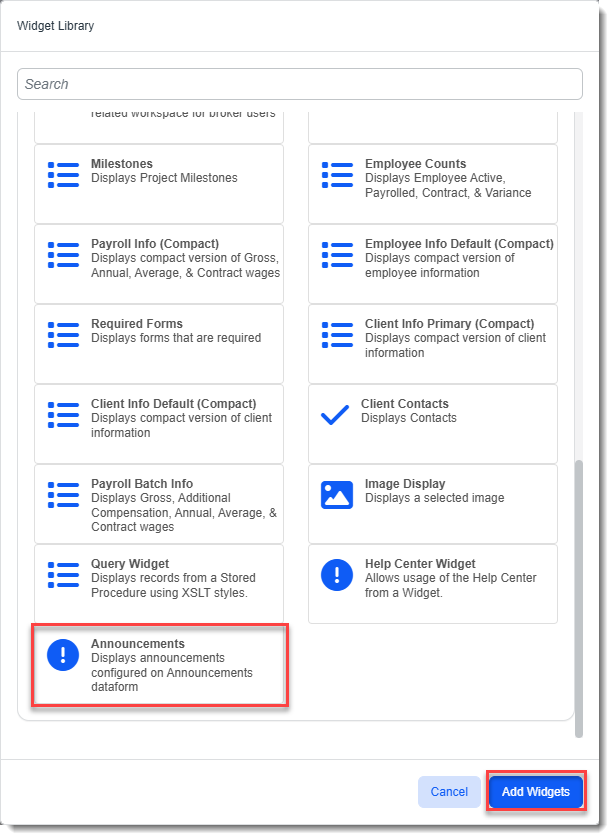
The Widget Library window displays.
-
Click Announcements and then click Add Widgets as shown in the example screen below:
-
The Widget Library window closes. An Announcements Widget control displays on the Widget Layout Details screen.
-
Drag the entire frame to the desired position to move it and drag the bottom right corner of the widget control to change the frame dimensions.
Note: A scroll bar will automatically be created if the announcement text exceeds the frame dimensions.
-
Click Save.
Step 2: Configuring the Announcement Details
To configure announcement details:
-
Go to the Admin Workspace.
There is more than one way to access the Admin Workspace:
-
From the modules bar, click
 Workspaces.
The Workspace Search dashboard opens.
-
Type %Admin in the search box to filter the list of workspaces and locate Admin Workspace.
OR
-
On the modules bar, on the right side, click <username> > Modules.
The Modules Search dashboard opens. The Admin Workspace is listed at the top of the dashboard.
-
Then, double-click the workspace row in the grid or click
(Open) next to the workspace name.
-
-
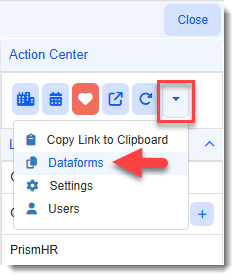
In the Action Center, click the down arrow on the toolbar and then select Dataforms.
-
Select Announcements in the grid and then click Open.
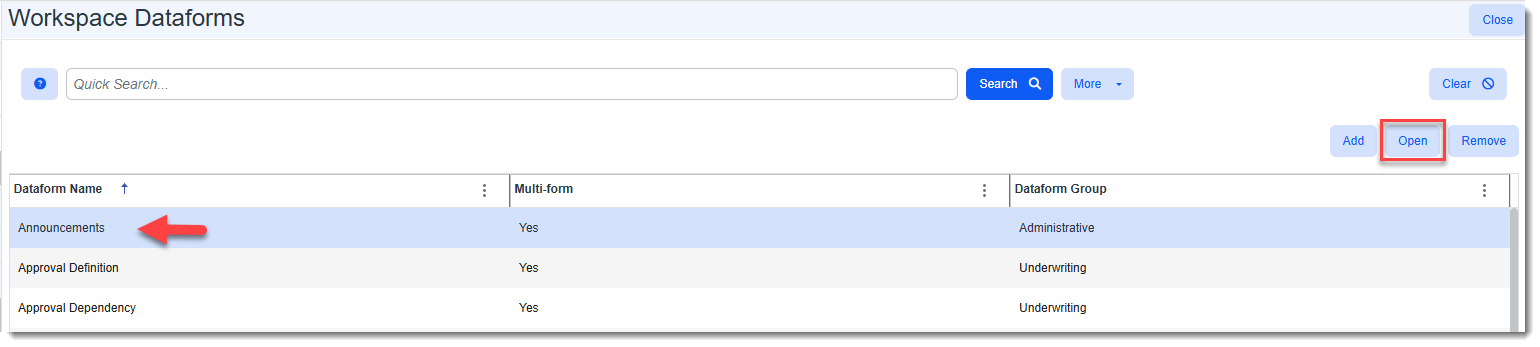
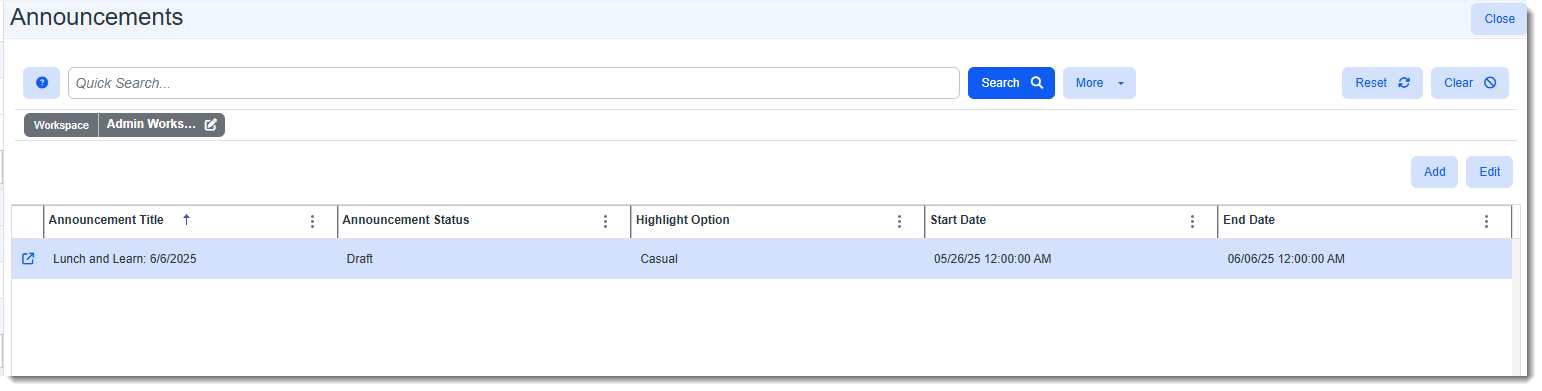
The Announcements Dashboard displays.
-
Click Add.
The Announcements window opens in Add mode with a default Announcement Status of Draft.
-
Draft = Unpublished
-
Published = Visible and within the Start Date and End Date range.
Note: Remember that it is possible for a message to be flagged as published and within the Start Date and End Date range but not visible because you set up a higher priority message in the same widget frame and the higher priority message has replaced the lower priority message. The message will not be flagged as Expired until the Scheduled Process evaluates it and sees that the date range has passed.
-
Expired = No longer within the Start Date and End Date range and no longer visible.
-
-
Complete the following fields:
-
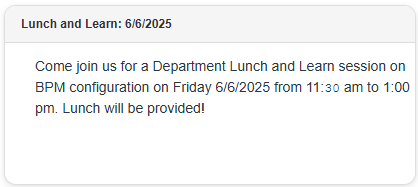
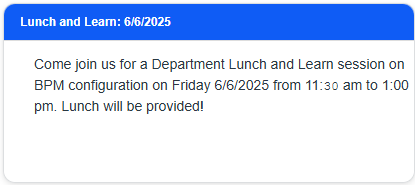
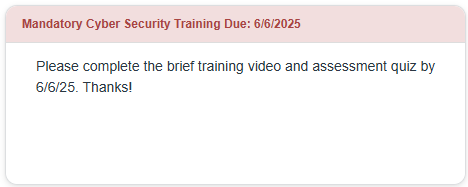
Announcement Title - Displays in the widget header.
-
Highlight Option - Represents the priority of the message and also determines the colors used in the header of the Announcements widget:
-
Casual - Lowest priority. Gray header background with black text.
-
Normal - Medium priority. Blue header background with white text.
-
Urgent - Highest priority. Lighter red background with deep red text.
-
-
Widget Selector - Click the down arrow and select the correct Widget Layout/Widget Position combination from the drop-down list. Your announcement will display here. Pay close attention to the widget position numbers displayed in parentheses if you have more than one Announcement and the position of the announcement matters. See the illustration in Step 1 for more details about the widget position number.
Important: Please be aware that if you edit the widget layout once you have already selected the widget, you will need to reselect the value in the Widget Selector field as it will be cleared.
-
Start Date and End Date - Define your display date range by entering the Start Date and End Date. The announcement will begin displaying on the Start Date (if the Status of the announcement is Published.) The message will stop displaying after the End Date passes and the nightly Archive Announcements Scheduled Process runs to archive any expired announcements from the previous day.
-
Announcement Content - Enter the announcement text. Use the rich text formatting toolbar to customize the text as desired. For instance:
-
Apply bold text, italics or underline styling.
-
Change the text color or text background color.
-
Increase or decrease the font size or change the font.
Tip: Use the View HTML
 option to better control the appearance of your announcement and make changes that are not available on the toolbar. For example:
-
Use it to clean up text that you may have copied from another application. For instance, there may be beginning and ending span tags (<span> to </span>), paragraph tags (<p> to </p>), divider tags (<div> to </div>) and other HTML tags embedded in the text which could, in some instances, create an undesirable format.
-
Add padding to the text. (Note that you can quickly use the left indent to create the appearance of left padding which may suffice for a one line message. Longer messages may look better if you edit the HTML and add padding to keep the message from appearing too close to the frame.
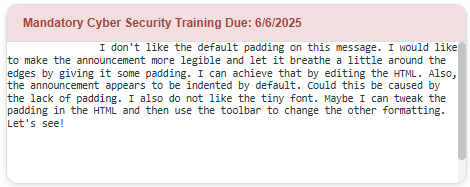
In the example below, the message is using a small default font, there is no padding and the lack of padding is causing the first line of text to shift to the right.
Let's use the View HTML
option to add some padding as shown below: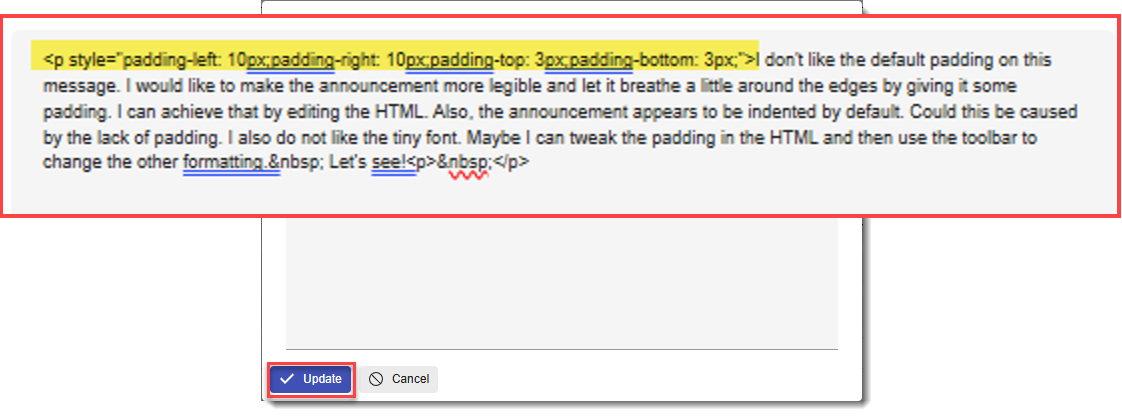
Then, let's use the toolbar to change the font to Arial 12 pt.
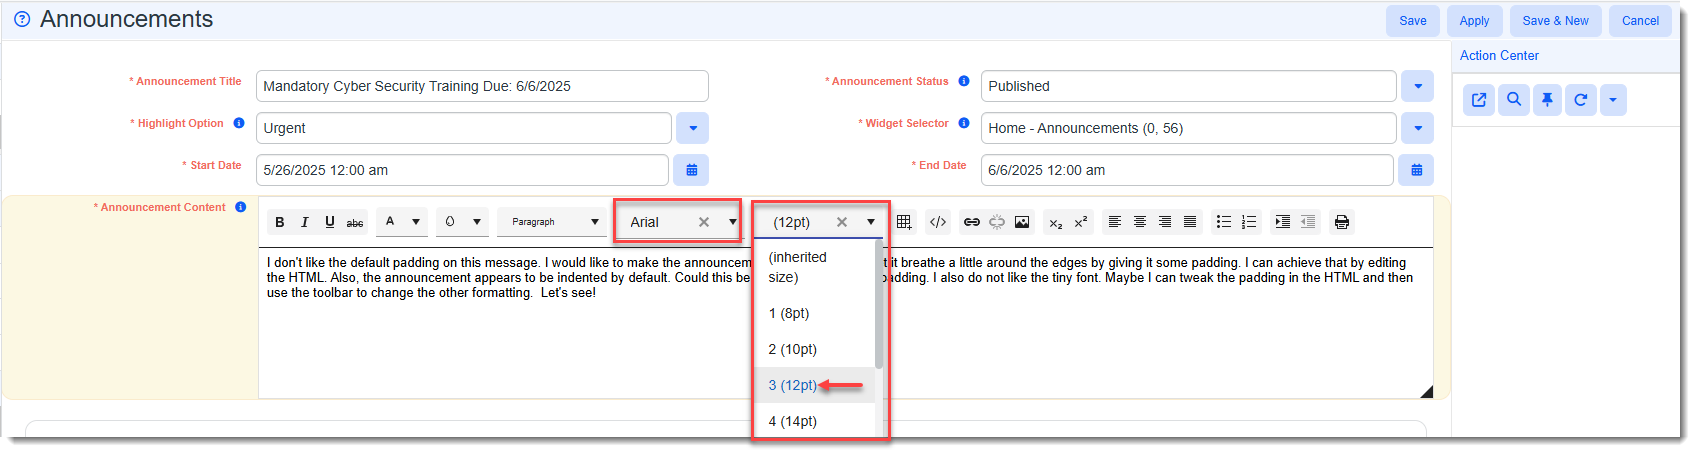
With these simple tweaks, we have now created an announcement that is much more legible and appealing. Also, the shifting that was occurring with the first line of text was taken care of by adding padding. Note that there appears to be no bottom padding but this is because the announcement text slightly exceeds the dimensions of this widget frame so a scroll bar has been automatically added.

-
-
When you are ready to publish your announcement, select Published in the Announcement Status field.