Step 4: Conditions
In this step, you can add one or more conditions to use in conjunction with the Workflow Action in Step 1 when determining if the workflow is triggered. What additional conditions would you like to have met to trigger this workflow?
Trigger on number of days from a date: You can set a condition based on the number of days/months/years from a date. This feature uses the Field, Operator, and Value columns. See the procedure later in this topic.
Clone a trigger: For triggers that are similar, use the Clone feature to copy a trigger condition. See the procedure later in this topic.
Decide when you want to publish: When you reach the end of the initial item of a Workflow Channel, you have the option to go back a step, continue, or finish. These options allow you to decide when you want to publish the newly added Workflow Channel. See the procedure later in this topic.
![]()
To configure Conditions:
- Complete the form:
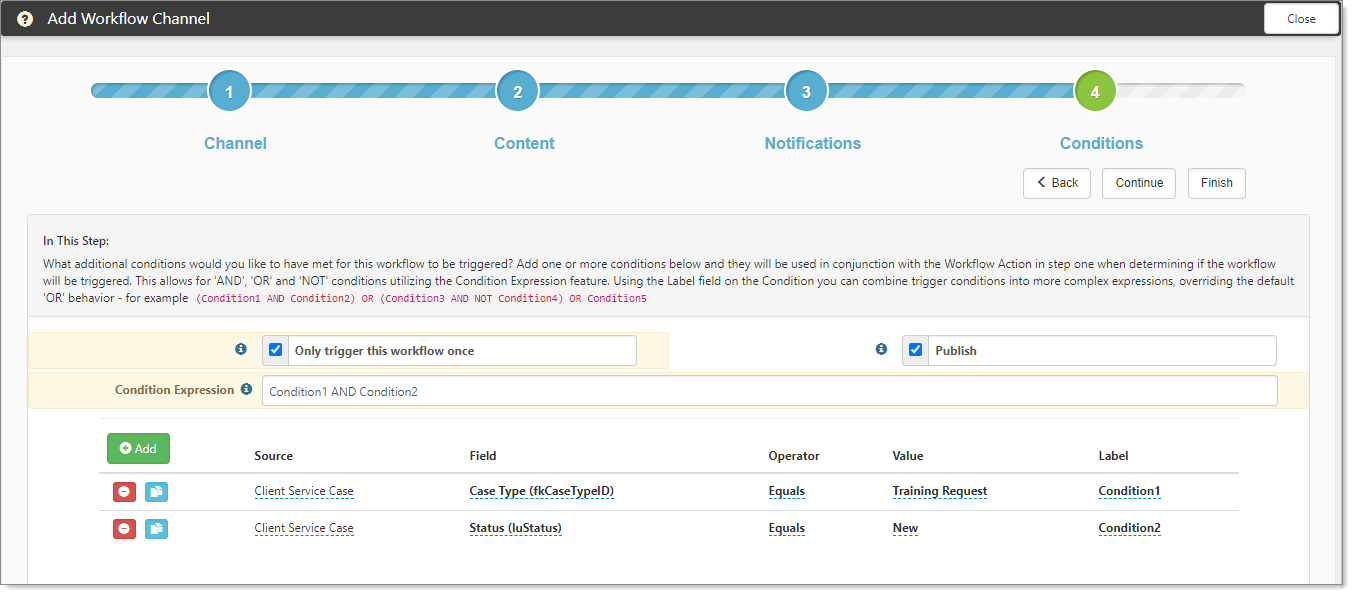
| Only trigger this workflow once |
Sometimes you only want a workflow to happen once. For example, the first time an employee marital status changes, you may want to send a notification about how this can affect their tax status and W4. You can use this option to ensure that this triggering condition is unique and only happens once. When a single dataform is selected as the Triggering Form in Step 1, then Only trigger this workflow once is enabled (selected) and marked read-only. When a single dataform is selected as the Triggering Form, its respective Replace Fields and Condition options are removed from the workflow item. This works for Scheduled Workflows as well. Single dataforms such as Client Master and Client Team are not candidates for cloning because these forms have a one-to-one relationship with the workspace. |
|||||||||||||||
|
Publish |
By default, this option is enabled. When the configuration is complete and you click Continue or Finish, a prompt is displayed asking if you want to publish. |
|||||||||||||||
|
Condition Expression |
The Workflow Action condition was set in Step 1. This is the dataform or task field (or HdrAction) that when changed, it triggers the workflow.
For a deeper discussion about Condition Expressions, see Condition expressions. |
- To add secondary conditions, click Add and complete the following fields:
| Source |
The Source list includes the triggering form and its tabs, the channel trigger (i.e., the original form that started the channel), all triggerable, active single-forms, and the tabs of those single-forms. Applicable server data procs, if configured, and other workflow items, such as a HdrAction, may also be included. Note:
For additional details about tabbed dataforms, see Workflows and Tabbed Dataforms. |
|
Field |
If you selected either a dataform or task for Source, Field contains an appropriate list of fields for the triggering task or form. You can add a triggered field and also use multi-lookup fields (Multi Lookup (MultiLookup)) as triggering conditions.
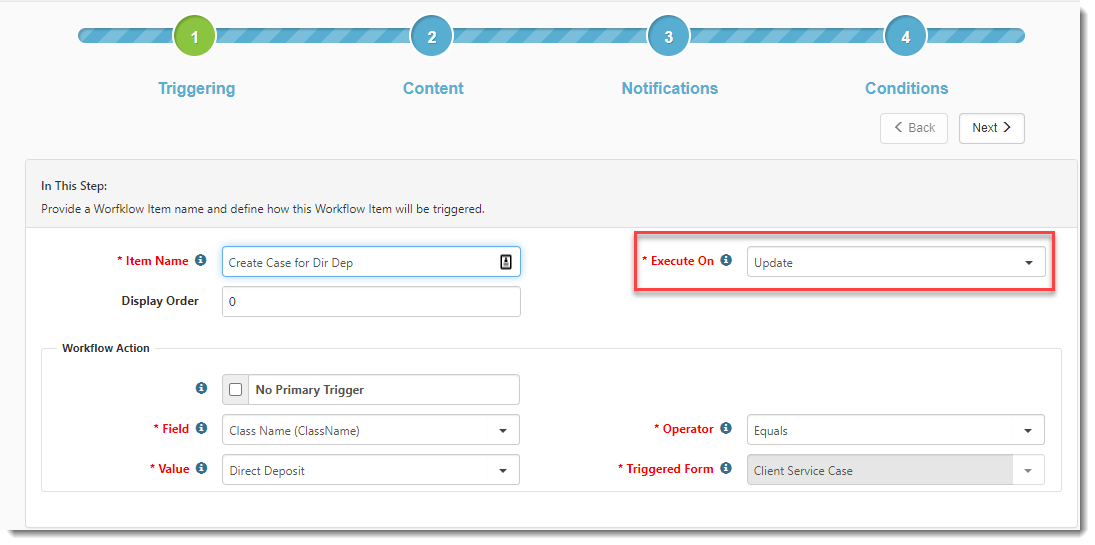
A dataform Active field can even be used to trigger a task or form. (If you are building a dataform condition using the Active field, the Source must be the Triggering Form.) Workflow conditions can be built based on a specific Active field value (i.e., Checked or Unchecked) or whether the Active field was changed from its current value (i.e., IsDirty):
However, keep in mind that when you add a new record (such as a Client Service Case record), behind-the-scenes the system is applying a default Active status to the record which places the Active field in an edit or "IsDirty" status upon "Add". If you do not want a workflow condition that uses the Active field as a trigger condition to trigger on the initial "Add" of a record, be certain to change the Execute On field value (located on the Step 1: Triggering page of the Workflow Items wizard) to Update.
See Step 1: Triggering. A triggered form field is only editable on Add. Trigger Fields also support parent form fields (only available operators are empty, not empty, and dirty).
For Source such as Client Master, you can select Additional Record Information. Additional Record Information is for determining who made a change to employee information, such as email address changes. See Tracking data modifications in PrismHR. To add a trigger field:
|
|
Operator |
Operator is based on the type of Field selected but ranges from IsEmpty (nothing in a field) to a specified value. Each value from a Multi Lookup field can be added as a separate = condition. This supports complex AND, OR, and NOT conditions as well. Is Dirty is not available in the Operator list when the Source is set to something other than the Triggering Form. |
|
Value |
This is the value you are comparing the field to when attempting to meet a triggering condition. |
|
Label |
A label is used when combining conditions into a complex Condition Expression. ClientSpace assigns a label to a new condition with the naming convention C#. For example, C1 for the first condition that you create, C2 for the second, and so on. You can change the label name by selecting the name of the label and typing a new name for the label. For example, you can select the C1 label and enter Condition1 as the new label name. Note: If a Label is not used in a Condition Expression, then the condition is an implied OR. In the example, if the Condition Expression was blank, this workflow would be triggered in the following manner: Workflow Action Trigger (Step 1) AND Condition1 OR Condition2 |
To trigger conditions based on number of minutes/hours/days/months/years from a date:
- Complete the form fields:
|
Field |
Select a Date or Date Time datatype field. This action makes the Aging operators available in Operator.
Note: When comparing Date to Date Time datatypes (or vice versa) 12:00:00AM is used as the comparison time for the Date datatype. |
|
Operator |
Select one of the following:
The less than operator requires that the evaluated date occurs between the calculated date and today. It has to be between the date set in the configuration. For example, if the value is 6d, the from date must be between 6 days ahead and today. |
|
Value |
Type a number accompanied by:
|
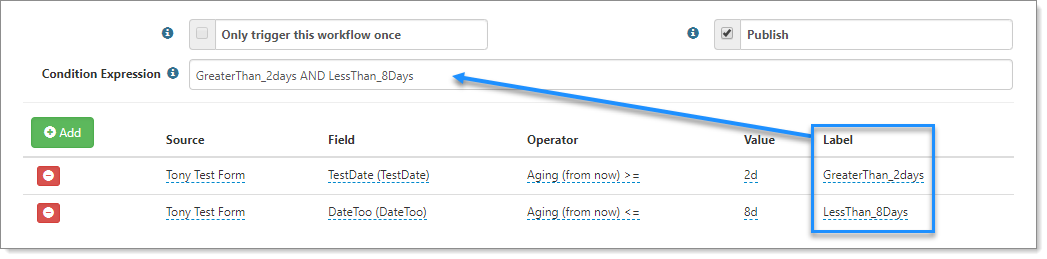
Putting it all together
The following example illustrates two conditions: GreaterThan_2days and LessThan_8Days. The Condition Expression is stated as GreaterThan_2days AND LessThan_8Days. For an aging evaluation, this condition requires more than 2 days and less than 8 days.
These trigger conditions can be a bit complex. If you need assistance, please log an Extranet case.
Cloning a Trigger Condition
To save some time, you can clone a trigger condition and then edit as appropriate.

To clone a trigger:
- In the Add section, locate an entry that you want to copy.
- Click
 Clone.
A new row opens, with the trigger condition copied. Source, Field, and Operator are copied.

- You can now edit the new condition as appropriate.
- Click Apply or Save.
Reloading Secondary Conditions
The Reload button located above the secondary conditions grid is used to restore the conditions in the grid if they do not load properly.
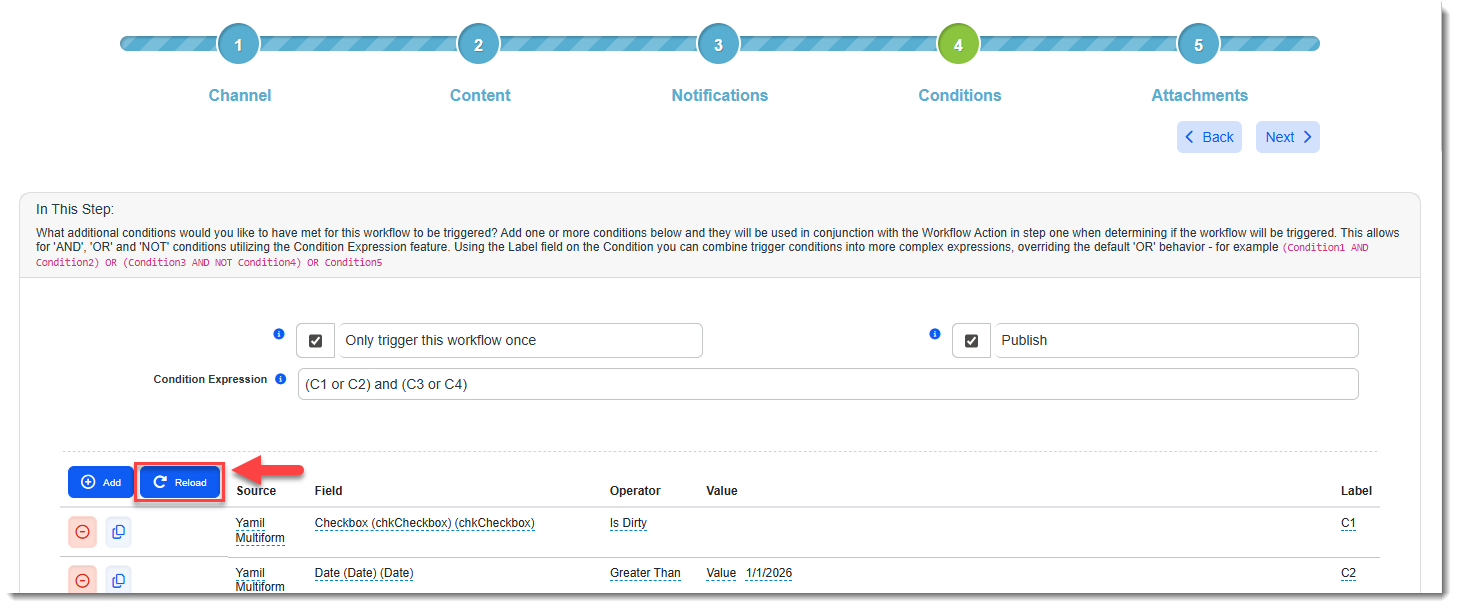
Improper loading can sometimes occur during times when ClientSpace server resources are low and you open a Workflow Channel (WFC) containing numerous complex secondary conditions (i.e., typically more than 50). There may be portions of condition statement, such as Operator values, shown as "Empty" and saving the WFC in this state could result in unintentional data loss.
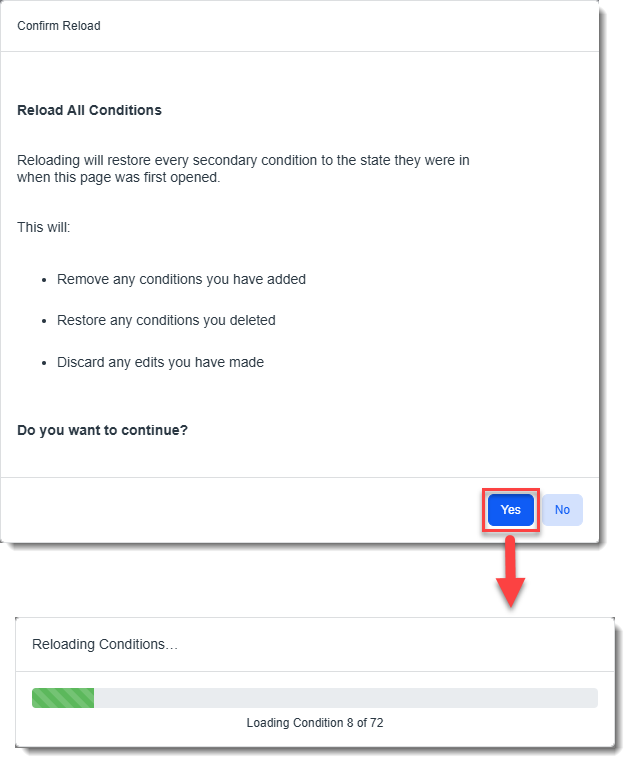
Reload reverts the grid to the original state it was in so that none of the secondary conditions are overwritten with empty values stemming from the loading issues. Reload does not retain any changes you made to the secondary conditions grid while it was in the improperly loaded state. When you click the Reload button, a confirmation message displays indicating that reloading will restore secondary conditions to the state they were in when the page was first opened and will remove additions, deletions and other edits. Clicking Yes starts the restore process. A status bar displays the progress:
What's next?
You can optionally add attachments. See Step 5: Attachments.