Implementing SSO from PrismHR to ClientSpace
The ClientSpace TSSO link in PrismHR enables you to seamlessly move from the Payroll application into ClientSpace without the need to log in. Making this magic happen, however, requires some advanced configuration. This topic describes the configuration and what to do if you encounter errors along the way.
|
•
|
The process utilizes the PrismHR User's PeoID to inform ClientSpace which PrismHR Server to use to validate the connection. |
|
•
|
Because you can configure ClientSpace with multiple PrismHR servers, the API Configuration form for the appropriate PeoID is used for API service endpoints. |
|
•
|
Allows a logged-in PrismHR user to access ClientSpace without the need to log in to ClientSpace. |
Note: PrismHR settings may require system administration rights. Additionally, this topic only describes the configuration portion of PrismHR related to ClientSpace. For help with this, refer to your PrismHR Administration documentation.
ClientSpace Configuration: API Form and User Record Configuration
The PrismHR API configuration form must have a Secondary ID (the PeoID) that matches the PrismHR User's PeoID. Locate the API configuration record by matching the PrismHR User's PeoID to the API Configuration Secondary ID.
|
•
|
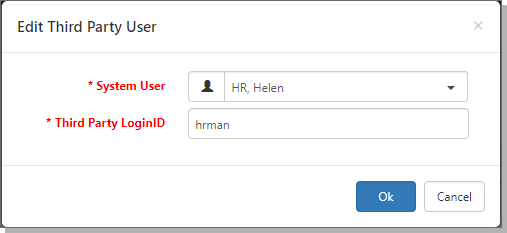
The Third Party LoginID must match the User ID of the PrismHR user. |
|
•
|
The Third Party LoginID must be mapped to a valid ClientSpace User through a third party application (TPA) record. This is the User that will be logged into ClientSpace |
|
•
|
Each PrismHR user that logs into ClientSpace using SSO will need one of these TPA user records. |
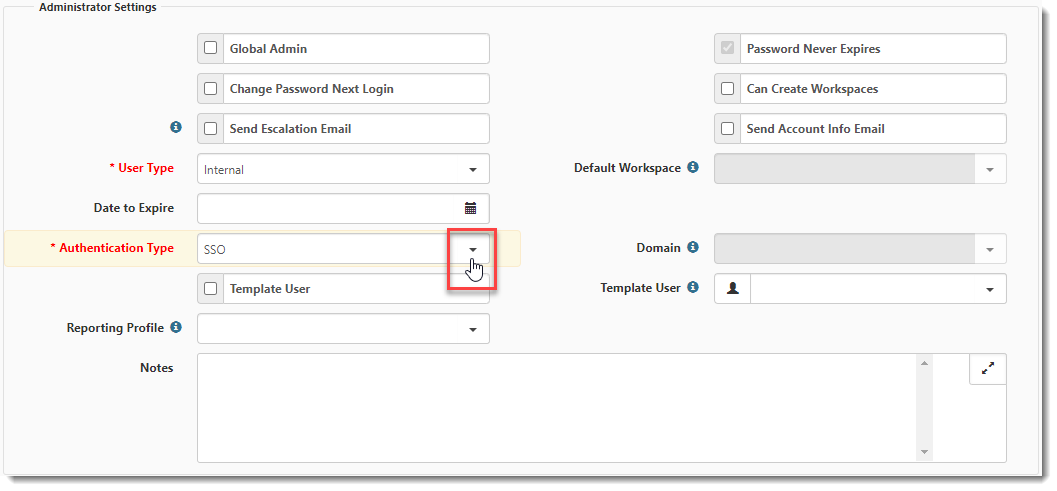
The user record should also be assigned an Authentication Type of SSO. This activates the following behavior:
|
•
|
The Password Never Expires checkbox located in the Administrator Settings section of the user record is checked and becomes Read Only. |
|
•
|
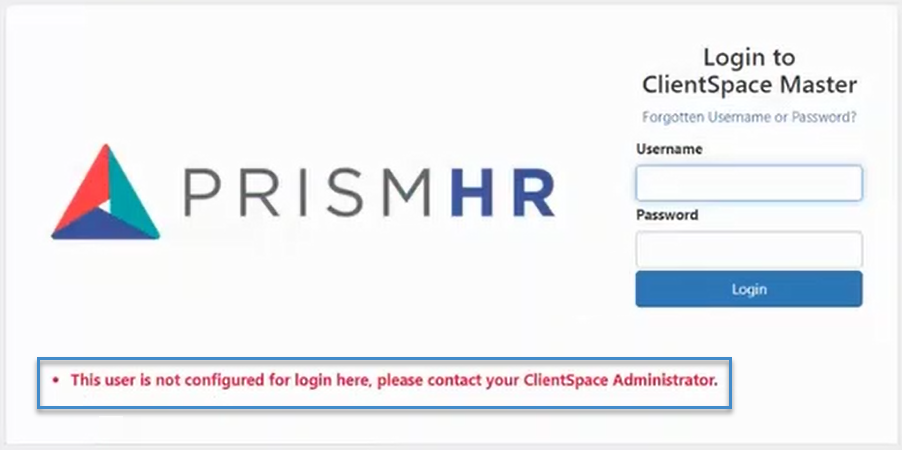
If an SSO user attempts to login via the ClientSpace login page, the following message displays: |
"This user is not configured for login here, please contact your ClientSpace Administrator."
To configure the Third Party Application (TPA):
|
1.
|
Go to System Admin  > Advanced > Third Party Applications. > Advanced > Third Party Applications. |
The Third Party Application Configuration dashboard opens.
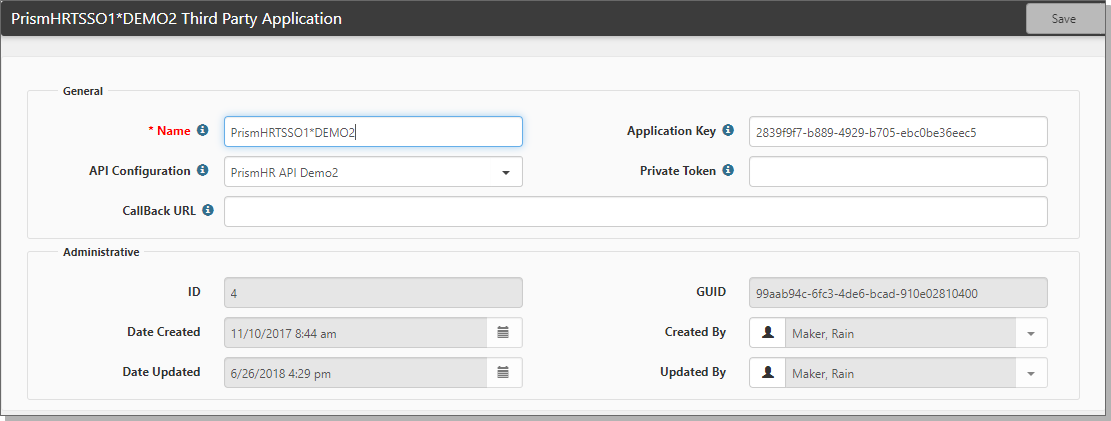
The New Third Party Application form opens.
|
Name
|
Type PrismHRTSSO+PeoID, where the italics indicate the PeoID. There are NO spaces in this name.
Example: PrismHRTSSO1*DEMO where 1*DEMO is the PeoID.
This allows multiple PrismHR Servers and Users to access ClientSpace.
|
|
API Configuration
|
You must select the appropriate PrismHR API configuration.
|
This action generates the Application Key.
After the new Third Party Application entry has been saved, you need to add Third Party users. The users act as translation records, essentially mapping a PrismHR account to a matching ClientSpace account.
To add users to the Application:
|
2.
|
In the Action Center, select Users. |
The Third Party Application Users dashboard opens.
|
3.
|
Locate a user and click  (Jump). (Jump). |
The Edit Third Party User form opens.
The user is added to the application.
To specify the SSO Authentication Type on the ClientSpace User Record:
|
1.
|
Go to System Admin > Users. > Users. |
The Users dashboard opens.
|
2.
|
Scroll through the list of users or use Search to locate the user. |
|
3.
|
When you locate the user, double-click the row or click  (Open)next to the user name. (Open)next to the user name.
The User Details form opens. |
|
4.
|
In the Administrator Settings fieldset, select an Authentication Type of SSO. |
PrismHR Configuration
To specify the ClientSpace TSSO Url:
|
1.
|
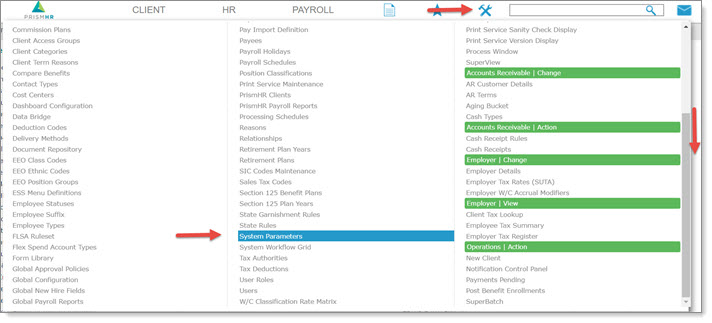
In PrismHR, select Back Office System > Change, System Parameters. |
|
2.
|
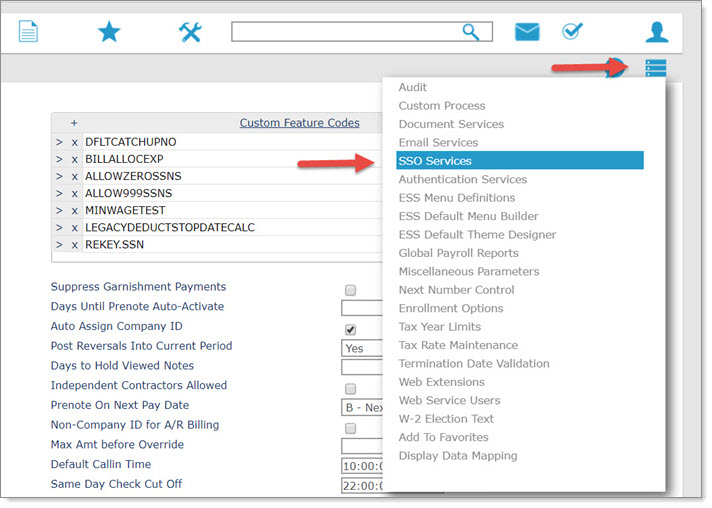
Select Tool Menu > SSO Services. |
|
3.
|
Select Service Url: https://extranet.clientspace.net/Next/Netwise/PrismHR/SSO |
|
4.
|
Additional PrismHR configuration is necessary. Consult with PrismHR for details (beyond the scope of this doc). |
Operation overview
|
1.
|
PrismHR User clicks the ClientSpace link (configured in PrismHR). |
|
2.
|
PrismHR sends the PrismHR User's PeoID and a secret token to the SSO Services Service Url that has been configured on the PrismHR server. |
|
3.
|
ClientSpace locates an API Configuration record matching that PeoID. |
- If not found, display message
"Unable to validate User in ClientSpace for PeoID 'x'. Please contact your ClientSpace Administrator."
|
4.
|
ClientSpace attempts to connect to the API using the credentials on the API Configuration record. - If unable to connect, display message
"Unable to connect to PrismHR for validation. Please contact your ClientSpace Administrator." - If able to connect but no session returned from PrismHR, display message
"Unable to obtain a valid Session from PrismHR. Please contact your ClientSpace Administrator."
|
|
5.
|
ClientSpace sends the secret token back to PrismHR for validation. - If a validation response if not returned, display message
"Unable to validate this User's Authentication Key, no response from PrismHR. Please contact the System Administrator of the system from which you are trying to log in." - If validation is refused, display message
"Unable to validate User in PrismHR, Error = 'error info'. Please contact your ClientSpace Administrator and report this error."
|
|
6.
|
If PrismHR validates the secret key, it returns the PrismHR User information to ClientSpace. |
|
7.
|
ClientSpace attempts to locate the Third Party Application by name PrismHRTSSO + PeoId and the PrismHR User ID. - If unable to locate a TPA record for that user, display the message
"This User or your Server is not configured for Single Sign On in ClientSpace. Please contact your ClientSpace Administrator." - f the TPA User is located, the ClientSpace User associated with that PrismHR UserID is logged into ClientSpace.
- If login is unsuccessful, display message
"Unable to log in to ClientSpace. Please contact your ClientSpace Administrator."
|
|
8.
|
When logged in, the ClientSpace User is redirected to the ClientSpace home page (honors the Default to Next User setting). |
ClientSpace to PrismHR
You can configure SSO connectivity to PrismHR using a custom link.
To configure a custom link:
|
1.
|
Go to System Admin  > Advanced > Custom Links. > Advanced > Custom Links. |
The Configure Links dashboard opens.
|
2.
|
Locate and open Workspace Landing for PrismHR. Or click Add to add the configuration. |
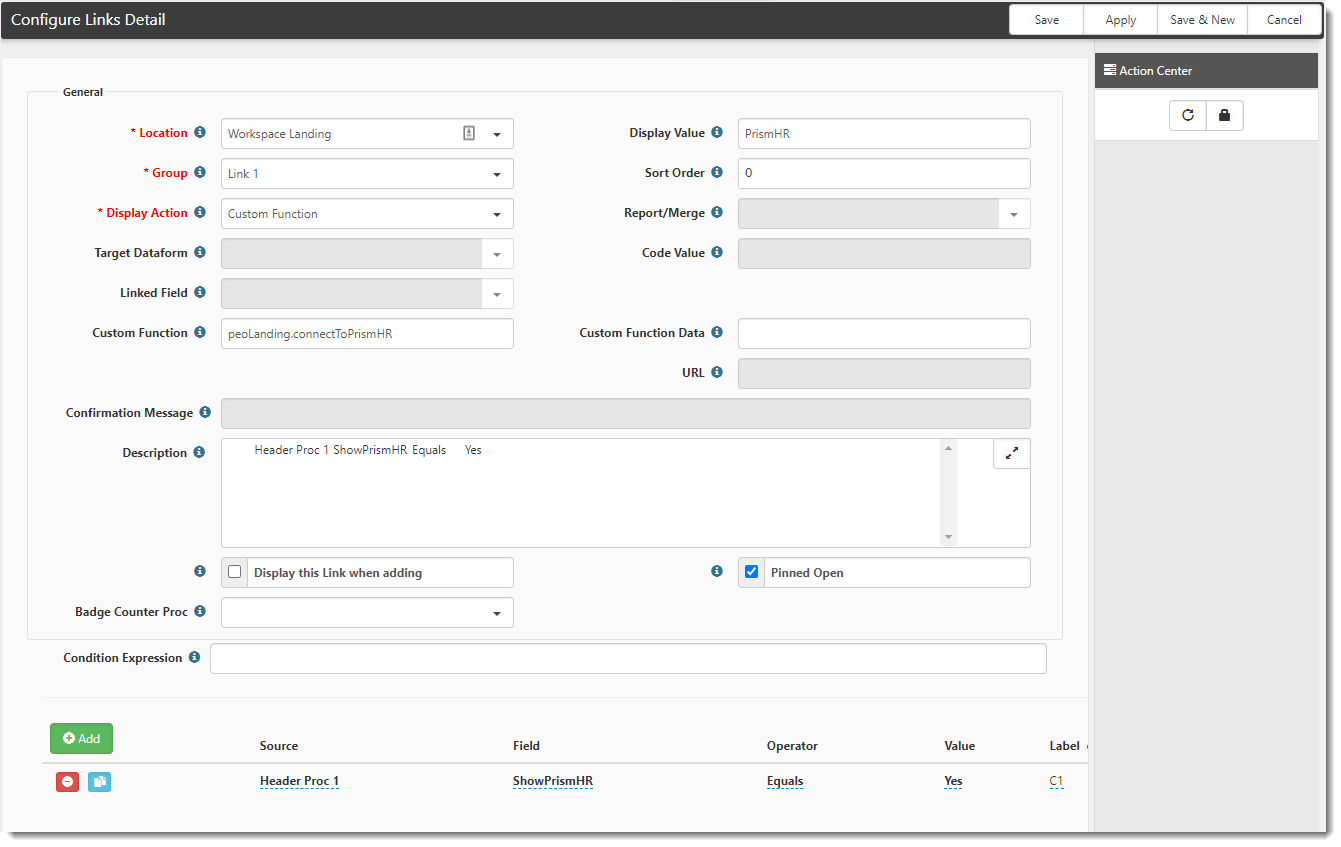
The Configuration Links Detail form opens.
|
3.
|
Complete the form fields.
This is available on PEO Landing Pages (Workspace Landing) and Client Service Case Forms. |
|
Location
|
Select Workspace Landing or Client Service Case.
|
|
Group
|
Select Link 1.
|
|
Display Value
|
Type Connect To PrismHR.
|
|
Display Action
|
Select Custom Function.
|
|
Custom Function
|
Type one of the following:
|
•
|
peoLanding.connectToPrismHR (Client Master) |
|
•
|
clientServiceCase.connectToPrismHR (Client Service Case) |
|
|
Display Conditions
|
|
•
|
Trigger Field: ShowPrismHR |
|
-
Click Save.
