Search dashboards
From the Case search dashboard to Task management, search dashboards in ClientSpace all work in a similar fashion. If you understand one, you understand them all. Usually, search dashboards are presented after you select an entry from the System Administration dashboard or from module in the modules bar (see User Modules). The following example (Task Manager) provides everything you need to know to be a search dashboard expert.

The numbered items in the image correspond to the following window elements:
|
1. Name |
The name of the record type you are selecting. |
||||||||||||||||||
|
2. Close |
Done working with these records? Click to close the window and remove this from your Work Items list. |
||||||||||||||||||
|
3. Search |
Everyone has their preferred way of searching, but some key areas are searched so often that we made them part of the default keyword search. Pause on the ? icon for a list of these fields and some search hints. Quick Search fields:
% Search Fields:
|
||||||||||||||||||
|
4. More |
If quick search does not provide the results you need, you can add additional search parameters under the More search area. |
||||||||||||||||||
|
5. Reset |
|
||||||||||||||||||
|
6. Clear |
Are you looking for something and the default filters are causing it to not display? Click Clear to clear all the currently applied filters and run an unfiltered search. For installations with large numbers of records, unfiltered searches can sometimes select too many records and cause poor performance. |
||||||||||||||||||
|
7. Filter chiclets |
The current set of filters applied to the records list is displayed in a series of chiclets found below the search bar. Some filters can be removed as indicated by an X. |
||||||||||||||||||
|
8. Jump |
Jump allows you to jump directly to the selected record, the same as clicking Edit. This is useful when accessing the application from a mobile device. |
||||||||||||||||||
|
9. Sort |
Click the column header of a list to sort the records by that column. The arrow indicates the direction of the sort, ascending or descending. |
||||||||||||||||||
|
10. Expand list / Manage column |
The inverted carat allows you to access a list of columns that may be added or removed to customize your list view, displaying only the columns you want. This customization is lost when you close the list. |
||||||||||||||||||
|
11. Add |
Click Add to create a new record. |
||||||||||||||||||
|
12. Edit |
Click Edit to edit the selected record. If no record is selected, you receive an error message indicating you must select a record to continue. |
||||||||||||||||||
|
13. Paging |
Did you pull back a lot of records? Need to see the ones that are not currently displayed in the list? Use paging to move to more records in the set. |
||||||||||||||||||
|
14. Record count |
Displays the total number of records that match your current filter set. |
||||||||||||||||||
|
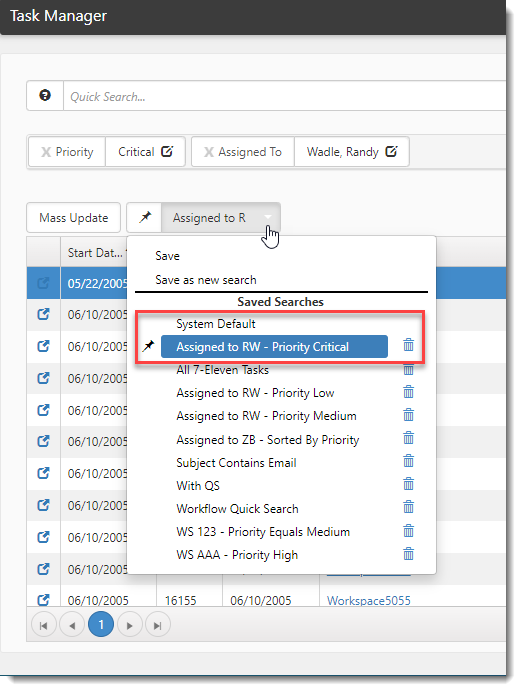
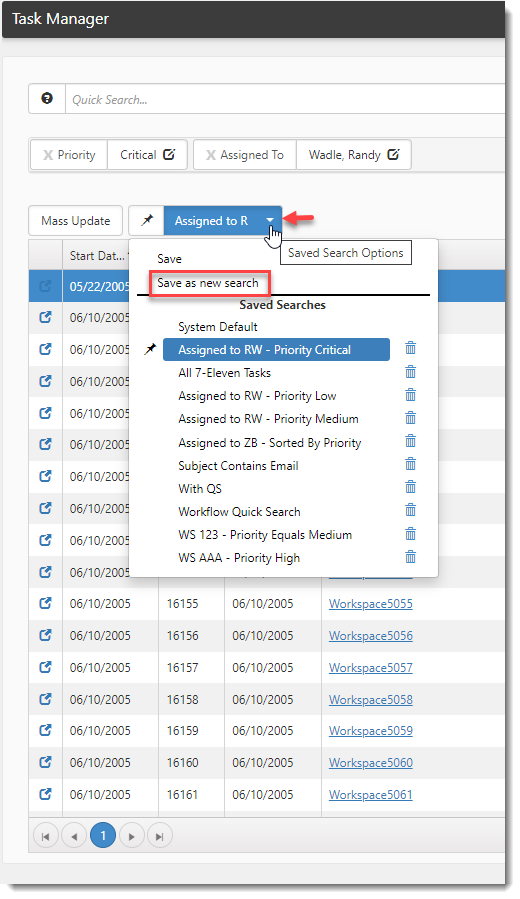
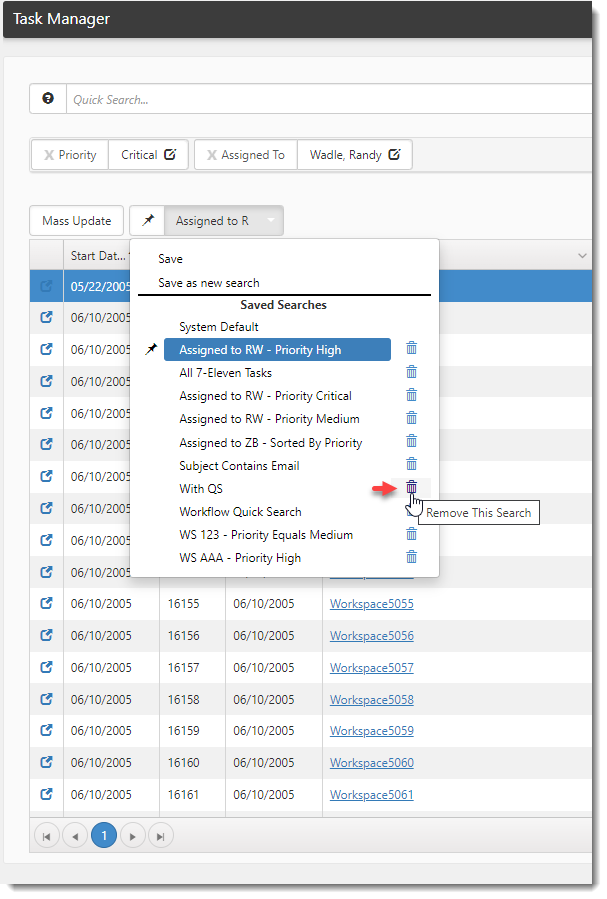
15. Search Library |
The Search Library allows you to save up to twenty filter and list configurations, including More Search, Quick Search, and column configurations (such as column width adjustments and column sorting). Note: The System Default search displays in the Search Library but does not count toward the twenty user-defined searches that you can create. The System Default search can be temporarily edited for purposes of creating a new search based on the default dashboard settings, but you cannot permanently modify or delete the System Default search.
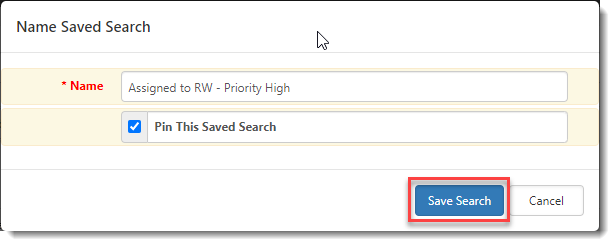
When the Name Saved Search window displays, enter a name for your new search.
Note: This field accepts up to 50 characters and allows special characters such slashes and quotation marks.
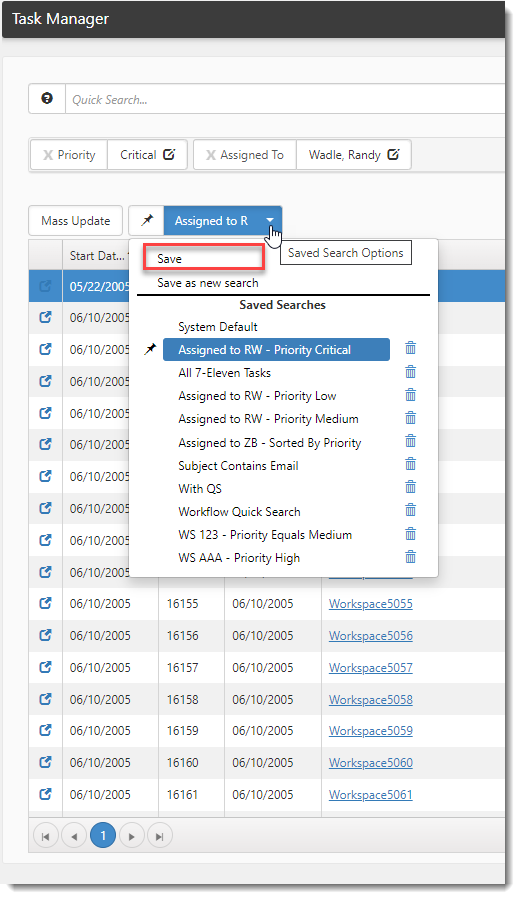
Optionally, click Pin This Saved Search to simultaneously save and pin the new search as the default dashboard view before clicking Save Search.
Note: If you have made updates to the pinned search and you want to save them, be certain to also select Save or Save as a new search from the Saved Search Options list.
|