Scheduling an Initial Import
The Initial Import form is accessed in the Admin Workspace and works in both multi-tenant and single-tenant environments. It allows you to run specific types of Initial Imports for PrismHR or HCM. For instance, you can run an initial import for a single API configuration, several API configurations, or all API configurations.
Note: The form is secured to the Developer role. If you need help configuring imports, please contact your ClientSpace Professional Services representative.
Once you create an Initial Import form in the Admin workspace, you click the Queue Me link to queue the record for the PrismHR Scheduled Initial scheduled process. When the scheduled process runs, it references only the API configurations, Import mappings, and client Import IDs referenced on queued, Active Initial Import forms.
Note: You can queue the same form more than once. For example, if the process failed the first time due to an incorrect entry on the form, you can correct it and run it again. Each time an Initial Import form is processed, the Queued date and time stamped status change is tracked in the Log Data field at the bottom of the form so that you can see if the form was queued more than once.
Before You Begin: Configuration Notes
Before initial use of this feature, Global administrators should review the configuration and consult a ClientSpace Professional Services team member, if necessary to ensure that ClientSpace is configured properly.
The Initial Import process can be used for single tenant and multi-tenant sites, but not both. The system evaluates the Use Multitenancy field value on the PEO Configuration record (System Admin ![]() > Administrative Data > PEO Configuration) to determine this.
> Administrative Data > PEO Configuration) to determine this.
In single tenant environments:
-
The MultiTenant API Configuration parameter must be set to 0.
-
The Use Multitenancy field in PEO Configuration must be set to No.
-
Client Master dataforms cannot have a Secondary ID set and the Import ID must be set as the Client Number only.
-
Initial Import maps, other than PHRAPI_initial_company, must have the Workspace Source column set to the Client Number (ClientNumber).
In multi-tenant environments:
-
The MultiTenant API Configuration parameter must be set to 1.
-
The Use Multitenancy field in PEO Configuration must be set to Yes.
-
Client Master dataforms must have a Secondary ID set and the Import ID must be set as Secondary ID:: Client Number.
-
Initial Import maps, other than PHRAPI_initial_company, must have the Workspace Source column set to the Import ID (ClientNumberImportID).
Accessing the Admin Workspace
There is more than one way to access the Admin Workspace:
-
From the modules bar, click
 Workspaces.
The Workspace Search dashboard opens.
-
Type %Admin in the search box to filter the list of workspaces and locate Admin Workspace.
OR
-
On the modules bar, on the right side, click <username> > Modules.
The Modules Search dashboard opens. The Admin Workspace is listed at the top of the dashboard.
Then, double-click the workspace row in the grid or click ![]() (Open) next to the workspace name.
(Open) next to the workspace name.
Completing the Initial Import Form
To complete the Initial Import form:
-
Once in the Admin Workspace, type "Initial" in the dataform search box to display the Initial Import tile.
-
Click the Initial Import tile to open the Initial Import dashboard.
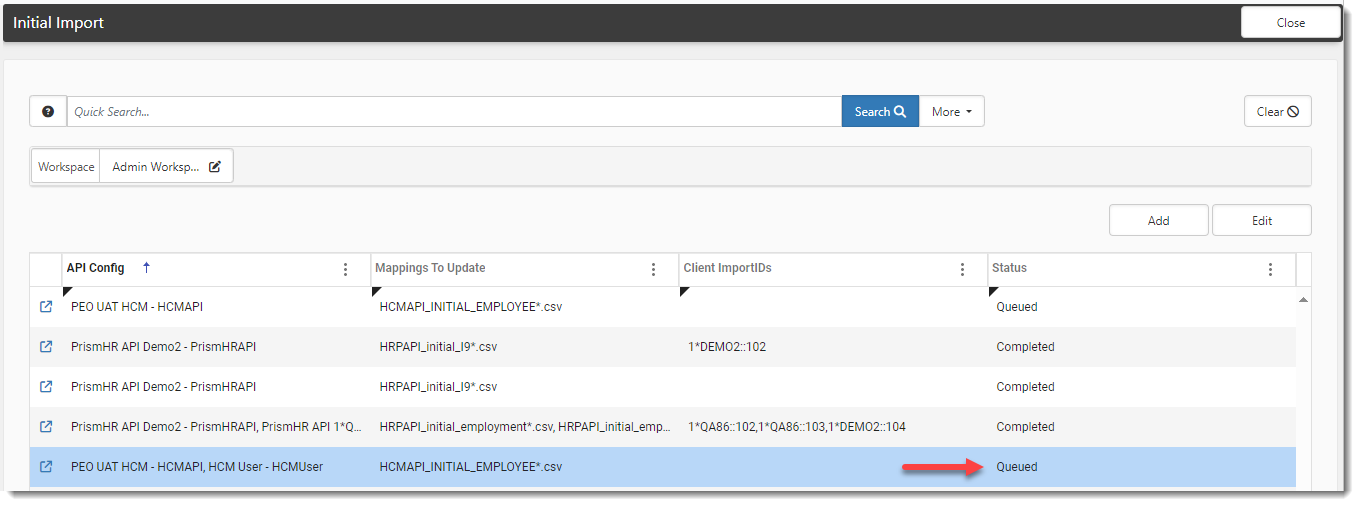
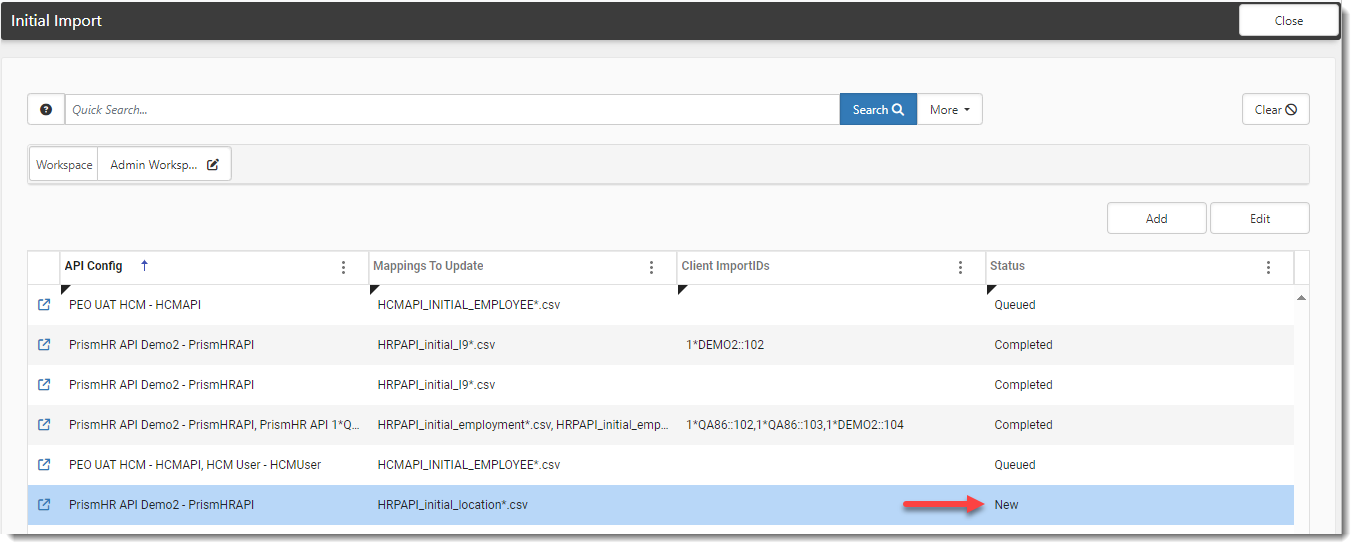
This is where previously entered Initial Import records are listed and managed. The Status column shows which records are New (i.e., not queued), Queued, or Completed. Inactive records display in bold, italicized text.
-
Click Add.
The Initial Import: Add window displays.
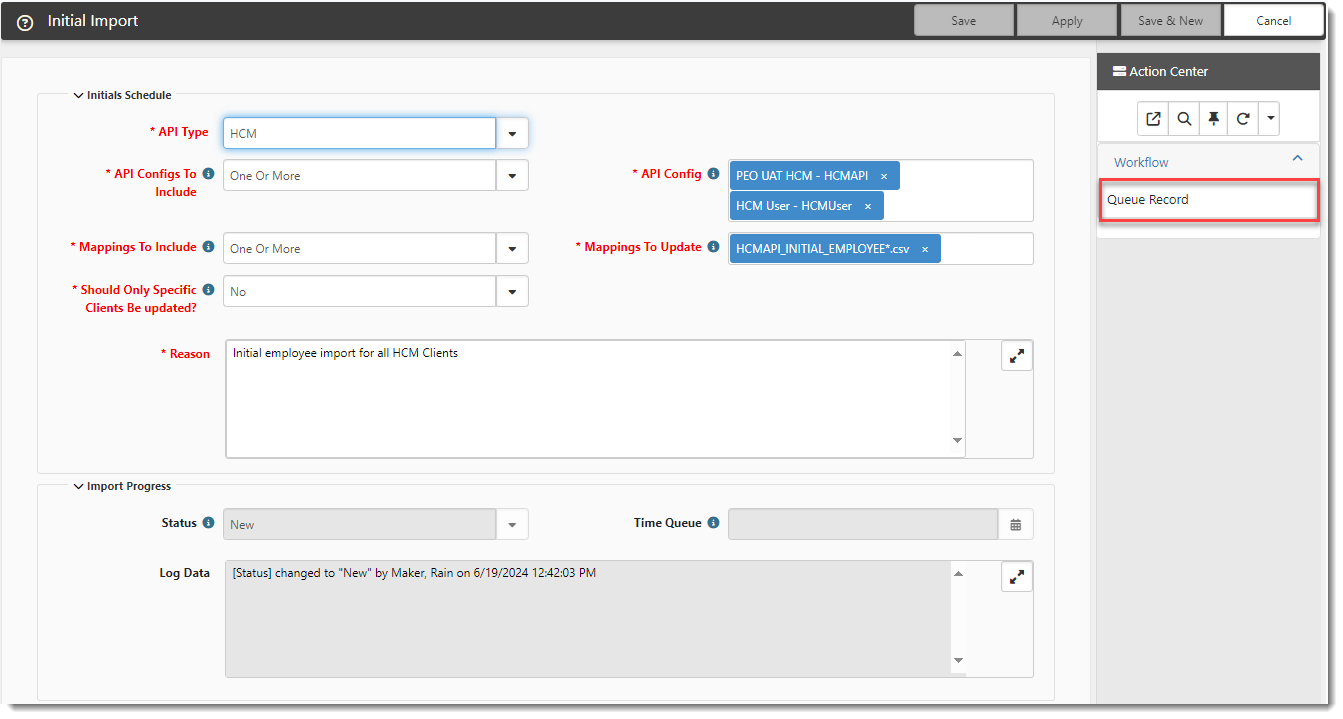
- Complete the form.
| API Type |
Defaults to PrismHR API. Click the down arrow to select HCM Note: The API Config field is filtered to display only PrismHR or PrismHCM API configuration records based on your selection. |
| API Configs To Include | Defaults to One or More. Valid selections are One or More and All. If you select One or More, you can select the APIs you want to run from the API Config field. If you select All, the API Config field is inaccessible as all APIs associated with the API Type will run. |
|
API Config |
If you selected One or More in API Configs to Include, click in the field to select one or more API configurations from a filtered list of API configurations associated with the API Type. |
|
Mappings to Include |
Defaults to One or More. Valid selections are One or More and All. If you select One or More, you can select the API mappings you want to run from the Mappings to Update field. If you select All, the Mappings to Update field is inaccessible as all Import Mappings associated with the API Type and API Configs to Include will run. |
|
Mappings to Update |
If you selected One or More in Mappings to Include, click in the field to select one or more Import Mappings from a filtered list of mappings associated with the selected API Type and API Configs to Include. |
| Should Only Specific Clients Be Updated? |
Defaults to No. Valid selections are Yes and No. Leave the field set to No if you want the specified initial imports to run for all clients (i.e., all Import IDs). Select Yes if you want the specified initial imports to run for selected clients. If you select Yes, the Client Import IDs field displays: |
|
Client ImportIDs |
If Should Only Specific Clients Be Updated? is set to Yes, add one or more Client Import IDs where you want the specified initial imports to run. Separate multiple Client Import IDs with a comma.
|
| Reason | Enter a note detailing the reason for the initial import. |
| Status | Displays the current status of the initial import form. This is a system-generated value that cannot be manually edited. |
| Time Queue | Displays a date and time stamp of when initial import form was last queued. This is a system-generated value that cannot be manually edited. |
|
Log Data |
Tracks Initial Import form statuses (New, InProgress, Queued, Completed, etc.) This is a system-generated value that cannot be manually edited. |
- What do you want to do?
- Queue the initial import: Click Queue Record in the Action Center.

- The Initial Import record is simultaneously saved and queued.
- Click Cancel to close the Initial Import record and return to the Initial Import dashboard where the Initial Import record is shown in Queued status.

- Save the Initial Import record without queuing it: Click Save.
- The Initial Import record closes and you are returned to the Initial Import dashboard where the Initial Import record is shown in New status.

- Queue the record when you are ready by returning to the Initial Import dashboard, clicking
 (Open) next to the record to open the Initial Import form and then clicking Queue Record in the Action Center of the form.


