Configuring the Auto Archive BI Reports Scheduled Process
The scheduled process Auto Archive BI Reports is Active by default. It automatically archives Business Intelligence reports that have not been run in a specified number of days based on the "Last Run Date". The number of days (Archive Limit) is set to 120 by default.
The following reports are exempt from archiving:
-
Reports manually flagged for exclusion
-
A Do Not Archive setting has been added to the Business Intelligence Admin dashboard (System Admin > Outputs > Business Intelligence) that allows you to flag reports that should never be archived.
-
-
Widget reports
-
Datasource reports
-
Dashboard reports
Note: After the process has run, reports that have been archived will still be visible via the Business Intelligence module until Clientspace is closed. Once ClientSpace is reopened, these reports will no longer be available. This is also the case with restoring reports; they will not be available via the Business Intelligence module after the restore until ClientSpace is closed and then reopened.
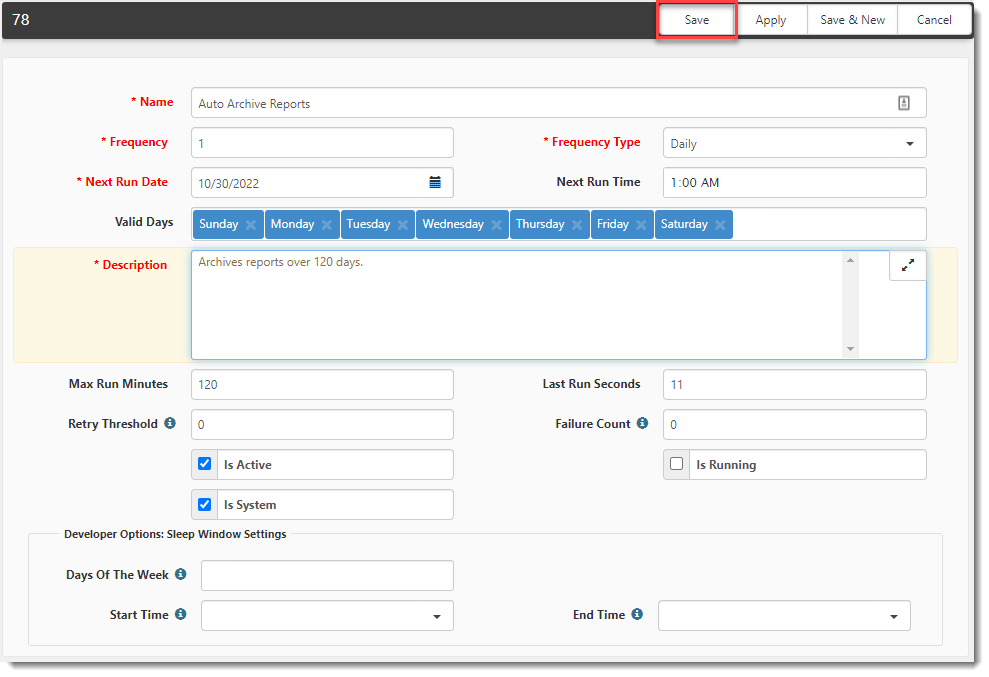
To edit the scheduled process default settings:
- Go to System Admin
 > Advanced > Scheduled Processes.
The Scheduled Processes Admin dashboard opens. - Click
 Jump to open Auto Archive BI Reports.
The form opens. - Determine the frequency of when to run the process and complete the following settings.
|
Frequency |
Specify how often to run this process. This is a numeric field. The default setting is 1 minute. This means that the process will poll the system every minute until if finds records to process. |
|
Frequency Type |
Select a type: Daily, Hourly, Minute, Monthly, Weekly, Yearly. The default setting is Daily. |
|
Next Run Date |
Use the date picker to select the next run date. |
|
Next Run Time |
Specify the time of day. The default setting is 1:00 a.m. |
|
Valid Days |
Select valid day(s) of the week for the process to run. |
- Is Active is checked by default. If you do not want this scheduled process to run, uncheck (i.e., clear) the Is Active checkbox.
- Click Save.
