This is where you tell ClientSpace which files to send to DocuSign. You can point to files from multiple fields, and when ClientSpace sends it to DocuSign, it combines all into one document. You have the option to Merge All Documents, so when the documents are pulled back into ClientSpace, they can come in as one big file – and put it in Link To Field. The DocuSign functionality runs business logic on the destination dataforms where the files are returned completed and the signed file is pinned as a new version in the field.
If you are using the Attachments feature to include additional documents (multiples) in an envelope, it places the documents back in the field from which they came when the process completes. It is possible to pull them back out as separate documents. When we do this, we place the completed doc in the field from which it was retrieved.
To assist in generating the merge files to prepare to send to DocuSign, the _GenerateMergeFile business rule can be configured to run the merge document and deposit the file in a field. This business rule can be configured multiple times to generate each file needed. After the business rules are run, you can review the documents in their individual file fields before you click the workflow link to send the files to DocuSign for signatures. See Business Rule Methods: Generating Merge Files.
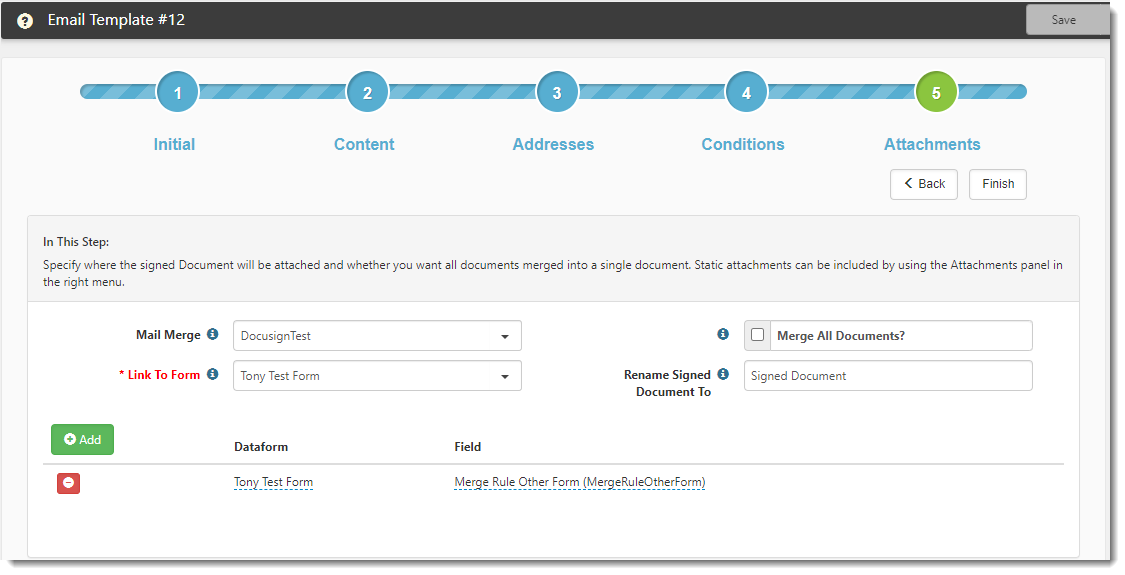
To complete the Attachments step:
- Complete the form.
|
Mail Merge |
The options in this field are Merge Admin records where merge templates have been uploaded. When you select a merge in this field, it tells the system to run the merge document and send it at the same time. You can view or edit the merged file before sending to DocuSign. The merge and send occur immediately after the clicking Send to DocuSign. Typically, you would set up another Email Template to also notify users or the client that a DocuSign email is coming. |
||||||
|
Link To Form |
Link To Form is a required field that informs the system of the form to which the document(s) will be attached after being signed and returned to the system. The Triggering Form field value from the Initial tab auto-fills the Link To Form field by default. You can edit the default value by selecting a single-form or a triggering multi-form (if applicable) from the drop down list. |
||||||
|
Rename Signed Merge |
Renamed files can be Mail Merge files, or merged attachment files if you have selected Merge All Documents. During the process that links the signed document to a form, the document is renamed by prepending the original document name with an identifying tag, such as a signer's name, that you specify here. By default, the original file name of signed and returned files are always prepended with "COMPLETED_". Any value you specify here is added before the original file name using the following format: COMPLETED_Rename Signed Merge field value}_{Original File Name}. |
||||||
|
Merge All Documents? |
Check Merge All Documents? if you want all signed and attached documents to be merged into a single document. When you select this option, you can also attach the merged document to a specified Link To Field but this is not required. |
||||||
|
Link To Field |
Once you check Merge All Documents?, the Link To Field displays. Optionally, select a file upload field from the Link To Field drop down list to which to attach the merged document.
If you leave Merge All Documents? selected but do not choose a Link To Field, the merged document is added to the Attachments Action Center panel on the dataform.
|
||||||
|
Add |
In the Add rows, specify the fields where ClientSpace retrieves the file for DocuSign. You can specify files from multiple fields.
Note: The Rename column is not available if you check the Merge All Documents? checkbox to merge all documents into one file.
|
- Click Save.
You are returned to the Email Templates list. - For the new Email Template, select the Published option.
What's next?
If you edited the merge template (Word document) from the time the original file was uploaded, then you must upload it again. See Uploading the merge template. Now you are ready to proceed to the next step, testing the tags. Go to Testing the merge document.