Configuring import management for non-Global Admins
You can allow users to upload and run imports without giving them the Global Admin rights. The SYS_ImportManager entity provides access to manage imports through the Import Management module.
The steps to do this include:
| 1. | Add the SYS_ImportManager entity to an existing role or add a new role. Ensure the appropriate users are assigned to the role. (Global Admins must perform this step.) |
| 2. | Add the Run Import module to your user profile. (Non-Global Admin users can perform this step.) |
Step 1: Create a new role (optional) or use an existing role
Determine if you need to create a new role or use an existing role. You need to be a Global Admin to perform this step.
To begin:
- Go to System Admin
 > Security > Roles.
The Security Roles dashboard opens.
To create a new role:
- Click Add.
The New Security Role form opens. - Complete the fields as specified.
|
Title |
Type Can Manage Imports. |
|
Description |
Type Users in this role can manage imports. |
- Click Apply.
- Go to Step 3 in the "To use an existing role" procedure below to add security entities and complete steps 3 through 15.
To use an existing role:
-
Select and open a role from the list.
-
In the Action Center, select Entities.
The Security Role Entities dashboard opens.
-
Click Add.
The Add Role Entities dialog opens.
-
Select SYS_ImportManager and click Ok.
You are returned to the Security Role Entities dashboard with the newly added Entity Name.
-
On the SYS_ImportManager row, select the appropriate security entity rights for the role assignment.
Note: The Delete option is not applicable for SYS_ImportManager security entity configuration.
View View rights must be assigned to open the module and view the Manage Import window.
Note: Users with only View rights can also view any import files they may have previously added at a time when they were in a role with Add rights. However, without Add rights, they cannot add any new upload files or otherwise interact with their older upload files as the Run Import, Add, and Cancel Import buttons are hidden.
View + Add • Users can open the module and view the import files they upload on the Manage Import window. • Users can access the Run Import, Add, and Cancel Import buttons to run and manage imports. View + Add + Edit • Users can open the module and view the import files they upload on the Manage Import window. • Users can access the Run Import, Add, and Cancel Import buttons to run and manage imports. • Users can double-click a row on the Manage Import window to view the Manage Import Details page where import error messages are recorded in the Log File and Log Data for the selected import. View + Add + Edit + Admin • Users can open the module and view the uploaded import files of ALL employees on the Manage Import window. • Users can access the Run Import, Add, and Cancel Import buttons to run and manage imports. • Users can double-click a row on the Manage Import window to view the Manage Import Details page where import error messages are recorded in the Log File and Log Data for the selected import. -
Click Close on the Security Role Entities dashboard.
You are returned to the opened role. -
In the Action Center, select Users.
The Security Role Users dashboard opens. -
Click Add.
The Add Role Users form opens. -
Select the applicable users and click Ok.
The newly added users appear in the Security Role Users list. -
Click Close.
You are returned to the role form. -
To close the form, click Cancel.
Step 2: Add the new module to your user profile
Now that the Run Import module is available and the new security entities have been added to a role, users assigned to the new role can add the new Run Import module to their user profile.
User modules are selectable modules. Add the most accessed user modules to the Modules bar. The Modules bar is located at the top of the workspace, providing quick access to favorite modules.

Adding Modules
To add modules to your user profile:
-
On the Modules bar, on the right side, click <username> > My Profile.

The User Details form opens along with the Action Center panel on the right.
-
In the Action Center, click Modules > Select Modules.
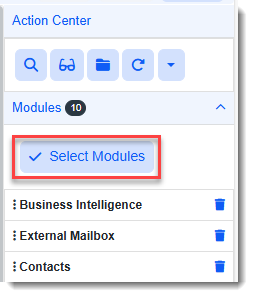
The Add Modules window opens.
-
Click the down arrow in the selection field to select a module and repeat this process of selecting modules from the list until all of the modules you want to add are listed under the selection field as shown in the example below:
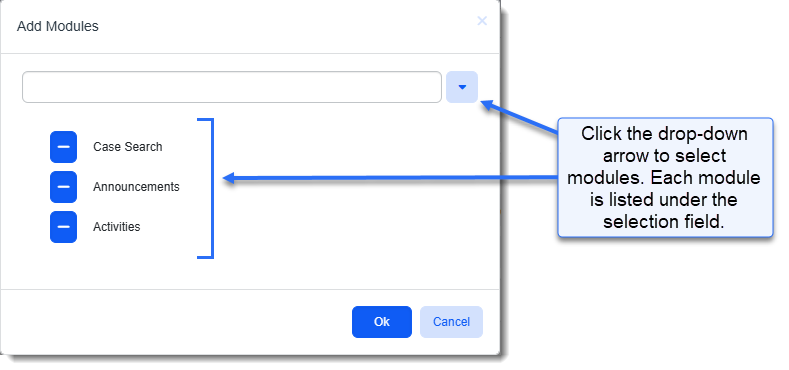
Note: You can remove a module from the list of selections prior to saving the list by clicking the Remove Module Selection
 button next to the module name.
 -
Click Ok.
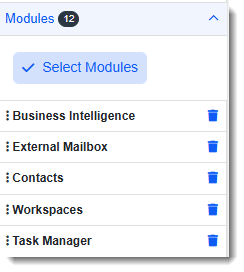
You are returned to the User Details screen. The newly added module(s) are listed in the Action Center, in the Modules group. (They will not be added to the Modules bar until you click Apply or Save).
-
What do you want to do?
-
To rearrange the order of modules on the Modules bar: See Managing Module Order on the Modules Bar.
-
To remove a module from the Modules bar: See
-
To save all changes and close the User Details window: Click Save.
-
To save all changes and keep the User Details window open: Click Apply.
Note: Once you save the changes, a View menu may display at the far right of the Modules bar to contain overflow if the added modules do not fit in the allotted display area. To make the modules visible, rearrange module order to prioritize them higher in the list. See Managing Module Order on the Modules Bar.
-
Managing Module Order on the Modules Bar
To manage the order of the modules that display in the Modules bar:
-
Review the current order of the modules that display in the Modules bar.

-
The top to bottom module order in the Modules panel of the Action Center on the User Details dashboard determines the left to right module order in the Modules bar. Review the modules in the Modules panel and locate the module to move up or down in the list (for example, Task Manager).
-
To move the module, complete the following drag and drop method:
-
Place the mouse cursor over the module name.
-
Press and hold down the left mouse button.
-
Move the mouse up or down while still holding down the left mouse button.
-
When you have moved the module to the desired location, let go of the mouse button.

-
-
(Optional) Repeat step 3 for additional modules as necessary.
-
Click Apply or Save.
The modules in the Modules bar update to reflect the changes.
