Creating Activities from emails
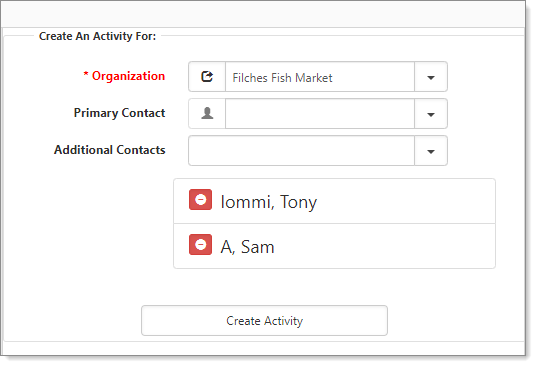
When you select Create Activity, Create An Activity For opens in the right pane. You can connect the Activity to an organization and contact. You can only select organizations that you have access to along with their related active contacts.
To create an activity:
- From the Post To ClientSpace page, in Links, select Create Activity.
The Create An Activity For form opens in the right pane with three fields: Organization, Primary Contact, and Additional Contacts.
- Complete the fields:
|
Organization |
To select an organization, do one of the following:
The new organization is now available in the Organization list. |
|
Primary Contact |
To select Primary Contact, do one of the following:
The new contact is now available in the list of primary contacts and additional contacts. |
|
Additional Contacts |
To add additional contacts:
The new contact is now available in the list of additional contacts and primary contact. |
- To remove users, click
 (Remove).
 - When ready, click Create Activity.
In the right pane, the message "Activity created successfully!" appears. - From here, you can click Open Activity to view the record with the newly attached email.
The Activity Details form opens, with text from the email message auto-filled.
To see the contacts you added:
-
In the Action Center, expand Contacts.
- When ready, click Cancel.
You are returned to the Post To ClientSpace page. - Click Close.
The Select Workspace form closes. The system uses the email sent date to populate the Date Sent of the email activity, so the user is not prompted on save when sending the email.
